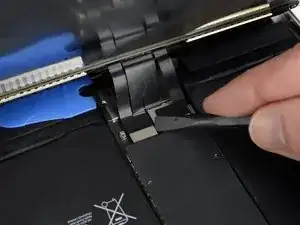
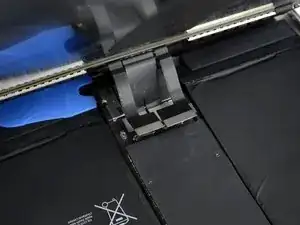
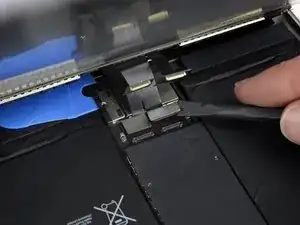
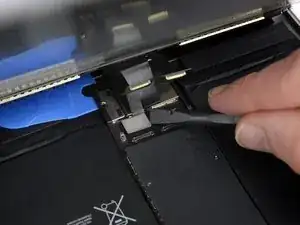
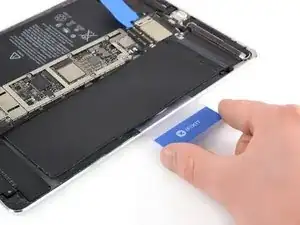
Introduction

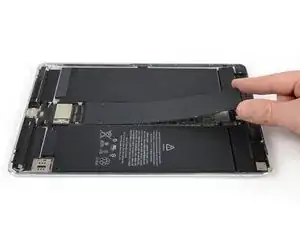
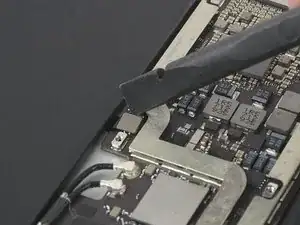
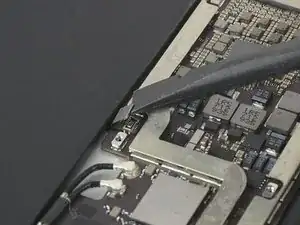
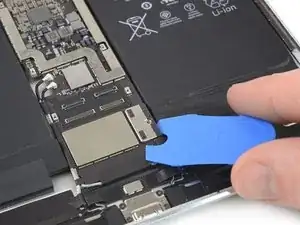
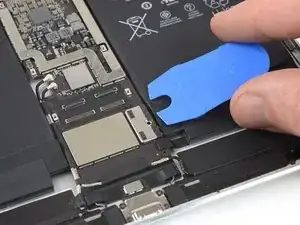
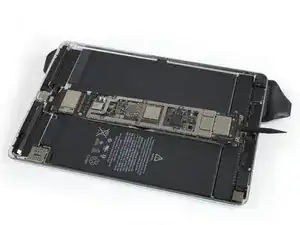
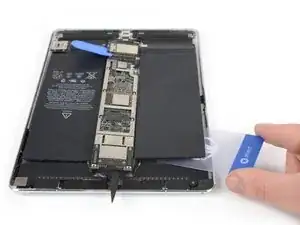
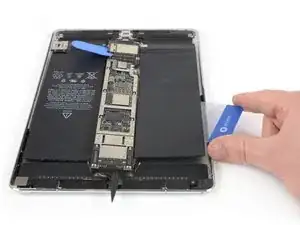
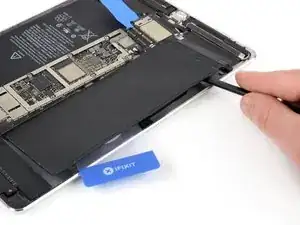
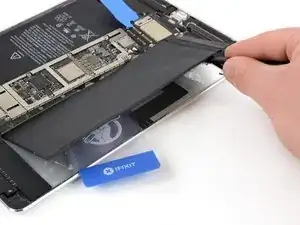
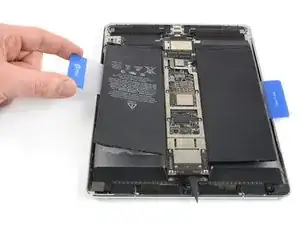
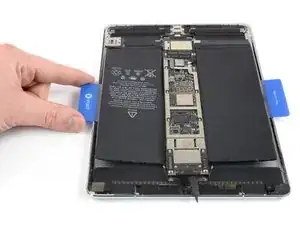
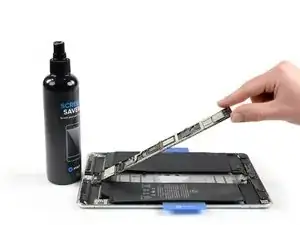
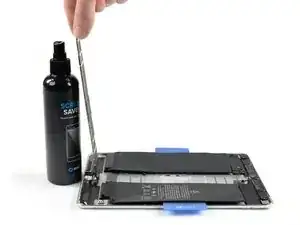
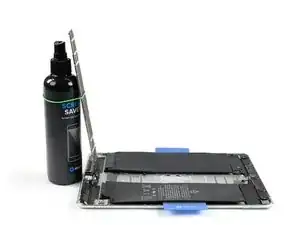
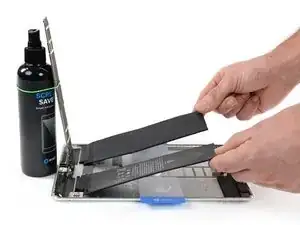
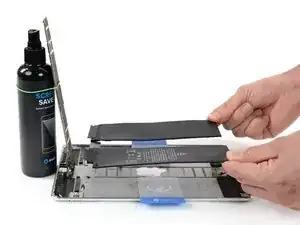
Use this guide to remove and replace the battery for the iPad Pro 10.5”.

Because there are steps in this guide where the battery may remain connected to the logic board, leave the iPad on until the battery is completely discharged (the iPad turns itself off) before attempting this guide. A charged lithium-ion battery can catch fire and/or explode if accidentally punctured.

Have plenty of high concentration (>90%) isopropyl alcohol to help make the removal and residue cleanup easier.

If your battery is swollen, take appropriate precautions.

  1. otaRXAqJBHRfjpZL
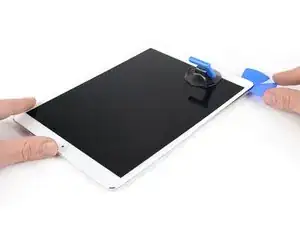
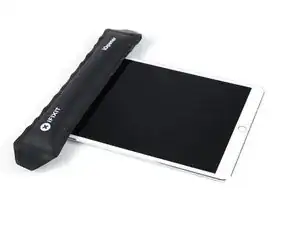
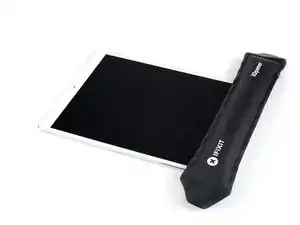
    • Strong adhesive holds the screen in place. In order to separate it, you'll first need to heat and soften the adhesive using an iOpener, hair dryer, or heat gun.

    • You may need to reapply heat repeatedly throughout this process to prevent the adhesive from cooling and hardening.

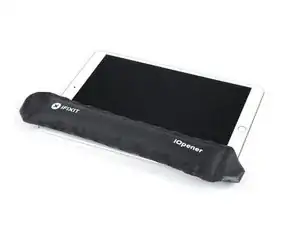
    • Prepare an iOpener and place it on the bottom edge of the iPad's screen for about two minutes.

  2. dXwytgcbeMBtyPIK
    • If your iPad's screen is badly cracked, wear skin and eye protection. Cover the screen with a smooth layer of clear packing tape to contain glass shards and help the suction cup adhere. Alternatively, use a strong piece of tape (such as duct tape) and fold it into a handle.

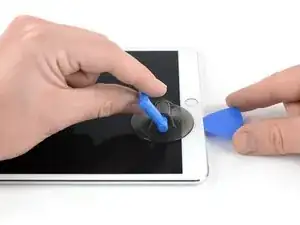
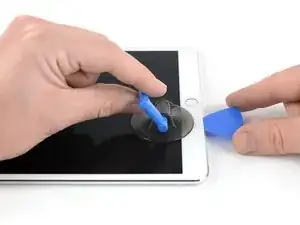
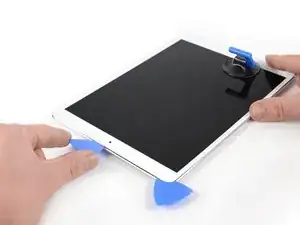
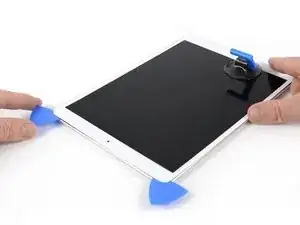
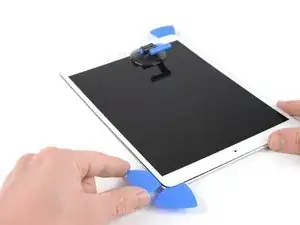
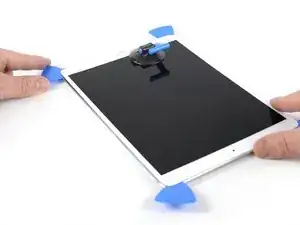
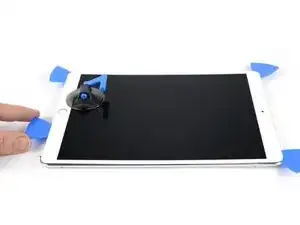
    • Place a suction cup next to the iPad's home button and press down to create a seal.

    • To get the most leverage, place the suction cup as close to the edge as possible without going past the edge of the display.

    • If you want to use the Anti-Clamp, a tool we designed to make the opening procedure easier, follow this guide.

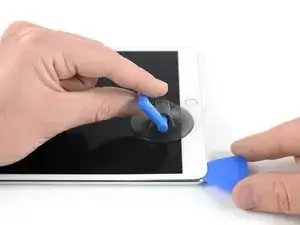
    • Firmly pull up on the suction cup to create a small gap between the front panel and the rear case.

    • Don't pull too hard, or you may shatter the glass. If necessary, apply more heat to further soften the adhesive.

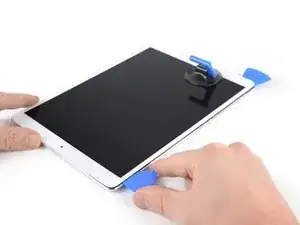
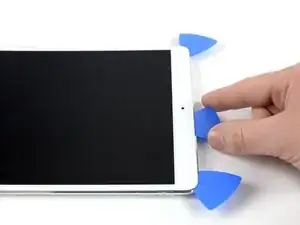
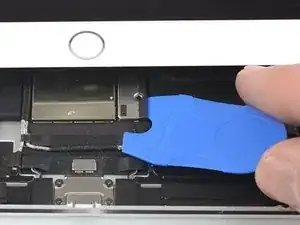
    • Once you've opened a sufficient gap, insert an opening pick into the gap.

    i used a proper suction tile puller (small one from DIY store used to hold bathroom tiles) to lift the screen off after heating around the edge using a heat gun. Be careful - It didn't damage anything. The tiny suction things that come with those iPhone kits are not strong enough for this. The one in picture might be good, but looks similar to the kits ones that have key ring.

    Robert Lord -

    The suction cup that comes with the iPad battery replacement is plenty large enough and strong enough.

    CAUTION, do not push the picks in more than a the width of the replacement screen adhesive strips. You will damage the $200 screen, maybe break the glass. The screen is multiple layers and the picks can get in-between the layers if you push too far in. I got into trouble at the lower left corner. After getting the screen loose, I found that I only need a 2-3 millimeters on the sides and bottom, and four or five millimeters in the corners.

    Gene Torrey -

    These comments need to be highlighted and added to the guide. The pictures showing the pick placement are very misleading. The thickness of the adhesive is only 2mm as you had mentioned! Waiting now for my replacement screen. Apples products look amazing but now I realize I would have been way better off just living with a one hour battery and or buying a new ipad.

    William Best -

  3. HRYjnydwI5uHt12k
    HRYjnydwI5uHt12k
    2nxd5mrkce3UfC1r
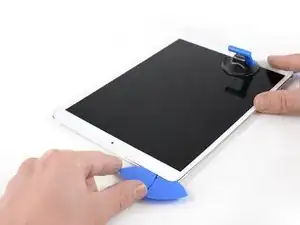
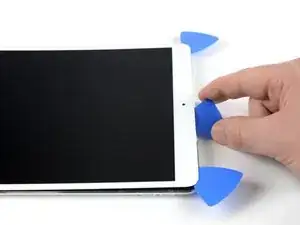
    • Slice through the adhesive under the screen by sliding the pick along the edge of the display, towards the bottom left corner.

    • Leave the pick in place temporarily to prevent the adhesive from re-sealing.

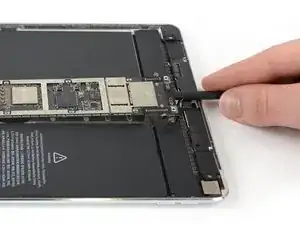
    Be super carful at the sides! If you insert your pick more than ~2mm, you will separate your display and front glass.

    voidfish -

  4. IDX6WsfJwQGPK1hD
    IDX6WsfJwQGPK1hD
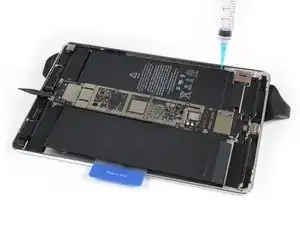
    woVkXQtjng5taXfv
    CX5pQLbDVpljSlel
    • Apply heat to the left edge of the iPad for about two minutes, or until it's slightly too hot to touch comfortably.

    • If necessary, re-heat your iOpener for a few seconds or until it's a bit too hot to touch. Be careful not to overheat the iOpener, or it may burst.

    • Insert a second opening pick at the bottom left corner of the iPad.

    • Slide the second opening pick along the left side of the display to separate the adhesive underneath.

    • Leave the opening pick inserted near the top left corner of the iPad to prevent the adhesive from re-sealing.

  5. Xsv3FIGGDpg2cySF
    • Apply heat to the top edge of the iPad for about two minutes, or until it's slightly too hot to touch comfortably.

  6. iaIrQdhTPk3NQkBo
    iaIrQdhTPk3NQkBo
    5MDrFiJpRxgYtktW
    rZvTbO5Akf3ef1fF
    • Insert a third opening pick at the top left corner of the iPad.

    • Use the opening pick to cut the adhesive under the top edge of the iPad by sliding it to the top right corner.

    • The front-facing camera is located right in the center of the iPad's top edge and can be damaged if the pick is inserted too far. Only insert the tip of the opening pick when cutting near the camera.

  7. NcHeiicA1BxMtSMG
    NcHeiicA1BxMtSMG
    2nq2lKnxklD4SEqb
    FyR4ypp5WTIbhUo3
    • Apply heat to the final, right edge of the iPad for about two minutes, or until it's slightly too hot to touch comfortably.

    • Insert a fourth opening pick at the top right corner of the iPad.

    • Slide the opening pick down to the bottom right corner to cut the adhesive.

    • Slide the opening pick around the bottom right corner—pausing to apply more heat if needed—and cut the remaining adhesive on the bottom edge, but stop before you reach the home button.

    We must be very careful when we are prying left and right size bezel to peel off the screen as there very little gap between edges and LCD. Slightly inside push can crack LCD. We need to pay full care and raising edges very very slowly.

    iRepairMan -

    if you manage to get hold of the adhesiv strip, then pull it out slow and careful, that help a Lot !

    HP SIE -

  8. yNLpdqy3o1k2mXRL
    yNLpdqy3o1k2mXRL
    IGBVYHPJbbyL5okD
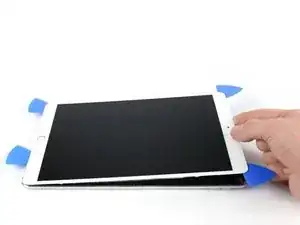
    • Insert a fifth opening pick at the top of the iPad near (but not directly on) the front-facing camera.

    • Gently twist the pick to separate the display assembly from the iPad.

    • Don't try to remove the display all the way yet! It is still connected to the iPad's motherboard.

    • If needed, apply more heat and/or cut any remaining adhesive that prevents the display from separating.

    Be very gentle when twisting. My screen broke in this step. I would not twist it but try to remove glue further as there is a aluminium support of the screen in the wide area beneath the light sensors and there is glue on that also preventing in easy lifting the screen. Just be careful not to damage the light sensors and camera.

    agrior -

  9. ocbIAZjbSbxccEWF
    ocbIAZjbSbxccEWF
    ZXh6TyUUb4CQX1wM
    ExGEFNSRgrxMVNIy
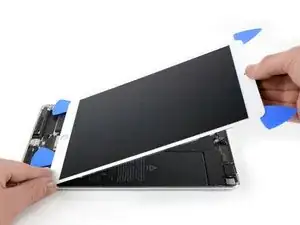
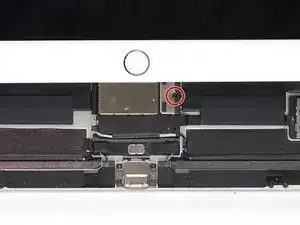
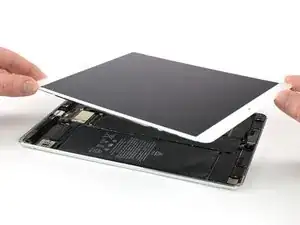
    • Lift the display assembly from its top edge and carefully slide it up (towards the front-facing camera and headphone jack), until the screw that secures the battery power connector is revealed at the bottom.

    • Don't lift the display more than 70° or you may damage the attached ribbon cables.

    How do you go about getting to this battery connector as it is covered by a large metal shield above the logic board, if you do not disconnect the battery you risk frying the back light.

    Ayden McCormack -

    The metal shield is not relevant for this. You can leave it in place or remove it if it comes of. Once the screw of the plate is removed you will be able to lift the print a little bit and put someting between the battery connector and the board connector. The connector is beneath the print. Look further on to see a deck card is used for this.

    agrior -

  10. 4rXEwLDSrwuJsswL
    4rXEwLDSrwuJsswL
    neY1rxtpUctU1N3T
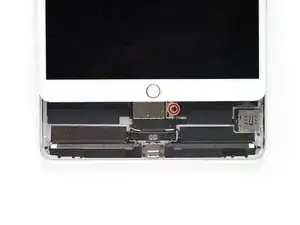
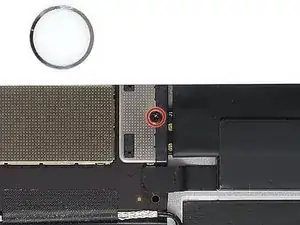
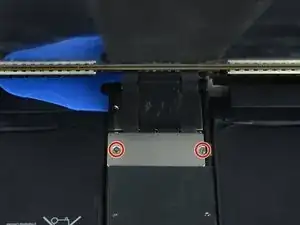
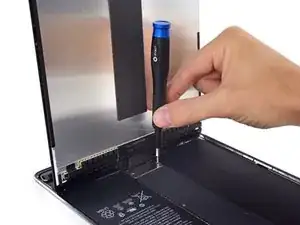
    • Remove the 1.9 mm Phillips screw that secures the battery power connector.

    • Throughout this repair, keep track of each screw and make sure it goes back exactly where it came from to avoid damaging your device.

    What size Phillips bit?

    Josh Heilik -

    In this whole guide I used 00 and 000.

    agrior -

  11. 4ouBh4GC2IOhyKNR
    4ouBh4GC2IOhyKNR
    5VpvOTBpSOqCXNgw
    PsWasEsoNUIanBMK
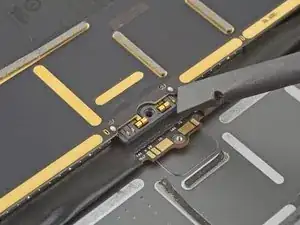
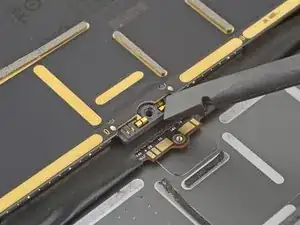
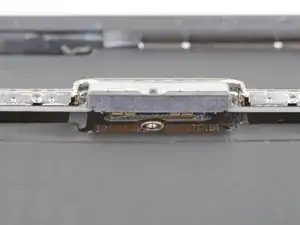
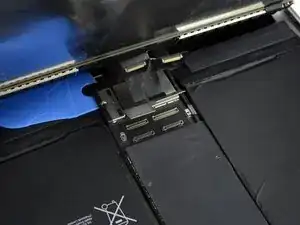
    • These photos show what the battery connector looks like underneath the logic board. Use these photos as a reference while you safely disconnect the battery.

    • Notice that the battery connector has cantilever springs on the logic board that press against the battery contact pads. Since both the logic board and battery are glued down, you'll need to slide something thin and flexible between the contact points to disconnect the battery.

    This picture looks nothing like my A2152 battery connector. I can’t really tell what is happening here.

    todd sorel -

  12. 2e3jiUVhPCTeK3V2
    • Be careful when you isolate the battery using a battery blocker. The battery contacts are easily bent or broken, resulting in irreversible damage.

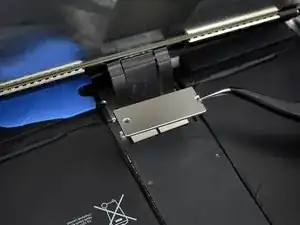
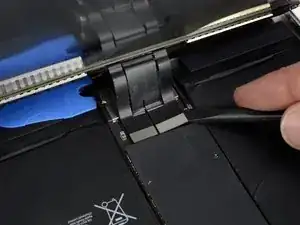
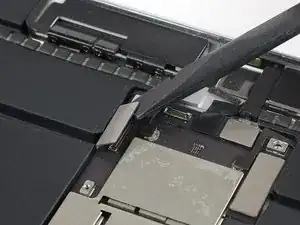
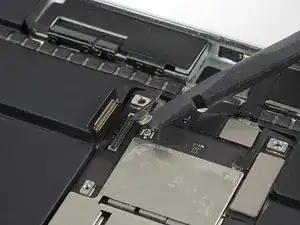
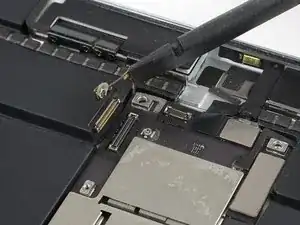
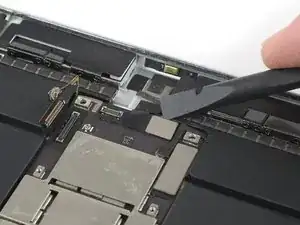
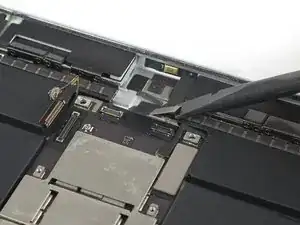
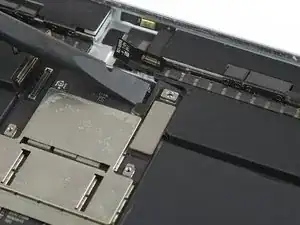
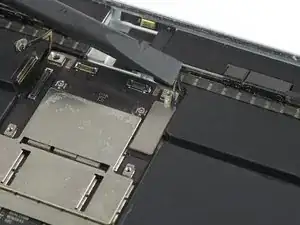
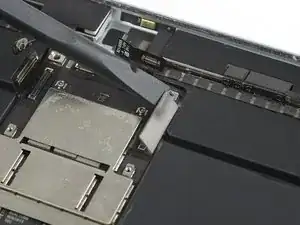
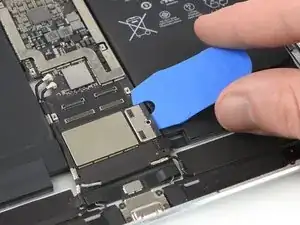
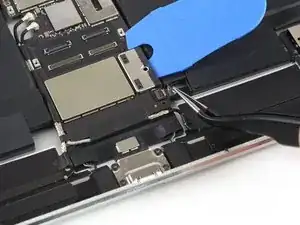
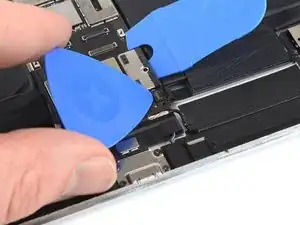
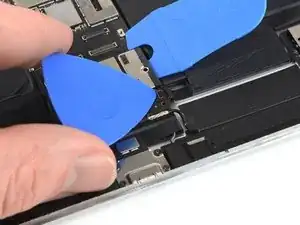
    • To disconnect the battery, slide one prong of a battery blocker or the tip of an opening pick under the battery power connector to ensure the power circuit is interrupted.

    • Don't push the battery blocker underneath the connector with excessive force. If you're having trouble fitting the battery blocker underneath the logic board, you can try using a playing card to disconnect the battery instead.

    • The battery blocker or playing card ideally should slide under the logic board without encountering any blockages.

    • Leave the battery blocker in place as you work.

    I found it very hard to fit something under the battery power connector. I did not have a battery blocker, so I tried a playing card. I was not able to slide it between the springs. The section of the battery power connector, above the cantilever springs, did not seem to want to give at all, like in the picture above. If other people had success, I would love to hear how.

    hdh607 -

    I didn’t have success either, but i kept myself grounded, and avoided battery contact as much as possible.

    Amber Wooldridge -

    I used a playing card cut to shape. I had to make a couple, to try a few times.. It does go in eventually. Not deep, but enough to break connection. You can test by trying to switch on iPad.

    Robert Lord -

    It took some time but I was able to get it under the back part and slide it forward.

    Barbara Nelson -

    You must disconnect the battery before plugging the new screen. I think i didn't break the circuit in first attempt and shorted the screen, the result was half of the screen didn't work. I used a playing card. Second attempt was successful with new screen.

    Robert Lord -

    I believe I have a good solution to this problem. I was dissatisfied with the thickness of the battery blocker, or even a thin guitar pick, for that matter; both required force and I feared bending the springs or leaving the connection intact.

    What worked for me was cutting a small strip of non-conductive, static-proof film (the kind that RAM and other sensitive components come in). There was every reason to trust in its non-conductivity but just to be sure, I used a VOM to test; its resistance was out of the VOMs range, meaning that its conductivity was nil. I used a spudger to gently lift the logic board off of the battery contacts and slid the non-conductive strip in between; went without a hitch.

    When reassembling, I laid the strip on the battery contacts, laid the logic board on top, installed it, connected the display panel and gently drew the slip out and installed the battery screw. Worked like a charm.

    Valdaquende -

    These are some extremely misleading set of instructions and picture. Much better if you have the battery discharged, so don't need to worry about blocking the connector. But DO NOT force anything in the through the socket and certainly do not try to bend up the soldered cover, as it appears to be happening in the picture. You will break the connector, most likely resulting in ipad shutting down every 3 minutes from the notorious "thermal sensor missing" panic system crash.

    Kostas “Kosprey” -

  13. vuHXR5SLK1ppwfYQ
    vuHXR5SLK1ppwfYQ
    rohBSEFOJRJTRUcZ
    lPR1DjbIaXn1OdBK
    • Slowly lift the display from its top edge, being careful not to strain the attached ribbon cables.

    • Remove the two 1.3 mm Phillips screws securing the display connector cover bracket.

    • You may need to angle the driver slightly in order to avoid straining the ribbon cables.

    • Remove the display connector cover bracket.

    Here it is very precocious steps to do. Flx cables to connectors are small in size and we cannot lift the display vertically. Therefore, we may struggle to unscrew the metal shield. We need to use smaller size of philip screw driver or place vertically the display to create enough gap between philip screw driver and the cover bracket. Similarly, when we are replacing new display we need to be carefully connect four flex cable with connectors with logic board.

    iRepairMan -

    agree, with re-assembly very tiny screws and awkward positioning, the back two cables pop off if not careful.

    Tom McGrath -

    I did this step using just the tip of the PH000 screwdriver, it made it much easier to get my hands into the small space, the replacement screen from ifixit had tighter cables that I was not comfortable stretching out to go to a 90* angle to screw back on. Make sure your tip is magnetized for best results :)!

    Amber Wooldridge -

    Meaning no disrespect for this excellent guide, I found this photo to be a bit misleading; at least in my case. It clearly shows about 90˚ between the case and the display. I tested the limits with the one I was repairing and could find no way to raise the display far enough to clear a screwdriver without jeopardizing the cables. I resorted to the same solution that Amber Wooldridge discovered; using a PH000 bit and hand-tightening. I had a tiny needle-nosed plier that I used to tighten them a bit (but very gently).

    Valdaquende -

  14. eFMfF6wqyCeBKRSU
    eFMfF6wqyCeBKRSU
    AQUlSPXnIfQFunMv
    quIQSO3BZ4g5PHqS
    • Use a spudger to disconnect the two visible display flex connectors by gently prying them straight up from their sockets.

    • To re-attach press connectors like this one, carefully align and press down on one side until it clicks into place, then repeat on the other side. Do not press down on the middle. If the connector is misaligned, the pins can bend, causing permanent damage.

  15. rLEFxLicwMOpGHhK
    rLEFxLicwMOpGHhK
    TAwItumI5lUCWasR
    FBQrmOyUp3ST3UwV
    • Underneath, you'll find two additional display cable connectors.

    • Use your spudger to gently pry them up and disconnect them.

    I went to replace the LCD assembly on an ipad Air 3, and one of the flex cables on the new LCD assembly broke in half. The flex cables on the old assembly work well and are intact. Is it possible to transfer the old flex cable(s) to the new assembly, or can I solder the broken pieces of the new flex cable together? I have also contacted the part supplier about this and am awaiting a response.

    Krella -

  16. kYoe4hwvKgs3PFDe
    • Remove the display assembly.

    • During reassembly, before installing a display, remove any remaining adhesive from the iPad, and clean the glued areas with high concentration isopropyl alcohol (90% or greater) and a lint-free cloth. This helps prep the iPad for fresh adhesive and ensures that it will bond properly.

    • If you plan to reinstall your existing display, remove any remaining adhesive from the back and clean the adhered areas with isopropyl alcohol.

    • Test your iPad's functions and install pre-cut adhesive strips to the back of the display using our display adhesive application guide before sealing it up.

    Definitely test your iPad’s functions before sealing it up. I needed to reopen the display to reconnect the display connectors in order to have the display functioning properly. As a result, the adhesive strips did not work as well and I needed to tape some of the edges closed with a small section of strong clear packing tape.

    hdh607 -

    I stuck the adhesive to the chassis first. That was messy because the plastic that covers the adhesive seems to be for screen side first. So you end up exposing both sides and those collect dust. I now realise you're supposed to put the adhesive on screen first. Not sure if it would have made much difference in the outcome (mine screen is not stuck in some places).

    Robert Lord -

    I found this out too. I had two sealing kits and they were both meant to be fixed on the screen first. I did not managed to get the screen to stick with the body as well. Now used some B6000 glue in addition.

    agrior -

  17. 4d3KqmbkkNIRUvmy
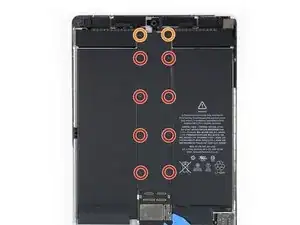
    • Use a Phillips screwdriver to remove the ten screws securing the EMI shield:

    • Eight 1.3 mm screws

    • Two slightly longer screws

    The top two screws are longer than the rest on my iPad. Be careful to put them back in the right spots.

    Scott van Gulik -

  18. muA1FORJsbJmjbxq
    • Apply a heated iOpener to the EMI shield to loosen the adhesive beneath. Apply the iOpener for at least two minutes.

  19. Om2WqxnabbGJqo2N
    Om2WqxnabbGJqo2N
    CVRpsCG5XJYTSc4p
    GJ3VlRqa3AmmQBvg
    • Use flat end of a spudger to pry up the EMI shield, starting from the top edge near the front-facing camera.

    • In addition to screws and mild adhesive, the shield is also secured with clips along the outer edges. Try to bend the shield as little as possible when removing it, so you can bend it back to its original shape and re-use it. During reassembly, it should snap back into place once the screws are tightened.

    • Continue carefully prying up the EMI shield until you can remove it.

    The two screws adjacent to the camera location are slightly longer! Make sure you don’t mix them up with the other eight, as shorter ones will not work in this location.

    tarpot -

    Thanks! I’ve updated the step with your tip!

    Arthur Shi -

  20. EkFZXfjrkbKXKPe2
    EkFZXfjrkbKXKPe2
    OGGhnjUQv1WJVb5j
    hWELNgLIvefeKel5
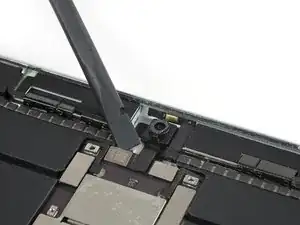
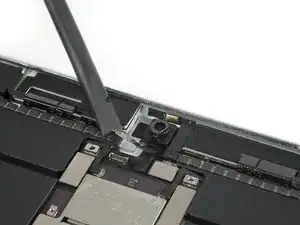
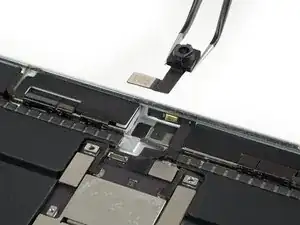
    • Use the edge of a spudger to pry up and disconnect the flex cable for the front-facing camera.

    • Remove the front-facing camera.

  21. K3LSHAWRRB2vZXCg
    K3LSHAWRRB2vZXCg
    DyrNJKu5R4SiaBVP
    RmLUD6nIcHHpHAoK
    • Use the edge of a spudger to pry up and disconnect both the left interconnect cable and antenna cable. Fold them gently out of the way.

    • If either cable is glued to the board, use a little heat to soften the adhesive so you can separate the cable without damage.

    wo finde ich das AntennenKabel , das ist abgerissen ?

    Markus Thull -

    Wo finde ich das Antennenkabel rechts und links das ist bei mir abgerissen ?

    Markus Thull -

    We also have no antenna cable as shown…

    Brian Gray -

    I think you need to assume that there is glue present and apply heat anyway. In my case the cable was not glued to the board but the connector was. So when I tried to gently lever the connector up, the cable ripped off the connector.

    If you look at the picture shown in step 21, you can actually see the glue on the connector.

    Adrian Berry -

    The left and right small antenna connectors are extremely delicate! They can crack if bent back too much and it's difficult to avoid bending them too much when removing and re-installing the logic board. This will cause the cellular radio and GPS to be inoperable. To be safe, remove antenna assembly (not shown in this guide) prior to removing the logic board.

    Eric Xu -

    To add to my comment, I'm actually working to replace the left and right small antenna connectors due to me breaking them. I'd recommend removing the top left and right speakers and just fully removing the two antenna connectors prior to removing the logic board. You do not need to fully remove the cellular antenna assemblies, just unscrew the plate/connector (with annoying perpendicular screws too) that cover the other ends of the small antenna connectors (easy to figure out once you remove the speakers).

    To remove the speakers remove 3 screws, then just pry carefully (they have adhesive tape holding them down).

    Eric Xu -

    Antenna cable is only present if you have a model with cellular connection

    HP SIE -

  22. PGQKjFrUIWQSLtEk
    PGQKjFrUIWQSLtEk
    DvxIGJCGiTILVBxe
    • Use the edge of a spudger to pry up and disconnect the microphone array cable.

  23. 4I4OiqdYoNFRCpbH
    4I4OiqdYoNFRCpbH
    g4kURSPqyBVlDwIo
    QEVkPQxgPYZlmMSi
    • Use the edge of a spudger to pry up and disconnect both the right interconnect cable and antenna cable, and gently fold them out of the way.

  24. X36rFHPnxxWxCIro
    X36rFHPnxxWxCIro
    s4PFJTIqGd5oETXE
    • Use the edge of a spudger to pry up and disconnect the cable for the Smart Connector, and fold it out of the way.

  25. l3Lcny1UgAUVMLOH
    l3Lcny1UgAUVMLOH
    i1dBPvKpQomcEMjc
    1JrLvMBWjrIccYBw
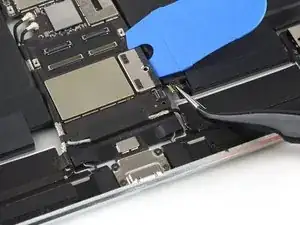
    • For the following steps, you'll need to relocate the Battery Blocker you inserted earlier.

    • The battery isolation pick or battery blocker is an outdated way of isolating the battery, as you risk damaging the battery pins underneath the logic board. If you use this method, take extreme care to insert it gently and straight in the direction of the logic board. Do not twist or swing the pick side to side.

    • Remove the Battery Blocker from the battery power connector.

    • Slide one side of the Battery Blocker under the battery power connector, and ensure that it doesn't cover the ZIF connector for the SIM card tray flex cable.

    What should I do to block the battery instead?

    Alec Ringberg -

    "The battery isolation pick or battery blocker is an outdated way of isolating the battery, as you risk damaging the battery pins underneath the logic board."

    As the previous comment says, if this is an "outdated way" then what is the up to date way?

    Adrian Berry -

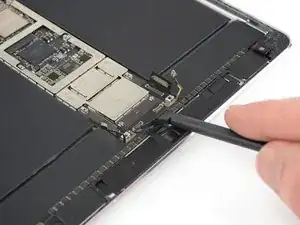
  26. LMlei1tVKwuCbgnm
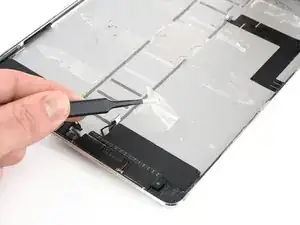
    • Use a pair of tweezers to peel off the tape that covers the ZIF connector for the SIM card tray flex cable.

    only applicable for the Cellular version

    HP SIE -

  27. yvGgjjBYGrI5j4RG
    yvGgjjBYGrI5j4RG
    iuXYqRARGZWRaeNa
    5t3PWGVGv613u3ES
    • Use an opening pick to flip up the locking flap on the ZIF connector.

    • Use a pair of tweezers to pull out and disconnect the SIM card tray flex cable.

    I don't have this connector on my 10.5 Pro. Maybe this is only for equipment with cellular. This needs to be confirmed by an expert.

    Gene Torrey -

    You are correct, this is only for models with the cellular option. Wifi-only models can skip this step.

    Gilian Mischker -

  28. Lpw4Mr5lfVtT2tXJ
    Lpw4Mr5lfVtT2tXJ
    EA6C5IMXjpl1QPiR
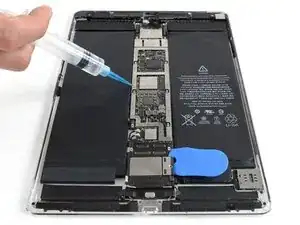
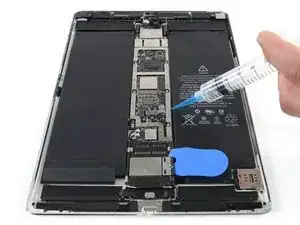
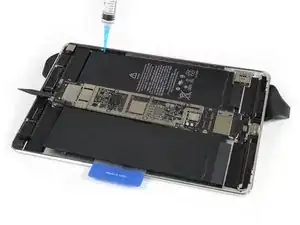
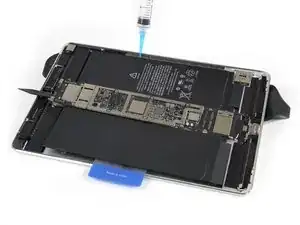
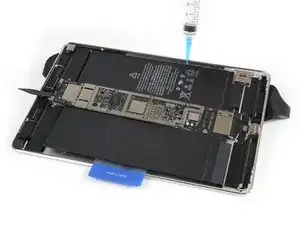
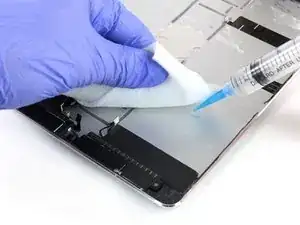
    • The adhesive that holds down the logic board is very strong. To remove the board, you must first weaken the adhesive using either a solvent, or heat.

    • Many glue solvents (such as isopropyl alcohol) are flammable, so don't mix these methods.

    • Apply some solvent in a seamless movement along both edges of the logic board. Allow it to penetrate the adhesive for several minutes.

    I didn’t remove the logicboard. Remove the screws from the charging port. Remove the two antenna cables and separate them from each other by cutting the tape in between. Remove the two speaker cables. Now you should be able to pull or push the charging port out of his socket of the case and pull it up. There is little but enough room to move it. Pay attention to both of the antenna and speaker cables that there are not in the way when you remove the battery. You would slide out the battery by pushing it out underneath the charging port.

    I used dental floss to remove the battery slowly and carefully. Don’t hurt any cables and ports underneath or next to the battery.

    Martin Sommer -

  29. rU2UcxXiYKpsRvBO
    rU2UcxXiYKpsRvBO
    ooidygkSolGMAcGO
    MVLaac6DPZOgBmjT
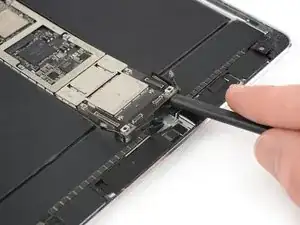
    • In the following steps you'll be very carefully prying up the logic board. The place to lift it is very tight. Avoid damage to the left and right interconnect and antenna cables, by making sure they don't get caught by the logic board when prying it up.

    • Insert the flat end of a spudger between the logic board and the rear case of the iPad.

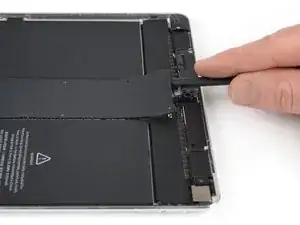
    • Use the spudger to slowly pry up the right side of the logic board.

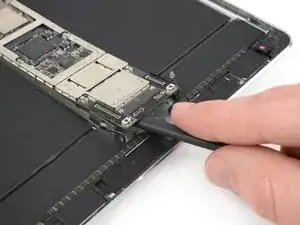
    • If the adhesive is too strong to pry up the logic board, apply some additional solvent and give it time to penetrate.

    • Pry up the left side of the logic board until you can get a good grip.

    • Don't try to remove the logic board all the way! It is still connected to the bottom area of the iPad.

  30. Y3ofBe3wWBi5ScAR
    Y3ofBe3wWBi5ScAR
    vBeUEuArV5ZEVCCD
    • Lifting from the top edge, swing the logic board upwards to a 45° angle to ensure all adhesive beneath is separated.

    • Use a spudger or opening pick to separate any remaining adhesive as needed.

  31. cyAKhB1XWlELl1PH
    cyAKhB1XWlELl1PH
    g4CFmCjfkWOvo6NP
    cDhmRsXGAQbMEMZx
    • Set the logic board back down, leaving the spudger underneath to prevent the adhesive from re-sealing.

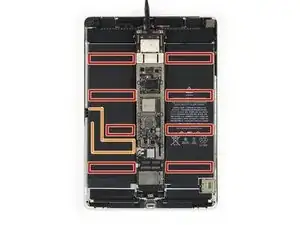
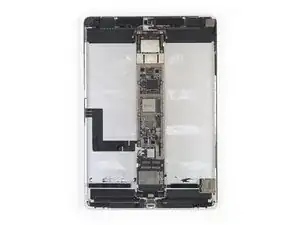
    • In the following steps, you'll use a liquid solvent (such as iFixit Adhesive Remover or high-concentration isopropyl alcohol) to weaken the adhesive under the battery. The location of the adhered areas and the Smart Connector flex cable underneath the battery are shown in the last two images:

    • Adhesive

    • Smart Connector cable

  32. bJQ22lLrLGJyA5XS
    • Elevate the left side of the iPad (long edge nearest the headphone jack) by placing an iOpener underneath, so that the iPad lays down at an angle.

  33. CXQ4NqxBasHXKmKO
    CXQ4NqxBasHXKmKO
    g3KvxGOLhePVOu2t
    RtexUBIiiOBcxexv
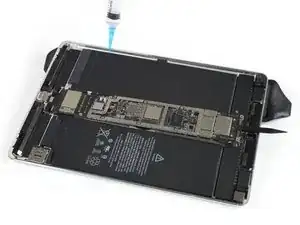
    • Do not apply any solvent to the Smart Connector flex cable to avoid it loosening during the battery removal.

    • Apply some solvent underneath the battery at the three separate points where the longer adhesive strips are located. Only apply the solvent point by point and not in a seamless movement.

    • Allow the solvent to penetrate for several minutes to help weaken the adhesive.

  34. aZXONJNM2Qnc2oxJ
    aZXONJNM2Qnc2oxJ
    E6AigHobCxJ6VvCj
    WEwi32AJxbUjMIvG
    • Remove the iOpener so the iPad lays flat, and rotate it so the headphone jack faces towards you.

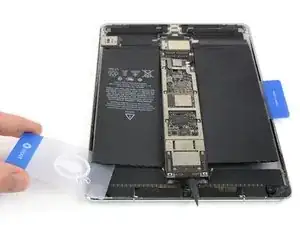
    • Insert a plastic card underneath the battery cell, starting near the outer corner.

    • Wiggle the card from side to side and push it under the battery to separate the adhesive underneath.

    • Stop before you reach the Smart Connector flex cable, or you may damage it. Leave your card inserted to keep the battery from re-adhering.

  35. 2PKHrbp3wCAnU2lA
    2PKHrbp3wCAnU2lA
    JiQDOT1SpDpulCnA
    JOlr31OebcMrhZ5U
    • Carefully insert a spudger underneath the battery at the same hight as the display connectors. You might need to reapply an iOpener or adhesive remover.

    • Be careful not to puncture the battery by prying too hard.

    • Pry up the battery using the spudger and cut the remaining adhesive with it.

    • Lift the battery with the spudger to ensure all the adhesive is loosened.

    • Place the plastic card under the center of the battery cell, and leave it there to prevent the adhesive from re-sealing.

    • Mind the Smart Connector cable.

  36. KheUNQTUkBFEdIIX
    KheUNQTUkBFEdIIX
    rhHkVJyjlSgEwmuV
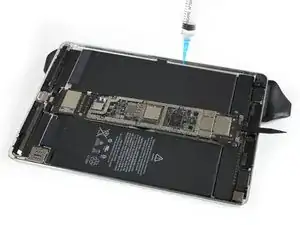
    • Elevate the right side of the iPad (long edge, nearest the rear camera) by placing an iOpener underneath, so that the iPad lays down at an angle.

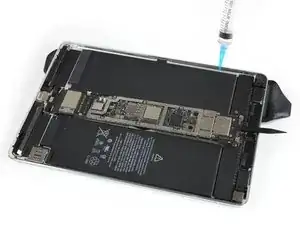
    • Apply some solvent underneath the battery at the two leftmost adhesive strip locations.

  37. aSjAVWmqyy32desO
    aSjAVWmqyy32desO
    OdERbbkIFhBiYPWt
    • Continue separately applying solvent at the remaining two adhesive strip locations. Allow it to penetrate for several minutes to help weaken the adhesive.

  38. qGAdSAFLDUXAtXvl
    qGAdSAFLDUXAtXvl
    uxw2Q6eyFdhlH6qN
    N2jIKWsdZ6rZEMmT
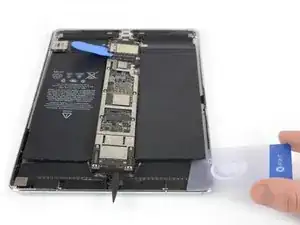
    • Remove the iOpener so the iPad lays flat, and rotate it so the headphone jack faces towards you.

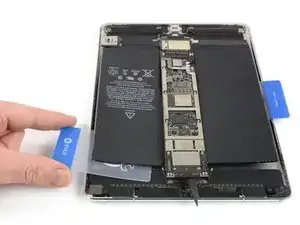
    • Insert a plastic card underneath the battery cell, starting near the outer corner.

    • Wiggle the card from side to side and push it underneath the battery to separate the adhesive underneath.

    • Slide the plastic card down toward the bottom edge of the iPad and cut all the adhesive beneath the battery cell.

  39. 1jM4ftiwSSCKm2yt
    1jM4ftiwSSCKm2yt
    g3pvGU6UdXrQIdGK
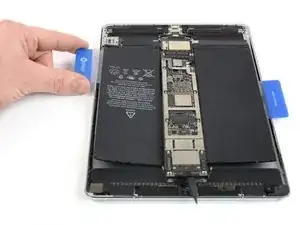
    • Lift the battery cell slightly to ensure all the adhesive is separated.

    • Leave the plastic card under the battery to prevent it from re-adhering.

  40. WRNpGLJPlMHMDVXA
    WRNpGLJPlMHMDVXA
    qXT6UtS1GsERMebI
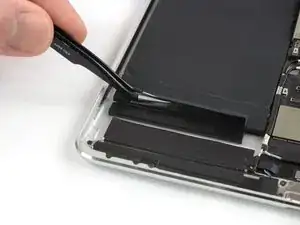
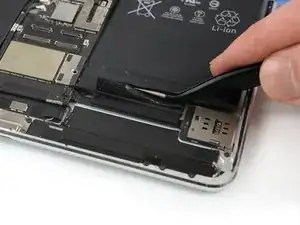
    • Peel up the black adhesive strip at the bottom edge of each battery cell, if they didn't already come off during the prying procedure.

  41. Q4UOsNbxEfclDlm4
    Q4UOsNbxEfclDlm4
    rBhSFELB1tEOLXCT
    UBQJKrcucbBJQ3MU
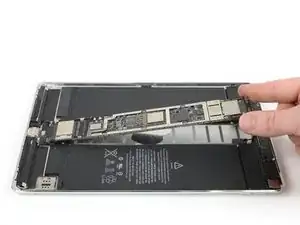
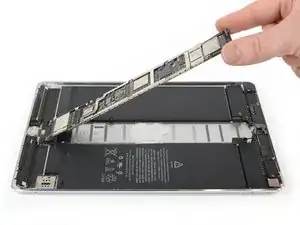
    • In this step, don't fold back the logic board to more than a 100° angle. Some connectors are still attached to it and can be damaged.

    • Lifting from the top edge, swing the logic board up until it's roughly perpendicular to the iPad.

    • Prop the board up securely so it doesn't move while you work. (Don't use anything metallic or conductive.)

    • You can use a small rubber band to keep the logic board in place.

  42. tWh62KjubJ1BDVIW
    tWh62KjubJ1BDVIW
    EGqTlICphNWAkF1V
    • Get a good grip on both sides of the battery and remove it from the iPad.

    • Do not reuse the battery after it has been removed, as doing so is a potential safety hazard. Replace it with a new battery.

  43. BeF2E6DJSiuhMXjF
    BeF2E6DJSiuhMXjF
    nf5kaLpYTeVYRQUN
    • Use a pair of tweezers to peel off the remaining adhesive strip parts.

    • Clean the glued areas with isopropyl alcohol and a lint-free cloth before installing a new battery to ensure the new battery fits and the adhesive bonds correctly.

    • If your new battery doesn't come with adhesive pre-applied, secure it with pre-cut adhesive or double-sided adhesive tape.

    • In order to position it correctly, apply the new adhesive into the iPad at the places where the old adhesive strips were located, not directly onto the battery. Press the new battery firmly into place for 5-10 seconds.

    After a successful battery replacement we ran into an issue where the iPad Pro would crash once or twice a day. I made sure to calibrate the battery per repair instructions but that didn’t fix the issue. I got it resolved after backing up the iPad and then putting it into DFU mode through iTunes and installed a fresh copy of iPadOS and then restore from backup. That fixed the issue of iPad crashing. Hope this helps if you run into a similar issue.

    Yousef Ghalib -

Conclusion

Compare your new replacement part to the original part. You may need to transfer remaining components or remove adhesive backings from the new part before installing.

To reassemble your device, follow these instructions in reverse order.

If possible, turn on your iPad and test your repair before resealing the tablet.

For optimal performance, calibrate your newly installed battery after completing this guide: Charge it to 100% and keep charging it for at least 2 more hours. Then use your device until it shuts off due to low battery. Finally, charge it uninterrupted to 100%.

Take your e-waste to an R2 or e-Stewards certified recycler.

Repair didn’t go as planned? Check out our Answers community for troubleshooting help.

Dominik Schnabelrauch

Member since: 23/11/16

217902 Reputation

14 comments

Is the black tape needed at bottom of battery when reassembling?

tcostasr -

If you say the “the battery isolation method in this guide is outdated” then what is the correct way to isolate the battery?!?! The rest of the guide makes no mention of the correct/prefered method of isolating the battery.

How is it that the author took the time to update the guide with that message but failed to mention what should be done instead

Experimax Naperville -

Good point! We are currently still researching a more reliable alternative to the battery isolation procedure. As of now, the battery blocker method still works—it just has substantial dangers. This is especially true for iPad Pros, where the Logic Board is adhered to the frame. I’ve reworded the warnings to reflect this.

Arthur Shi -

Hi can you advise please? In step 25 the SIM card tray flex cable is disconnected, no problem apart from i don’t have a SIM card tray flex cable in the A1701 that i’m repairing!! Urgent assistance required please. Regards R

R Taylor -

You have the Wi-Fi model, which will look slightly different and have different procedures compared to the cellular model. You can skip the SIM flex cable step.

Arthur Shi -

Ich habe diese Antennenkabel defekt wo bekomme ich sie oder für was sind die ?

Markus Thull -

hi

I fixed my battery according to the guide.

I have two problem

1. battery screw not able screw back in. but I am able to turn on iPad.

2. after turning on I am not able to unlock because on the keypad 1, 2, 3, these keys not responding to the touch. all other keys are touch responsive.

kindly help me with these two issues.

many thanks

Raghu Kshatriya -

I just finished following this guide, thank you so much for writing it!

I know that 18 of the 43 involve dealing with glue, but JEEZ that’s still underselling how much glue is in this thing.

The iOpener worked surprisingly well for removing the display. But the iFixit adhesive remover was not effective for removing the old battery. After 5 minutes, the solvent only ate around the edges of the adhesive strips and made a huge gooey mess with the center still sticky. After 10 minutes the glue had already re-adhered. I recommend anyone reading this try heat first, and see whether that works for you.

FWIW, I skipped the steps with the battery blocker since there doesn’t seems to be consensus on how to do it safely. I just made sure the battery was completely dead so the backlight couldn’t turn on and fry anything even if it wanted to.

Either way, after about 3 hours start to finish including cleanup (man there was a lot of cleanup) I’m very happy to say that I have a new battery and everything is working perfectly!!

Evan Mallery -

thanks for the guide, after fighting against the glue, and sweeting like i was running a marathon i just replaced the stupid battery, the only problem, its that the top right speaker sounds baad, like its loose or something, and its weird, because i never touch it, ill try to open it tomorrow and see what's the problem

Cristian Villalobos -

The guide should include a warning not to clean the glue around the edges of the screen after opening. Or, at least not use any solvent. Any liquid you use will leak in between the digitizer and LCD, hence ruining your display. Another comment though, why the battery I bought like two weeks ago is made in May of 2019?

Shi-zun Fu -

I was lucky enough to take off the adhesive from the Logic board and the battery without using any solvents and used just my hair dryer. You definitely need to be patient with the process and not force it. Putting the new battery back on, as well as putting back on the display, and camera was super quick. Those darn new screen adhesives are a pain to put on but once the screen sits flush with the body, it was totally worth it. Think I spend about an hour and a half total. Battery isolation with the little pick did help out and felt safe having it in place throughout the repair process. Having the locations of where the battery adhesives were located, as well as the Smart connector was super clutch! I appreciate the disclaimers and warnings all throughout the repair guide.

Lazaro Sanchez -

Just to provide some failing experience and heads-up: My LCD screen has cracks and flickering after the battery replacement. I think it’s because when removing the screen I used the suction cup too frequently and added too much pressure to the screen when using it. Try to use the iOpener and the pick for most of the time for removing the screen.

JimmyX -

I didn’t remove the logicboard. Remove the screws from the charging port. Remove the two antenna cables and separate them from each other by cutting the tape in between. Remove the two speaker cables. Now you should be able to pull or push the charging port out of his socket of the case and pull it up. There is little but enough room to move it. Pay attention to both of the antenna and speaker cables that there are not in the way when you remove the battery. You would slide out the battery by pushing it out underneath the charging port.
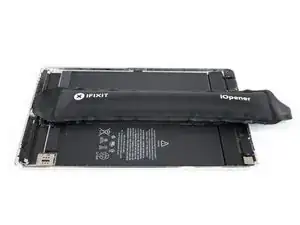
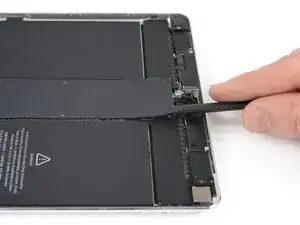
I used dental floss to remove the battery slowly and carefully. Don’t hurt any cables and ports underneath or next to the battery.

Martin Sommer -

I also managed to replace the battery by using the tip loosening antenna and speaker cables + sim ribbon and then unscrewing charging port. This makes all this a much simpler operation as logic board can stay in.

Martin Dalgaard-Lassen -