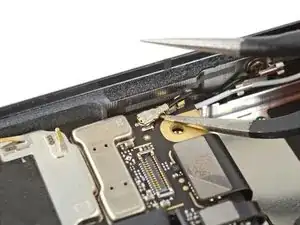
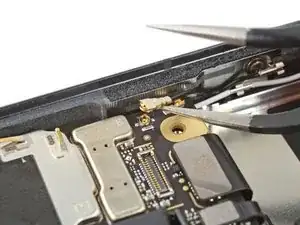
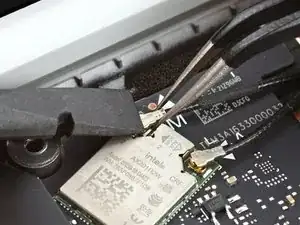
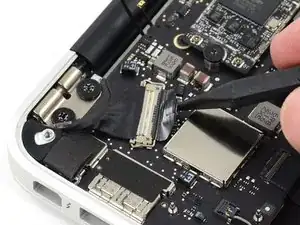
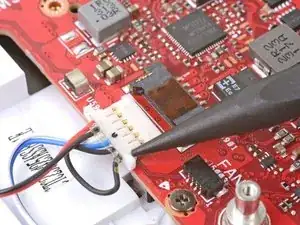
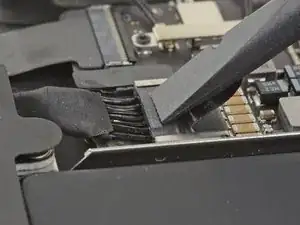
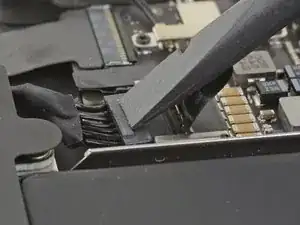
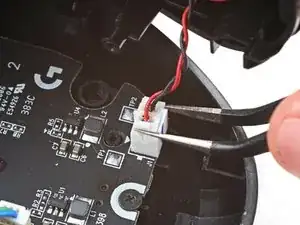
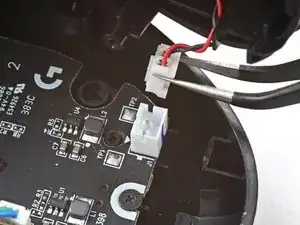
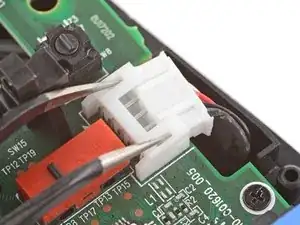
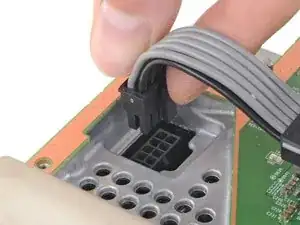
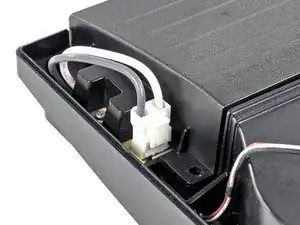
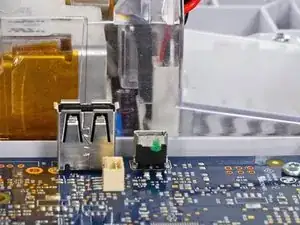
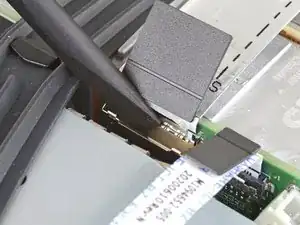
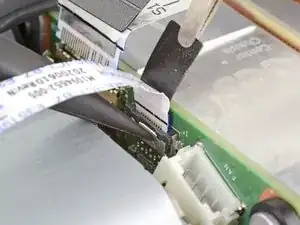
Introduction

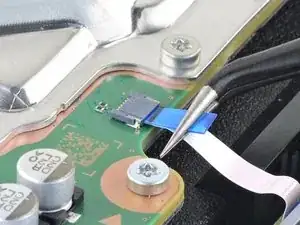
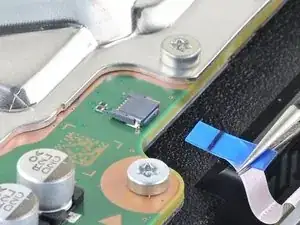
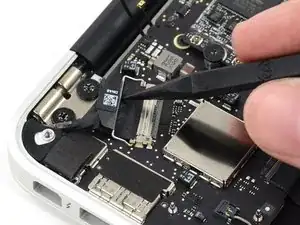
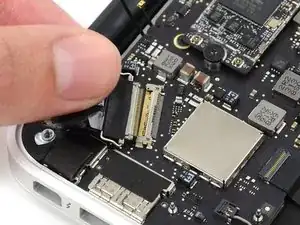
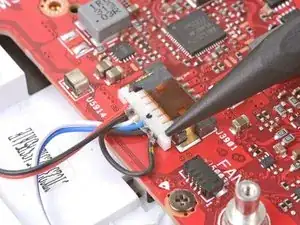
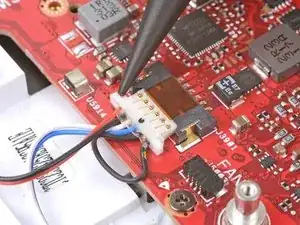
Modern electronics contain a dizzying array of internal data and power cable connectors—and nothing brings a project crashing to a halt like accidentally breaking a connector.

Use this guide to familiarize yourself with the most common types of connectors, and learn the tools and techniques you’ll need to disconnect (and reconnect) them safely.

  1. ZIF Connectors
  2. No-Fuss Ribbon Cable Connectors
  3. Locking Tab Connectors
  4. Other Ribbon Cable Connectors
  5. Flat-Topped (Low Profile) Connectors
  6. Press Connectors
  7. Coaxial Cable Connectors
  8. Display Cable Connectors
  9. Sliding Connectors
  10. Large Sliding Connectors
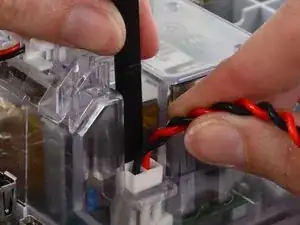
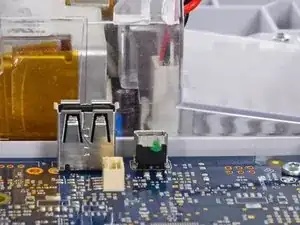
  11. JST Connectors
  12. Power Cable Connectors
  13. Bundled Cable Connectors
  14. Glued-Down Cables
  15. SATA Cables
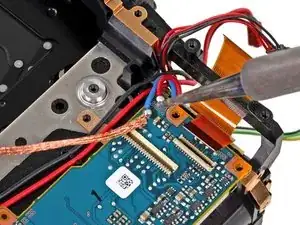
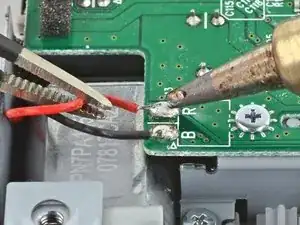
  16. Soldered Connections
  17. Rare & Exotic Connectors (Part 1)
  18. Rare & Exotic Connectors (Part 2)
  1. qL3eKapT2niCAuIK
    qL3eKapT2niCAuIK
    AEJNWBM2K6KITBNF
    mGOmpIW2GvxNidIq
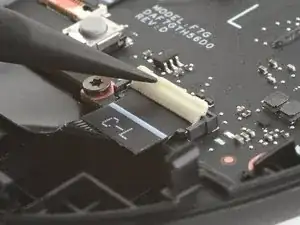
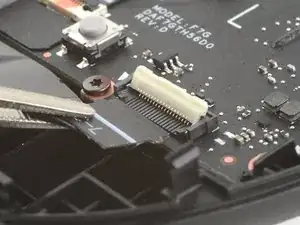
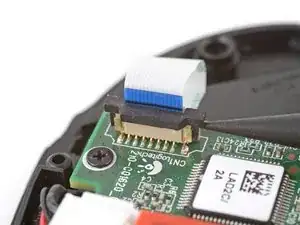
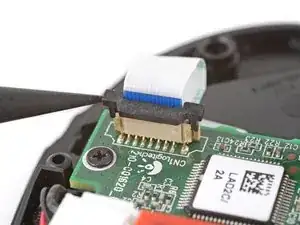
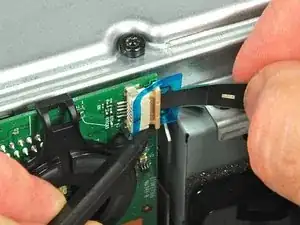
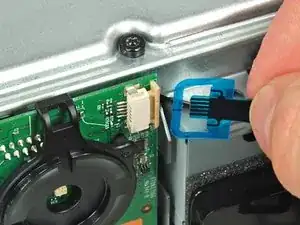
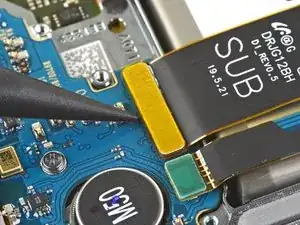
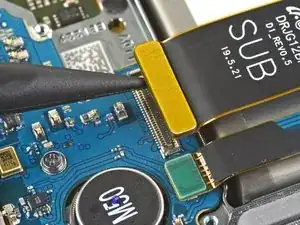
    • Zero insertion force (ZIF) connectors are often used to secure delicate ribbon cables of many sizes. A hinged locking flap runs across the top of the socket, and the cable is inserted on one of the long edges.

    • To disconnect the cable, use a spudger, opening tool, or a clean fingernail to flip up the locking flap—this is the unlocked position.

    • Use the widest tool possible to avoid damaging the delicate hinge pins.

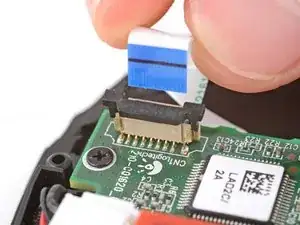
    • Once the flap is in the unlocked position, use tweezers or your fingers to gently pull the cable out of its socket.

    • If the cable has a pull tab, use it to grip the cable. You may damage the cable by gripping it directly.

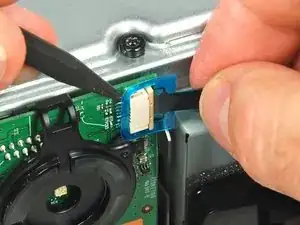
    • Some cables may have small "arms" or notches that help secure them. If this is the case, you'll need to lift the cable to free it and then pull it out.

    • To reconnect, make sure the locking flap is flipped up and gently reinsert the cable. Then, flip the locking flap down to secure the cable. The cable should slide into the socket with little to no force. If you're having trouble, remove it, check that the flap is fully unlocked, and try again.

    • Some cables (like the one pictured) may have a line that marks the edge of the connection area. Make sure you insert the cable so the line is flush with the edge of the socket.

    What if I break the ZIF connector itself (were the ribbon goes), is my tablet ruin?

    elainegb27 -

    Unless you are good with a soldering iron or hot air station I would suggest taking it to someone that can do it.

    deswaite -

    “…Be sure to pry up on the hinged flap, not the connector socket….” but we’re not going to provide any further information than this and good luck with that :-)

    andyescribe -

    That’s what the photos are for—providing a visual example. There are a million different implementations of ZIF connector out there, so it’s not possible to provide specific instructions for each one in a single guide. For that, you need to search for the guide for your specific device. Unfortunately, looking at your post history, it appears you attempted to do that, but the guide you were following (Nexus 6) mislabeled the battery connector as a ZIF connector. I’ve corrected the guide. Sorry for the trouble!

    Jeff Suovanen -

    You have provide awesome tips which is very helpful. I have issue with FPC that not connecting with Cable

    Ralph Vale -

    hola he intentado cambiar el cristal de mi apple watch 2 despues de conseguirlo me he dado cuenta que he retirado el cable sin bajar la pestaña o no se que he doblado los pines despues de intentar una y otra vez el conector zip de la derecha ha quedado inservible es posible comprar ese conector en algun lugar o sabrian que nombre de conector debo buscar ya que no viene en ninguna expecificacion gracias

    Fran Ansio -

    Great tutorial, thanks. Had I not seen it, I would have irreparably damaged my keyboard. Perhaps it lacks a bit more guidance on how to place the cables back. I found that part to be the hardest actually.

    Juan Dueñas -

  2. 2TXi6iGGfol3ZANu
    2TXi6iGGfol3ZANu
    RnShvM56GJZFSCW1
    • You may run into a ribbon cable with a socket that looks like a ZIF connector with no flap. Usually, the cable will be more rigid and have a stiff, reinforced plastic end. These connectors are often found in larger devices such as printers, projectors, or games consoles.

    • Before trying to disconnect these cables, carefully check for a release mechanism and make sure it's not a ZIF connector. Otherwise, you may permanently damage the socket and cable by forcibly removing it.

    • Simply pull these "no-fuss" ribbon cables straight out of their socket to disconnect them.

    • To reconnect the cable, hold it as close to the end as possible and insert it back into the connector. Apply force to the plastic reinforcement rather than the cable itself.

    • Try not to kink or crease the cable.

    How can I remove ribbon connect or of Sony Bravia led tv

    Sonali Likhare -

  3. YrWipaYlstuHLYvZ
    YrWipaYlstuHLYvZ
    nmLeweibx1DZ4W3S
    NPMFSBiIAhNs6owF
    • Some ribbon cable connectors have a plastic locking tab around them. These are often used in large game consoles and mice.

    • Use a spudger to gently push up on alternating sides of the plastic tab until it clicks up into its unlocked position.

    • Don't push the tab too hard or too far, otherwise it may come completely off the connector.

    • Once the tab is unlocked, you can gently pull the cable straight out of its socket.

    • The cable should be able to slide in and out of the socket with little to no force. If you feel resistance, the tab may not be fully unlocked.

    • During reassembly, insert the cable into its socket and use the flat end of a spudger to push the tab down into its locked position.

  4. NuM422AWDcYQXIaq
    NuM422AWDcYQXIaq
    SxWf6hMjvPSVPxL2
    XFXdcZKNoeHkGBYE
    • There are many other types of ribbon cable connectors that might require you to mix-and-match disconnection methods. Some Xbox gaming consoles have ribbons cables with a section that loops around the connector, and have a locking tab.

    • To disconnect this connector, use a spudger or clean fingernail to lift the looped tab away from the connector.

    • Then, use the tip of the spudger to push the plastic locking tab away from the socket—it should only move about 1–2 mm.

    • You can now pull the cable straight out of its socket.

    • To reinstall:

    • Fully insert the cable into its socket under the locking tab.

    • Loop the tab around the front of the connector.

    • Use a spudger or clean fingernail to push in the locking tab, securing the cable.

    i knocked the locking tab off… on three of them, any way to reattach them?

    John Baker -

  5. fTwJVQ4yHDfF3IXy
    fTwJVQ4yHDfF3IXy
    Vay2CGUSYOoWJ1dn
    Pq6RuKSQ3xEUn1V6
    • Some connectors have a flat, plastic top that sits flush on top of their socket. Often, these connectors have multiple cables connected to them. Flat-topped connectors are usually on the larger side, and are typically used to connect batteries in laptops and larger gaming devices.

    • To disconnect the cable, use the flat end of a spudger to lift and unclip the outer edges of the connector. You may need to use your fingers to pull the connector completely out of its socket.

    • Sometimes, these connectors have a slide lock running across the top that holds the connector in place. If this is the case, push the lock away from the connector before trying to disconnect it.

    • Flat topped connectors can also have a metal locking bar that keeps the connector in place. Unclip and flip the locking bar up to disconnect it.

    • To reconnect the cable, carefully position the connector over its socket and press straight down—the connector should snap into place without much force. If you're having trouble, the connector is most likely misaligned. Reposition it and try again.

    • Don't try to force the connector into place or you may damage the delicate pins.

  6. VLvukFspqt3EDiUi
    VLvukFspqt3EDiUi
    pW6Hgx5LyO2NIVIQ
    3CXLfoFYNWJUDyyP
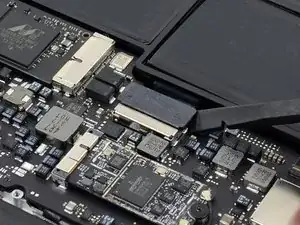
    • Press (or "pop") connectors are found at the end of a ribbon cable and have a flat, metal or plastic top—typically rectangular. These connectors are extremely common in smartphones and laptops, and connect a wide variety of small to medium-sized cables—screen, battery, board interconnect, etc.

    • Place a spudger or an opening tool under the connector's edge and pry straight up to disconnect it.

    • Make sure to pry under the edge of the connector itself, and not under the socket on the board. Otherwise, you risk permanently damaging the socket.

    • Work carefully: don't pry on or accidentally scrape any small, surface mounted components on the board.

    • Although more rare, some larger pop-style connectors might have a built-in pull-tab for easy disconnection. Lift straight up to disconnect these.

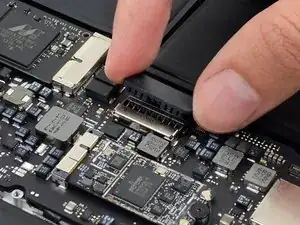
    • To reconnect, align the connector carefully over its socket and press down with your fingertip—first on one side, then the other—until it clicks into place. Don't try to force the connector into place. If you're having trouble, reposition it and try again.

    • Don't press down on the middle of wider connectors until they're fully seated. If misaligned, the connector or the pins underneath can bend or break, causing permanent damage.

    I have an idea,/Request that I'm sure would be worth the effort, and fit right into this subject. how about a step by step guide on fixing the mistake of fudging up the socket yes on the mother board Guilty, right now it's a 500 dollar paper weight!! ! And I'm sure there's a long line of us,right guys, since you guy's are Awesome at it! Where to source the female sockets that's go onto the board and the proper steps and tecniques , would be greatly appreciated, keep up the great work!!

    JOE -

    Sorry to hear that! My usual advice would be to take it to a repair shop that performs board-level repairs (a.k.a. microsoldering). Replacing a damaged connector socket typically requires a lot of skill, practice, and tools that likely cost more than the full retail price of your device. So, it’s not exactly DIY-friendly! But if you’re interested, you can find a good introduction to board-level repairs on our YouTube channel.

    Jeff Suovanen -

    Is there a specific name for this type of connector? (brand, etc).

    David Schwartz -

    Stack-type Board-To-Board connector. JAE is a big manufacturer. FPC (Flexible Printed Circuit), what we commonly know as flex cables usually - is considered a board in this context.

    Jan Magne Skaue -

  7. peuDh3TopBbbkw6g
    peuDh3TopBbbkw6g
    CAUyFkZYjyplWeBC
    DpYG2i3VUDQtQcu1
    • Coaxial connectors like these—also called antenna, U.FL, or IPEX connectors—have a metal head that snaps over a circular socket on the board, like a metal snap button on a shirt. These connectors come in various sizes and are often used to connect Wi-Fi or cellular antenna cables.

    • To disconnect the cable, slide a thin, ESD-safe pry tool or angled tweezers under the metal neck of the connector (as close to the head as possible) and lift straight up from the board.

    • If you work with these connectors often, you may want to buy a specialized disconnect tool (small size, large size). These tools speed up the disconnect and reconnect procedures while minimizing the risk of damage.

    • When working with these connectors, it's key to always lift the head straight up. If pried on at an odd angle, you risk breaking the socket off of the board underneath.

    • Reconnecting these can be tricky. Use tweezers to hold the connector in place over its socket and gently press down with your finger or a spudger—the connector should "snap" into place. If you're having trouble, reposition the head and try again.

    • Don't try to force the connector into place or you may permanently damage it.

    Hello, I am repairing a tablet and the head to my coaxial cable fell off. What do I do?

    Brittany Dush -

  8. I1blJLmNh4Yc6VuF
    I1blJLmNh4Yc6VuF
    2DhgBvVedgnuxjxB
    SIxMYGuqKZhmjTKO
    • Display (sometimes called eDP cables in laptops) and camera cable connectors often have a small metal buckle running around the socket, locking them in place. The connectors are typically wide and may have tape attached to the buckle.

    • Disconnecting these cables is a two-step process. First, gently push the tip of a spudger under the metal buckle to unclip it, then swing it over the socket.

    • Next, hold the buckle and cable together and gently pull the connector straight out of its socket.

    • To reconnect:

    • Grip the cable and buckle together and insert the connector fully into its socket.

    • Aligning the connector can be tricky. Reposition it as necessary and don't try to force it into the socket, or you may damage both the connector and its socket.

    • Flip the buckle over the socket and use a spudger to press the buckle down until it clicks into place.

  9. HoqLnCdxwnKFFNpW
    HoqLnCdxwnKFFNpW
    j1C4SOwgLhGf6thB
    jVHpPAlgO1tpPYLt
    • Some connectors slide into the side or top of their sockets and have no convenient place to pry or pull. Typically, these connectors have multiple cables attached and are used for small batteries or speakers.

    • To disconnect, use the point of a spudger to push on alternating sides of the connector to "walk" it out of its socket.

    • It may take a lot of alternating before the connector comes out. Be patient, and don't pull on the cables.

    • To reconnect the cable, align the connector and use a spudger or clean fingernail to push it fully into the socket.

    • Don't push on the cables themselves, or you may damage the connector.

    • Some connectors (like the one pictured) have a small marking that shows which side of the connector should be facing up.

    I used tweezers to open this connector

    Muescha -

  10. KqkPcWAooFJ1rFaO
    KqkPcWAooFJ1rFaO
    34IWjVC3hf1mMoiR
    • Large sliding connectors work the same as smaller sliding connectors, usually sliding into the side of a socket. Typically, these connectors have multiple cables attached and are commonly used for laptop batteries.

    • Most of the time, these connectors will have a lip or a tab along the top that can be used to push the connector out of its socket.

    • If there's no clear spot to use a tool, check out bundled cable connectors.

    • To disconnect, use the wide end of a spudger to push on the connector tab to slide it out of its socket.

    • It may take a lot of force to disconnect the cable. Go slowly, and don't pull on the cables.

    • To reconnect the cable, align the connector and use a spudger to push against the tab to fully seat the connector back into the socket.

  11. DDWEIDyUvYUFDISW
    DDWEIDyUvYUFDISW
    Tejvt6vcaNDL3yiu
    1swDgDFAPB6uty2a
    • JST connectors are a type of sliding connector that usually have multiple twisted cables attached to it. They're typically on the smaller side and are often used in mice or for speakers.

    • To disconnect the cable, first try pushing on alternating sides of the connector, like small sliding connectors.

    • If that doesn't work, use a pair of tweezers to firmly grip the sides of the connector and pull straight away from the socket. Hold the tweezers closer to the connector to get a better grip.

    • If you're having trouble, try rocking the connector side-to-side to loosen it.

    • If the connector's socket has cutouts, you can insert the arms of a pair of sharp tweezers into the cutouts and gently push the connector out of its socket.

    • To reconnect the cable, insert the connector into its socket and push on the edges until it's fully seated.

  12. VoJCwEG4QdSVwaWb
    VoJCwEG4QdSVwaWb
    jLEFSsXHSB6nAgeL
    vQLKnIgKoSDY4uKy
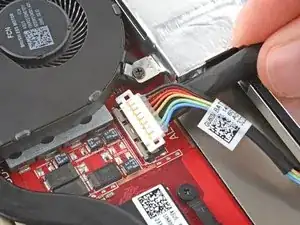
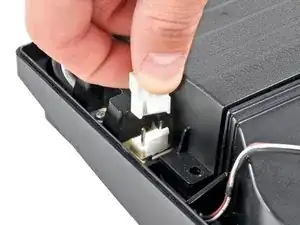
    • Power or power supply cable connectors usually have multiple cables running to a large plug with a locking tab. They're often found in larger electronic devices, like gaming consoles and desktop PCs.

    • Squeeze the tab against the connector and pull straight up to disconnect it.

    • To reconnect, push the connector over the socket until the clip engages. You'll hear and feel a distinct "click."

    Hallo, ich habe genau wie auf dem Bild bei meiner PS3 Slim ein ähnliches Kabel von dem Laufwerk zu trennen versucht. Beim Ziehen ist nicht das Kabel abgerissen, sondern die Anschlusstelle an der Platine hat sich auf einer Seite gelöst. Muss man hier nun das Teil wieder dran löten oder kann man es irgendwie mit Klebern fixieren?

    Stefano Aram -

  13. a3xhXTt5Q2cr2U6b
    a3xhXTt5Q2cr2U6b
    pemG1DGJMhEbY1rK
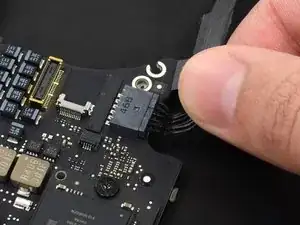
    • Bundled cable connectors have many small wires leading into them, often wrapped in a sleeve. They may not have anywhere to push with a spudger or a spot to grip with tweezers. Pulling on the cables themselves might be the only option.

    • This should be a last resort if the sliding connector and JST connector disconnection methods didn't work.

    • Grip all the cables at once as close to the connector as possible and pull the connector slowly and steadily out of its socket.

    • Pull evenly on the full width of the cables so no individual wires are strained.

    • To reconnect, align the connector and use a spudger or clean fingernail to push the connector head fully into the socket.

  14. qw1N4gAHGUHZVKpj
    qw1N4gAHGUHZVKpj
    Oa4FPlxqgWJiUEyU
    • Sometimes removing the connector from its socket isn’t enough—an additional step or two is required to free up the cable. Here we have a ribbon cable that is lightly glued into place.

    • To remove it, carefully slide a spudger or opening pick under the cable to separate its adhesive.

    • For particularly delicate or stubborn cables, a little heat from a hair dryer, heat gun, or our handy iOpener will help soften the adhesive.

  15. 3pqqIWWHNyugRqMa
    3pqqIWWHNyugRqMa
    66YnPF4jLpBLenQV
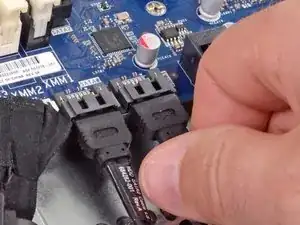
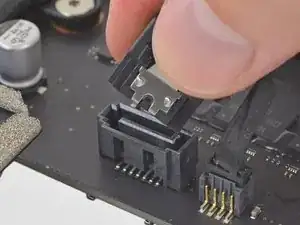
    • Some common internal power and data cables, like these SATA cables, work much like the regular audio/video cables you already have around the house.

    • To remove them, pull in the direction of the cable.

    • Some variants of the SATA cable have a small metal release tab on the side that you may need to press before pulling.

  16. NdAxcOB6VSVwhppW
    NdAxcOB6VSVwhppW
    tlZKY2j2F2CRtnHs

    LOL. not sure I'd call hardwired solder in wires a 'connector'

    Bubba Mustafa -

  17. sWEnDoriSLPN6ioT
    sWEnDoriSLPN6ioT
    SYEFGcXPCASGClcL
    oOtLg2XZFWkWkZi1
    • Eventually, you're bound to come across a connector that you've never seen anywhere else.

    • Inspect the connector carefully, and try to determine how it disconnects.

    • Work slowly, using lots of gentle wiggling. If your first attempt doesn't seem to be working, don't force it. Try another approach and see if a different tool gives a better result.

    • If you're still having trouble, look for guides of similar devices to see if they provide any clues, or ask for help in our Answers forum.

    • For example, the connector shown here has a locking tab deep in a tight cavity. A long, thin tool like a spudger can help unlock the tab and disconnect the cable.

    Hi,

    I've just been wrangling with a 25ish year old Kenwood stereo. There were some connectors on it that I couldn't work out - which led me to this guide. The specific connectors aren't shown here. It turns out theybare spring-loaded, and you have to push the upper part (that I initially thought was a plug) down into the board - and this releases the ribbon cable. On the stereo, there are some shorter ones (8-pin), and some longer ones (15pin). On the longer ones, if you look close enough, they helpfully say ‘push' on them.

    I've taken some photos of you'd like to add them to this guide?

    J Salter -

  18. StGZIBBIvUDswvRT
    StGZIBBIvUDswvRT
    ITbgOwD5FaXf2DGX
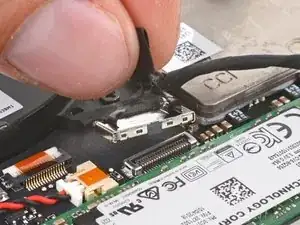
    • Some connectors in hard-to-reach areas might use special or unintuitive locking mechanisms.

    • Photo 1: A large metal cover latches over the full connector, locking it in place.

    • Photo 2: A metal tab needs to be pushed in—instead of pulled out, to unlock the flat cable.

    • Remember: Work slowly, using lots of gentle wiggling. Don't force cables out of board connectors. Most of the time, once unlocked, the cable should release freely.

Conclusion

Still having trouble? Ask our Answers forum for help.

For more electronics skills, click here.

Jeff Suovanen

Member since: 06/08/13

433644 Reputation

24 comments

Beautiful work. However, my modern LCD flat screen TV set uses the "No-Fuss Ribbon Cable Connectors" and I think they are fairly common in this application.

"Step 2 — No-Fuss Ribbon Cable Connectors

Occasionally, you'll find a ribbon cable that simply pulls out of its socket, with no retaining flap.

<snip>

These kinds of connectors are fairly rare, so check carefully for a way to release the connector before you resort to pulling on the ribbon cable."

Tom -

This was great! thanks for the detailed pictures. I have a question though on a very specific port used on apple tv 1.

here's the link to my post

What is the 4prong black port next the the IR plug?

Manny O -

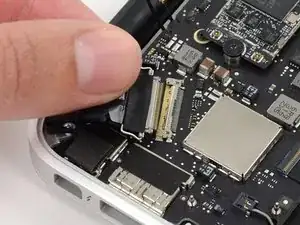
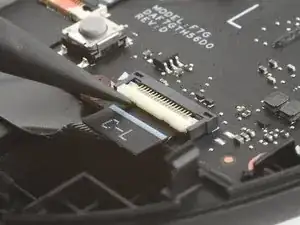
It's important to note that ZIF connectors often do require force to insert, for example the digitizer ribbon cable on the Nexus 6, which has a bit of negative tension from being curved. It has to be pushed in using the little raised portion with a fingernail, and held so the line on the cable matches the line on the PCB before closing the retention bracket or else it will not connect properly.
Benjamin Columbus -

I have a visio T-con board that has two flat ribbon connectors the one to the screen as a flip open latch you can do with your finger nail the other has a thin metal strip that over hangs the end on both sides. And ideas on how this one opens up? Rowland

rowlandstevens -

Great post!

Would be great if Jeff or someone could help me with my question, doesn't look as though that connector type is covered in the the post above. Its listed here - Need help with these Connector latches

TIA,

Norm

Norm -

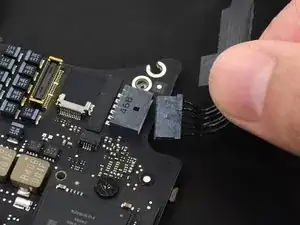
good page, but I was looking for the display connectors for ipad air 2. They seem to just push on, but the pressure is so light I am not confident that they are seating correctly. It won’t turn on at any rate though the screen briefly comes up at boot.
FNorthrop -

Those are pop connectors—see Step 4. Align them carefully, and press them down; you should feel them click into place.

Jeff Suovanen -

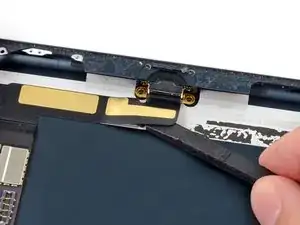
I recently ran into a FFC (Flat Flex Connector) type I didn’t know how to open exactly, and this page only refers to the flip-lock type. Turns out it was a slide-lock connector and the diagrams on the page below were very helpful. I simply used my tweezers to push on the two tabs towards the cable, the actuator moved easily once you knew which way to apply force.

Doing ifixit versions of these diagrams would be VERY helpful.

Slide Lock Diagram: ''https://gct.co/Images/products/ffc-con...

Flip Lock Diagram: ''https://gct.co/Images/products/ffc-con...

Parent Page: ''https://gct.co/ffc-connector''

Googling to find these hints was VERY difficult not knowing the terminology. But this ifixit page was at the top of the stack, update to save the next guy half an hour googling?
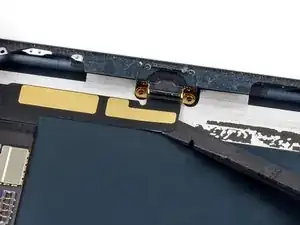
(Updating to say you DO mention ‘sliding’ connectors… but the mechanism of the actuator is not very clear and/or the photos didn’t quite get me there, mine was a smaller pin-pitch I think too).
clickykbd -

@clickykbd This is a great idea! I’d love to add it to the guide. Do you mind sharing the name of the device you were working on, so we can try to get some photos of that connector in the wild? Or do you have some photos of your own? For copyright reasons, we usually can’t borrow other people’s images or graphics for our guides without permission. Thanks for sharing!

Jeff Suovanen -

Jeff, It was a Marshsall VLCD70MD-3G on-camera/field monitor. The connector was for the LCD ribbon flexible pcb cable.. I’ve still got it apart as I am trying to source a LCD, so I can try to get some half decent photos in a day or so. I’m pretty sure I’ve run into these before and they came apart with the “just pull” method… but reseating them without mangling the flat-flex was very difficult without knowing the trick if I recall. Thought I would do my homework this time.

clickykbd -

Bonjour

Je voudrais retirer un câble nappe écran sur la carte mêre de mon téléviseur LG 47LE5510 il y a dessus un petit levier qui se lève à l’ongle mais le câble semble collé et je n’ose pas forcer. Sur le connecteur est indiqué FS60 et le câble est un EAD60974135.

Pouvez-vous m’aider car je ne voudrais rien casser et ces 2 câbles coûtent cher en piece détachée.

Merci d’avance

blac3 -

Thank you, thank you, thank you. My husband really needed this.

Donna M. Hines -

Some ZIF ribbon connectors I’ve found, have the latch on the side of the insertion of the cable, some others on the oposite side. So be sure to pull on the correct side, or you will damage the connector. Another tip is to pull them very gently and when closing it, also with not much pressure, I have spoiled some hinges in the process, what is left to do is replace the whole connector.

luislupo -

Great article, but just one question… WhatWhat happens if you break one of these? Can you suggest a fix for something like the ZIF connector.

Is it pretty much a write off if you snap the latch on some of these connectors?

Nadim Sawaya -

I have a 3D printer from China, it is an Artillery Sidewinder X1 v4 model .  It uses ribbon cables from the power supply to the heated nozzle and the heated print bed.  It is my understanding that power is sent along a couple (or more) of the wires to distribute the load, and I get a good deal of heat at the connector site, on the ribbon cable itself. It is enough heat that I believe the connection and/or the ribbon cable itself will fail.

It is a friction fit connection and I imagine it is difficult to keep the connections inline at the connecting point.  The printer uses 20 wire and 30 ribbon wire cables as can be seen at: https://www.amazon.com/Artillery-Ribbon-...

My question, and I do understand the value of your time, is  – what can I do to better align the connections?  Is there some sort of heavier gauge ribbon I can use and, perhaps, do so through some sort of adapter at the connection point?

Anything you can suggest is appreciated.

Jim Kennedy -

Hi,

i need the connector in step 10.

Where can i buy this?

Thank Manuel

Manuel Otocki -

Merci : très clair et complet. Je vais pouvoir aider un ami à rebrancher le connecteur de son GPS

Vincent Le Duc -

how to fix a connector that's overheated and the clamp on top of it got melted or broken? Can I still force flex cable to connect to the connector? Thanks!

John Z. -

Outstanding web page!!!!

Robert -

Where may I purchase these zif ribbon connectors?

Christopher S -

URL disabled

Robin Ortiz -

Hi Robin! Which URL is disabled? Can you point me to a specific step?

Spencer Day -

URL disabled on my phone.

Robin Ortiz -

How to fix it now

Robin Ortiz -