Introduction

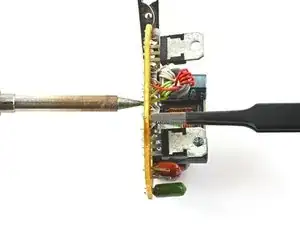
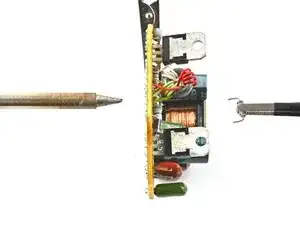
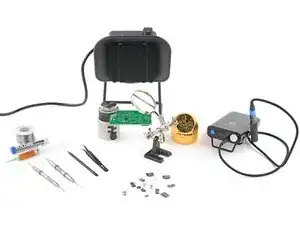
While many repairs can be accomplished without soldering, there are times when it's necessary to replace certain components, e.g., joysticks, headphone batteries, and rumble motors. Additionally, soldering opens up a new world of fun electronics projects. It may sound intimidating, but it's easy to get started!

This guide will demonstrate basic soldering skills as well as specific instructions for the following:

  1. HJSm5FbPWsCBUaPP
    HJSm5FbPWsCBUaPP
    3hRHPBMwLEZREkZG
    • Before you begin soldering, note the following safety precautions:

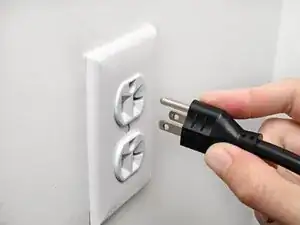
    • Never solder on devices that are powered on or plugged in. Unplug, turn off, and remove power sources before soldering.

    • Don't solder directly to hard-shell lithium-ion batteries (such as 18650 cells). The heat from the soldering iron will damage the battery internals. Use a battery spot welder instead.

    • Be extremely careful if you're soldering/desoldering lithium-polymer battery wires! You can easily short the battery with solder or your tools, resulting in battery damage and a fire hazard. Follow these precautions:

    • Drain the battery below 25%. This reduces the battery's ability to start a fire if it was short-circuited.

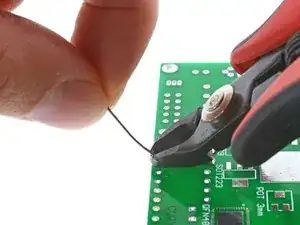
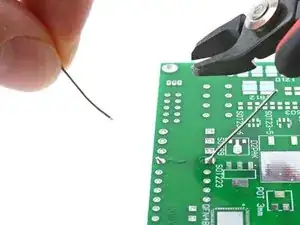
    • Work with one wire at a time to avoid short circuits. Use tweezers and hold each wire to control its movement and ensure it doesn't short. If you're desoldering a battery from a circuit board, use flush cutters to cut each wire one-at-a-time to isolate the battery before you desolder the wires.

    • Whenever possible, create an indirect path by soldering connectors onto the battery and the circuit board. This reduces the chance of an unintentional short.

  2. b1IAYvZaoe2UtLee
    b1IAYvZaoe2UtLee
    jhaQmLQ6qW4WMQNC
    RiQw3pyi4kr2CvcR
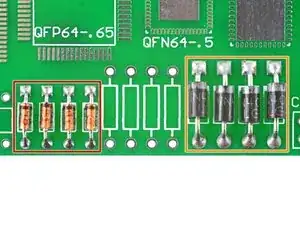
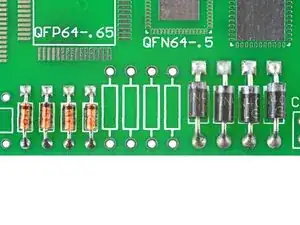
    • Through-hole soldering refers to threading components with leads through holes on a circuit board, then securing them with molten solder. Through-hole soldering is prevalent in DIY projects and modern electronics, where it's used to secure large components (such as capacitors and ports).

    • Common through-hole components include joystick modules, ports, capacitors, microcontrollers, batteries, and wires.

  3. 3rKpSlZF54O2EMls
    3rKpSlZF54O2EMls
    IdpoY2CylkG5PkRN
  4. oFeWHKdNCJcNLSCZ
    oFeWHKdNCJcNLSCZ
    YFOOu4wYMInC4E3n
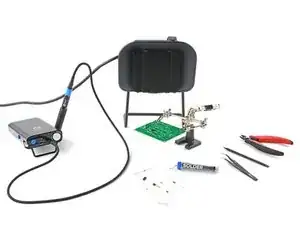
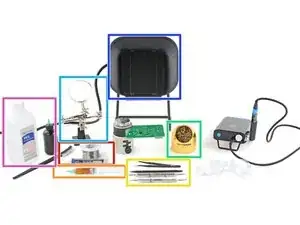
    • Set up your tools in a well-lit area, away from anything flammable.

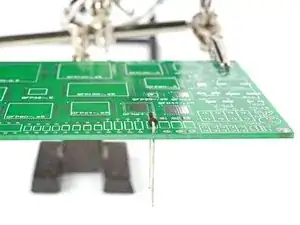
    • Secure the circuit board with a vise or a "helping hands" tool. Angle the board such that you can easily access the solder pads.

    • Place the fume extractor close to the project so it'll catch the solder fumes.

    • Wear your safety goggles.

  5. O1gdcaYufYyf4FeE
    O1gdcaYufYyf4FeE
    GHlBir5foPYPTcoX
    hy3MOAX1XaXMTDWu
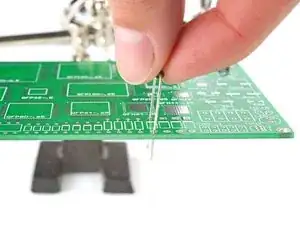
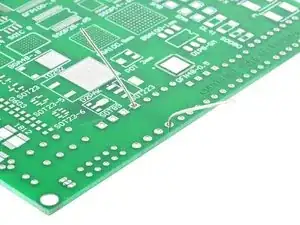
    • Thread the component leads through the circuit board holes. Most components should lie flat, close to the board.

    • Double-check the orientation if the component is electrically directional (such as diodes, LEDs, and electrolytic capacitors).

    • Diodes normally have a bar indicating the cathode (-). LEDs have a shorter lead on the cathode (-) and a flat spot on the dome.

  6. PcoaUectOKlnaGYI
    PcoaUectOKlnaGYI
    SpU64DvIYZoUaIDP
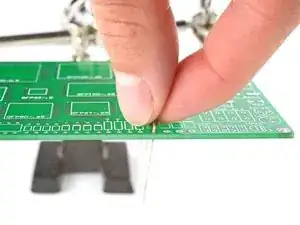
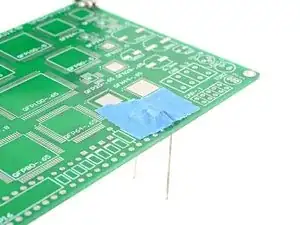
    • Bend the leads out slightly to help keep the component in place. Alternatively, you can use painter's tape to secure the component.

  7. wQgGfIEMQbQXGXS5
    wQgGfIEMQbQXGXS5
    CEHIXkSXcGEsxw2A
    oF3Fw4onddkwpImR
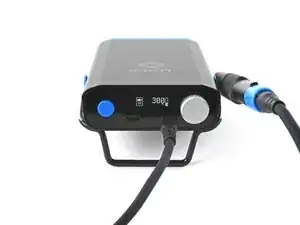
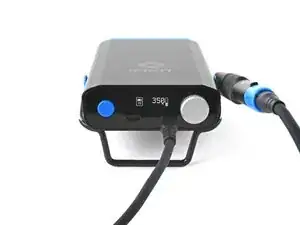
    • Turn on your soldering iron. If your soldering iron has temperature control:

    • Set it to 300 °C (~570 °F) if you're using leaded solder

    • Set it to 375 °C (~700 °F) if you're using lead-free solder

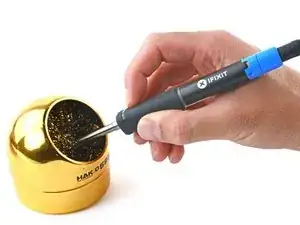
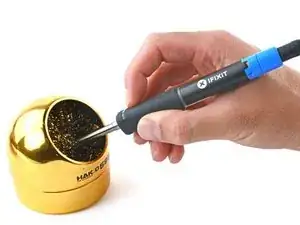
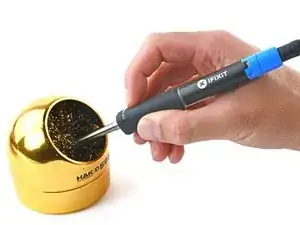
    • Clean the tip of your soldering iron. If you're using a sponge, wet the sponge and quickly wipe the tip across it. If you're using brass wire, stab the tip into the wire a few times.

  8. UHTMhHXlveK4pRCY
    UHTMhHXlveK4pRCY
    WygEZbsNALnbJckg
    kyG2b3mdOjSMTVgN
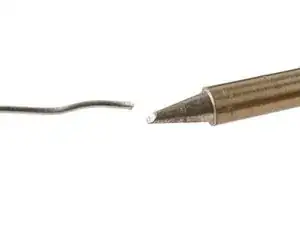
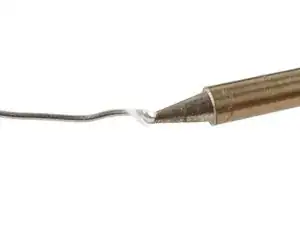
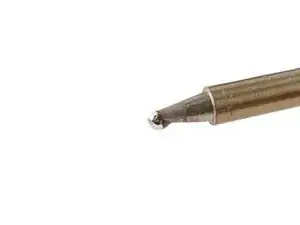
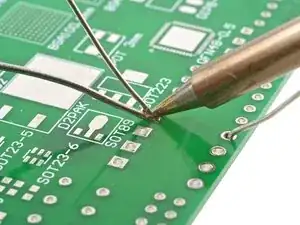
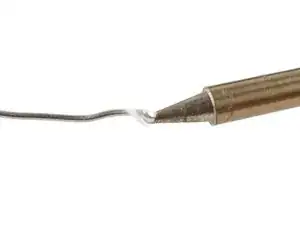
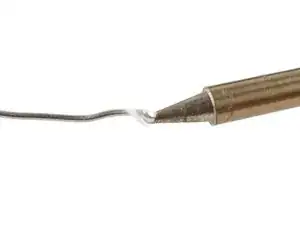
    • Melt a small glob of solder onto the tip of the iron. This is called "tinning the tip" and will help with heat transfer.

    • You'll likely see some wispy smoke as you melt solder. This is mostly the rosin-core flux that's built into the solder wire. Flux helps molten solder flow, but gets vaporized over time. Once that happens, you'll need to either melt more solder to refresh the flux, or apply flux from an external source.

    • If this is your first time using a soldering iron, repeat the cleaning and melting procedure a few times to get a feel at how molten solder handles and how much solder the tip can hold.

  9. Tuv5C5XZiglCHQGP
    Tuv5C5XZiglCHQGP
    wZvYHqOEaTLH5WRO
    SMoXZnUEy2FFbchM
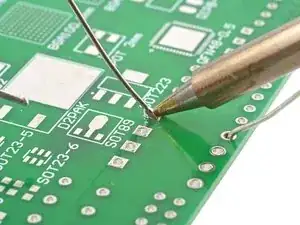
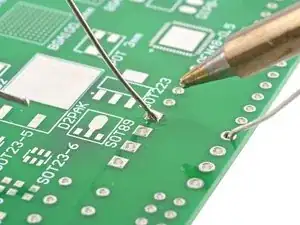
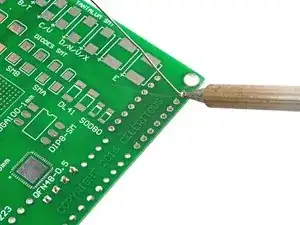
    • You're going to heat the solder pad and the component lead very hot for 2 to 3 seconds. The pad and lead should readily melt the solder wire.

    • Press the tip against the circuit board's solder pad and the component lead for about 1 second to heat them both. Angle the tip so it has maximum contact with the pad and lead.

    • If you're using a narrow soldering tip or working with a large solder pad, you may not be able to transfer enough heat to the area. You can try increasing the temperature by 50°C or switch to a larger tip for more effective heat transfer.

    • If you heat the circuit board continuously for more than 10 seconds, the excessive heat may damage the solder pad or component. Additionally, it could start loosening adjacent components.

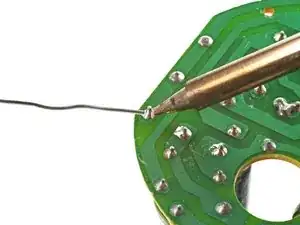
    • Feed the solder wire into the heated area until there's a concave pool of solder surrounding the lead.

    • This should happen within a few seconds. If the solder doesn't adhere to the pad, apply flux to the pad or increase the temperature.

    • Don't feed the solder directly onto the tip as it won't flow properly into the pad and lead causing a weak connection.

    • Remove the solder wire, then remove the soldering iron from the solder pad.

  10. ZWpAGie1SW2oXHLX
    ZWpAGie1SW2oXHLX
    g6XXxSQqyeXtkGgl
    • Congratulations—you've created a solder joint! Inspect the joint to see if it formed correctly:

    • Leaded solder joints should look like a shiny, concave tent surrounding the entire lead.

    • If the joint isn't shiny, it may not have formed correctly. Reheat the joint briefly and allow it to cool.

    • Lead-free solder joints should look like a concave tent surrounding the entire lead. They may be shiny or dull.

    • If the solder joint doesn't surround the entire lead, reheat the joint and add more solder.

    • If the solder looks like a round bead instead of a concave tent, it didn't bond to the component lead. Reheat the joint and try to get the lead hot enough so the solder bonds to it.

    • Check if any solder unintentionally bridged with a different joint. If so, apply some flux and reheat one of the joints to carefully break the bridge. If the bridge doesn't want to separate follow this step and use solder wick to pull away any extra solder.

    • Like any skill, practice makes perfect. If your first solder joint doesn't look picture-perfect, that's OK! It takes a few attempts to get the hang of the movement and timing.

  11. EvYTSCO3wpFnuUnY
    EvYTSCO3wpFnuUnY
    koNdtHtIf6rE6xRE
    Ju6CWLyBZxTWENLr
    • Once you've finished soldering all of your leads, use a flush cutter to trim the leads right above the solder joint.

    • Leave a glob of solder on the tip (tin the tip) before you turn the iron off. If you're using rosin-core solder, wait till the tip stops smoking. The solder glob protects the tip from getting dirty or oxidized, increasing its longevity.

  12. I6G4WIbVKJm4mGtx
    I6G4WIbVKJm4mGtx
    lmAxEYHs3QHHya2D
    ZYoyPuPipYhOAH3H
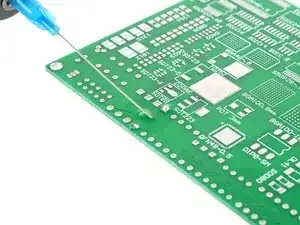
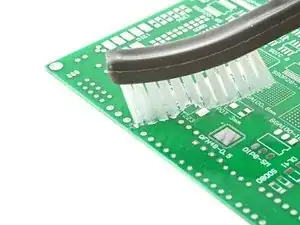
    • Apply some isopropyl alcohol to the solder joints and scrub the area with a soft-bristled brush to remove any flux residue.

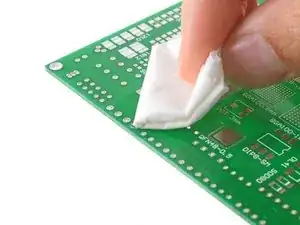
    • Wipe the solder joint with a lint-free cloth to soak up the flux and alcohol residue.

  13. 44cBSKJNVFmFoROV
    44cBSKJNVFmFoROV
    xQvVUEbKVWJhLvvV
    sopKK53NvBNtMKmV
    • If you're soldering a component with multiple through-hole leads (such as a joystick module, microcontroller, or port), solder two opposite leads to hold the component position in place. Check the alignment, then solder the remaining joints.

    • Alternatively, you can bend two opposite leads to secure the component to the board while you solder.

    • If the molten solder doesn't flow or is hard to manipulate, apply more flux to the joint.

  14. PTfa3hW1smJmhG21
    • The next 8 steps will show you how to desolder through-hole components using a solder wick and desoldering pump.

    • If you're new to soldering, be sure to read the soldering steps above first, as this builds upon that knowlege.

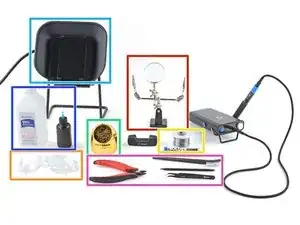
    • In addition to the soldering equipment, you'll need:

    • Solder wick (aka desoldering braid) and/or a desoldering pump.

    • Flux

    • A spudger, tweezers, and/or pliers (to help loosen stubborn components)

  15. UYCH6BO4ktCE5iHU
    UYCH6BO4ktCE5iHU
    uKIBRPwgAjdvUYpG
    • Secure the circuit board with a vise or a "helping hands" tool. Angle the board such that you can easily access the solder pads. Wear safety goggles.

    • If possible, use a tip with the largest surface area that can still fit between the solder joint.

    • Turn on your soldering iron. If your soldering iron has temperature control:

    • Set it to 350 °C (~650 °F) if you're using leaded solder

    • Set it to 375 °C (~700 °F) if you're using lead-free solder

  16. KhEBughwBE1ADhJG
    KhEBughwBE1ADhJG
    UkdOyxNNSINvcYpA
    UwpWIIyRVNxYlFLk
    • Clean the tip of your soldering iron. If you're using a sponge, wet the sponge and quickly wipe the tip across it. If you're using brass wire, stab the tip into the wire a few times.

    • Melt a small glob of solder onto the tip. This will help with heat transfer.

    • If you're desoldering with a solder wick, proceed to the next step.

    • If you're desoldering with a desoldering pump, skip to this step.

  17. Nfa14DZjyynuBPiV
    Nfa14DZjyynuBPiV
    DSXTLXTiXFB2YEaT
    RR3BQUHZUNHSKQtt
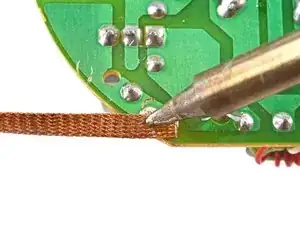
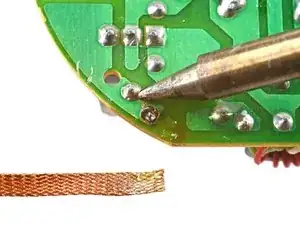
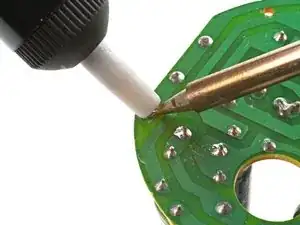
    • You're going to melt the solder joint through the wick, allowing the wick to draw the molten solder into itself.

    • Apply a bead of flux to the solder joint.

    • Place a clean portion of the solder wick on top of the solder joint.

    • Press the soldering iron tip firmly against the wick for 2-3 seconds. You're trying to heat the wick hot enough so that it melts the solder underneath it.

    • If you heat the circuit board continuously for more than 10 seconds, the excessive heat may damage the solder pad.

    • If the wick doesn't draw solder, you may need to increase the temperature. The wick may also be oxidized due to age—apply more flux or try a newer roll of wick.

    • As the solder saturates the wick, slide the wick so that a new portion touches the joint. You'll know it's saturated when the wick's color changes from copper to silver.

    • Once most of the solder has soaked into the wick, lift the wick and tip away together from the joint.

  18. uPgnE1WWIRxVsi31
    uPgnE1WWIRxVsi31
    5NGbJmhKYlgNsA5C
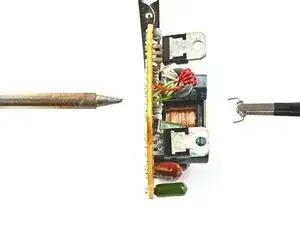
    • Use tweezers to grip the component and remove it.

    • If the leads are stuck but don't have a lot of residual solder, heat the solder pad directly and use tweezers or a spudger to gently remove it.

    • If there is still a lot of solder left on the pad, apply more flux and try using the wick again.

    • Use flush cutters to remove your used wick.

    • When you're done desoldering, refer to this step to clean up your board.

  19. bfAi641IbEIqYAa1
    bfAi641IbEIqYAa1
    1EwRAhiBEZpLJOX3
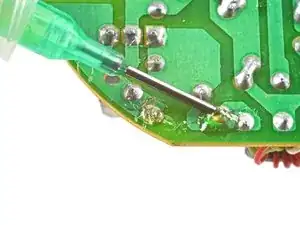
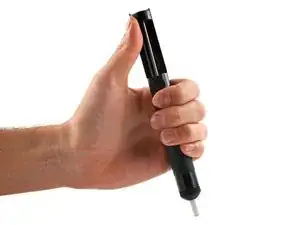
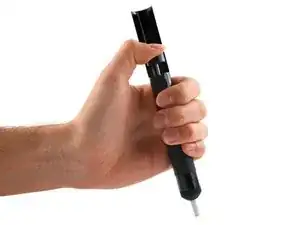
    • To desolder with a desoldering pump, you're going to heat the solder joint and use the pump to suck up the molten solder.

    • If this is your first time using a desoldering pump, check out this guide.

    • Depress the desoldering pump plunger until it locks in place.

  20. WBoHITphoqpMDXrM
    WBoHITphoqpMDXrM
    AVwcXPErZu4kHFbn
    psvmiklAPbOL2Qdd
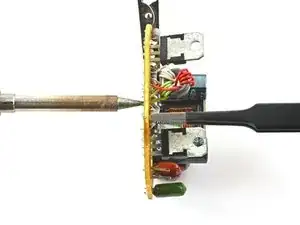
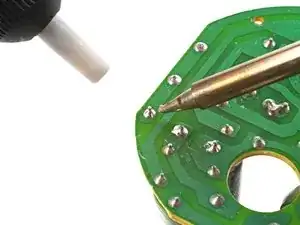
    • Press the soldering iron tip against the solder joint.

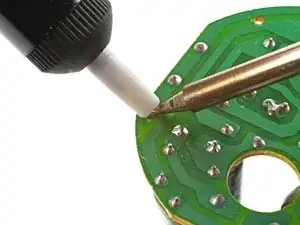
    • Once the solder melts, position the pump nozzle as close to the molten solder as possible without touching the tip.

    • The nozzle is made of heat-resistant plastic, so don't worry if you occasionally brush the tip with it.

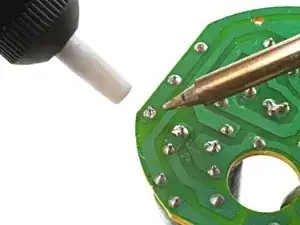
    • Press the side button to activate the pump and suck up the molten solder.

  21. gq6Xi1DY5bGXLMVa
    gq6Xi1DY5bGXLMVa
    VEOXvvsoKgfKtvmb
    • Use tweezers to grip the component and remove it.

    • If the leads are stuck but don't have a lot of residual solder, heat the solder pad directly and use tweezers or a spudger to gently remove it.

    • If there is still a lot of solder left on the pad, heat the pad and repeat the solder sucking procedure to remove any remaining solder.

  22. FwZI442iPc1Hg5Vf
    FwZI442iPc1Hg5Vf
    MqjhFYGUdxFVmDqa
    • If your desoldering pump doesn't remove all the solder and you're having trouble heating the joint, apply some more solder and try again.

    • If you're still having trouble melting the solder, apply some low‑temp solder to the joint to keep it liquid for longer.

    • Clean your soldering iron before use to avoid brittle joints from mixing low‑temp solder with standard solder.

    • Are you desoldering a lot of pins? Or do you just desolder a lot? A dedicated desoldering station or gun is a worthwhile investment.

  23. uLTEBIRVEuYFXVM1
    uLTEBIRVEuYFXVM1
    1HTHk15jnK6JHY3e
    vHafmh1OK2A53oUs
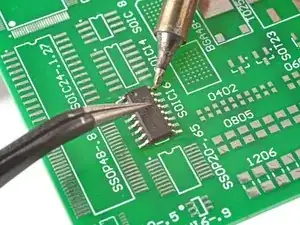
    • Surface-mount soldering is a process where components are soldered onto the surface of the circuit board. Most electronics manufacturers use surface-mount technology (SMT) because it can be automated and is more cost-effective.

    • In industrial manufacturing, a machine uses a stencil to lay down solder paste onto the circuit board. Robotic arms precisely pick and place each component onto the board. The board passes through an oven, where the solder paste melts and solders the components to the board.

    • Surface mount components are significantly smaller than through-hole components, making them difficult to solder by hand. But with a bit of patience, practice, and a good magnifying glass, you can become proficient in surface-mount soldering!

  24. I5cnWfTCPlvAYaiE
    I5cnWfTCPlvAYaiE
    uUeKEupsu5xEQ5uA
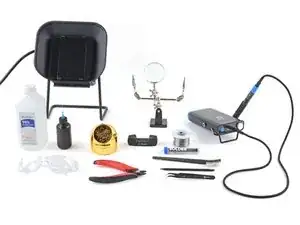
    • The next 6 steps will show you how to solder surface-mount components onto a circuit board. You'll need a fine-tipped soldering iron in addition to the following:

    • Solder wire (leaded or lead-free) or solder paste

    • Flux

    • Tweezers and picks to help manipulate the tiny components

    • A tip cleaning tool (wet sponge or brass wire)

    • A magnifying glass or lens

    • A fume extractor (if you're working indoors)

    • High concentration (>90%) isopropyl alcohol and a soft bristle brush (like a toothbrush)

  25. hCUgWtpQhqVyMCGy
    hCUgWtpQhqVyMCGy
    MgHm6b5ZyUg3rXjK
    • Set up your tools in a well-lit area, away from anything flammable.

    • Set the circuit board on a flat, non-flammable, heat-resistant surface or secure it with helping hands or a PCB vise.

    • Place the fume extractor close to the project so that it'll catch the solder fumes.

    • Wear your safety goggles.

  26. iHmbwEqL6lq3uIiO
    iHmbwEqL6lq3uIiO
    MeHCAJQeyUcrQVIp
    Ta1wjSBZtNk6mAPD
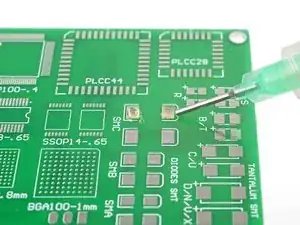
    • Apply a small bead of flux onto each solder pad.

    • If you're using solder paste, apply a small amount of paste instead. Most solder pastes contain flux.

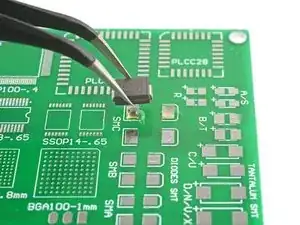
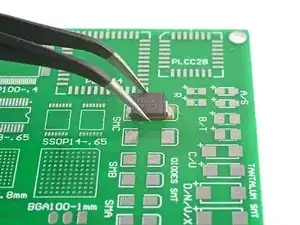
    • Use tweezers and picks to carefully maneuver your component so that it straddles between the solder pads.

    • This can be very tricky depending on the size of your component! Take your time and don't press against the component too hard, or you may fling it out of place.

    • Double-check the component orientation if it's electrically directional (such as LEDs and diodes). These components normally have a bar indicating the cathode (-) end.

  27. hVBy6Nkcd3BgcJrt
    hVBy6Nkcd3BgcJrt
    ciICHnDV6xukKLDH
    dKcekFiDW14Vok5u
    • Turn on your soldering iron. If your soldering iron has temperature control:

    • Set it to 350 °C (~650 °F) if you're using leaded solder

    • Set it to 400 °C (~750 °F) if you're using lead-free solder

    • Clean the tip of your soldering iron. If you're using a sponge, wet the sponge and quickly wipe the tip across it. If you're using brass wire, stab the tip into the wire a few times.

    • If you're not using solder paste, melt a small amount of solder onto the tip. You'll transfer this solder onto the joint.

  28. wD6CFSCHv4jJCIhk
    wD6CFSCHv4jJCIhk
    rN3GpIkXansVETME
    btoJ55GmZWBcXhXT
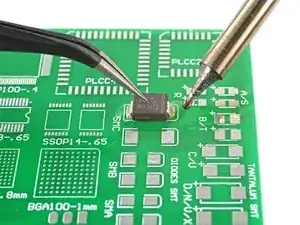
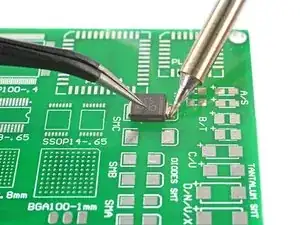
    • Carefully press a tweezer point or the tip of a spudger on top of the component to hold it in place.

    • The soldering iron will spill a lot of heat around the point of contact, which can easily loosen surrounding components. Be careful not to bump the surrounding parts with your tools.

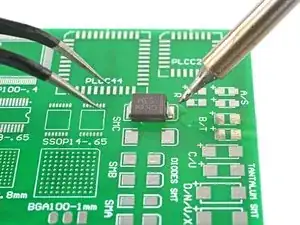
    • Touch the soldering iron tip to the solder pad and the component. Once the pad heats up, it will draw the molten solder onto itself.

    • This should happen within a few seconds. If the solder doesn't adhere to the pad, apply more flux to the pad or increase the temperature.

    • Don't heat continuously more than 10 seconds at a time, or the heat may damage the component and solder pad. Allow the circuit board to cool down, then try again.

    • Remove the tip from the solder joint.

    • Repeat this process for the rest of the component leads.

  29. 2xFaXVAM3O4rtjpw
    2xFaXVAM3O4rtjpw
    Th2eQuNgeR2tWb6W
    j4I1N1G5wLkbGMDB
    • Be gentle when you're cleaning small components as they can easily break off the board.

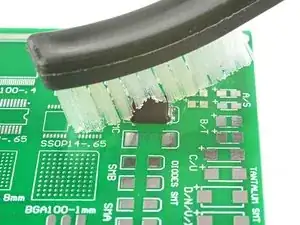
    • Apply some isopropyl alcohol to the solder joints and scrub the area with a soft bristled brush to remove any flux residue.

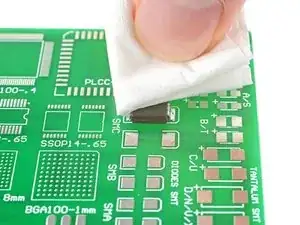
    • Wipe the solder joint with a lint-free cloth to soak up the flux and alcohol residue.

  30. jvhBQCwqybnvMWgb
    jvhBQCwqybnvMWgb
    YopteTeCYMRLgPls
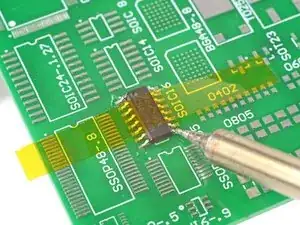
    • Many surface mount components (especially integrated circuits) have multiple leads that need to be soldered. They can be difficult to align and secure to the board:

    • Hold the component in place and solder the corner leads to secure it in place.

    • Alternatively, you can secure the component to the board using polyimide tape and then solder the corner leads.

Conclusion

Congratulations on completing this introductory soldering guide! You've taken the first step toward mastering a valuable and versatile skill. With the basics under your belt, you're well-equipped to tackle various electronics projects and repairs. Remember, practice makes perfect, so don't hesitate to experiment and refine your techniques.

For more soldering information, click here.

Arthur Shi

Member since: 03/01/18

263318 Reputation

31 comments

This is a great guide with awesome clarifying pictures.

Thanks!

Martin -

TIP: Another method which works well for clearing solder from holes (especially on repairs like AC Jacks on laptops) is to use compressed air to clear melted solder from holes. A quick blast with a duster can works well (I have even used a drink straw in a pinch and blown out with a blast of air from mouth). Heat the solder until it liquefies, put the duster straw right above the solder and quickly hit the melted solder with an air blast to instantly clear the hole of solder. This works well on very small holes as melted solder does not always push out cleanly with metal tools. You have to be quick with the air blast because the solder re-hardens rapidly.

GURUmicro -

just be careful doing this lol, flying molten solder can and will burn you or other components.

Logixal -

Flying solder might also get into places you don't want it. Making shorts and other unwanted connections of which you don't know where they are, so it can give you a very hard time finding them.

Hens Baltesen -

This is not IPC standards but for the ghetto approach, it will get the job done. I solder in manufacture settings, run my own shop. This is wrong to a degree but will do. If ifixit would like tips from ILLFIXIT then your more then welcome!

Tony Stark -

yeaaaa….. i was going to say something along these lines lol. itll get the job done but its by no means the right \ best way to do the job.

Logixal -
A very good guide to soldering.

I have never soldered anything (I'm a girl you see), but your clear and detailed guidance inspired me to give it a go.

I was well prepared in advance-it could be difficult-and that helped a lot.

I have now got a new battery soldered into my Palm TX and I'm as happy as Larry (or Lorraine in this case)..

geeklynews -

Go Gurl! I'm a gurl, too. I worked in my dad's machine shop for 13+ years. I hit the ground running. Programmed, set up, and fixtured, retro-fitted CNC Mills, using SurfCam and G Code programming. We used Master Cam for the wire EDM. My fave was running a standard lathe. I guess I enjoy cylindrical objects. We held tolerances of .005+/- .001, all the way down to .0003+/-.0002. That…is very microscopic. lol
…add to that, Public Relations, Inventory, Inspector, Fixing Crashed tools, Shipping, Document Control, and so on. All I know is, if it needs to be done, it can be done, if your sharp. And, sometimes we gurls, have a different “feel” for delicate or fine work, as compared to some of the guys. There is nothing we cannot do, as well as anyone else, if we want to, and are willing to learn, and practice. I'm ready to try a little delicate connecting, myself.

Happy Trails and Tablets,

PoniGurll, or

DIY Gurll, otherwise, it won't get done!!

cherihashorses -

Using a solder wick braid is a good thing to do every time you are trying to remove solder from the thru-hole and pad. This is because after you use the solder wick you have a clean hole and a clean pad with just a slight film of solder on it and you have a nice open workspace without any old solder in there. Old solder doesn't have solder flux anymore -it's burned off-and won't "flow" around the component or wire leads and leaves an icy-looking "cold" solder joint, a dull grey glob of solder that is weak and doesn't conduct electricity very well. By wicking it off, the new solder, which does have solder flux, will be shiny, smooth, quite strong and conductive. I've been soldering since the early 70's and solder wick is a good friend if you use it right. No need for staples or picks, either.

Clarkness -

Also, to help the solder wick pickup the solder faster and to help clean the solder pad at the same time, put just a little flux on the wick before applying the iron to the wick, then wipe the area clean with some alcohol, works great.

C.Vos -

One more thing about having your solder iron on the pads for too long. If you get them too hot the pad will actually separate and lift up off the PC board, tearing the delicate copper trace, and the PC board will be useless.

Clarkness -

Perfect Illustrations, Thank you.

semi bariche -

I found this to be a clear and easy tutorial on how to solder to remove and install small electrical components. Excellent for beginners and useful for experts in teaching situations.

Allan Ryle -

Very good guidance

allwin2abbas -

another tip is if you do not have a soldering station and your iron gets too hot just unplug it and continue and never ever dunk your soldering iron in flux if it is excessively hot because it will take the conductive coating off the tip of your soldering iron. also dont dip touch the tip of your iron (while its off) because the oils from your hand can burn through the tip like the flux.

ps: this is from my personal experience and its just some things to look out for

Blair McLeod -

Nice job!

Well done,,,,

midatlantic.midatlanticmarine -

This is a good job thanks.

Ivette Carlier -

What is the best diameter of solder to use on iPod Shuffle batteries? Lead-free? Please be very specific. Thanks much!

plantae13 -

Sooo just bought a soldering iron, never used one before in my life, re attaching wires to a little motherboard for a light switch and dimmer, this page literally just taught me exactly what i needed to know and success the first try! Thank so much! finally someone knows they’re stuff instead of me having to go through 30 different pages of nothing on google lol respect dude! keep it up!

mistynoel85 -

Great guide! It also helps to use a bit of flux on the points to aid with adhesion of new solder to the contact points, and to help with heat transfer from the solder tip onto the solder pad.

arfan_nazar -

I need to solder my wifi it came loose on my insignia tablet. All i need to know is where its located on mother board. Please guide me

Valerie Callahan -

“Appreciated” Marvellous photos /snaps also nicely & thoroughly explained. Bravo.

BBN -

Plug in the soldering iron. Wait for it to heat up… test by tapping solder on to the soldering iron tip. Having ‘tinned’ the soldering tip, apply the tip to the component leg and PCB. If the component leg is comparatively ‘thick’, apply more heat to the leg than the PCB. Tap the solder jointly on the component leg and the iron tip. If the component leg is at the right temperature, the solder will flow and make a sound electrical connection. If the component leg is not at the right temperature, the solder will melt on the iron tip and ‘drip’ onto the component not making a good connection.

I’d never do any soldering without a solder sucker e.g. https://www.amazon.co.uk/Draper-23553-De... but be careful when using it on delicate PCBs as the suck can lift circuit tracks where too much heat has been applied.

Davo -

I’m a little late with my comments but just had to brag about my younger days with Heathkits and other companies! I learned how to solder the hard way (without any instructions) and put together a B/W TV, a color TV, an AM/FM receiver and various other little projects. I understand Heathkit is coming back and encourage you younger people to enjoy the hobby of putting together their kits after doing these soldering lessons.

Mike Gross -

The girl is so proud of soldering her first new battery into herPalm TX and is probably not interested in retro-fitted CNC Mills and tolerances of .005+/- .001, all the way down to .0003+/-.0002 and so am i….

Thumbs up for geeklynews

arno -

Absolutely. I’ve worked alongside women in the US Navy. Most of them are very competent, excellent technicians. Like guys, though, you have your whiners and slackers. We are all the same.

Paul Hudson -

Some information in the top title area was misleading, as the iPod isn’t sold anymore (except for the touch with a soldered battery) and the iPhone has had a socketed battery since 2008. I fixed it in the latest unverified version.

DistroHopper39B -

Hello, thanks for this tutorial what kind of soldering wire, especially regarding the diameter, would you advise to use?

Bonjour, thanks for this tutoriel. Quel diamètre de fil à soudure préconiseriez-vous ?

Da Moun -

and where/how do we post future questions ?

James Walker -

practice on eWaste first

Lindsay Alford -

We refreshed the soldering guide!

Arthur Shi -