Introduction

Learn how to replace the microphones inside your Sony H.ear On 2!

Replacing noise canceling microphones requires minimal disassembly but will require you to solder 2 connections.

Note: Headphone symmetry allows for identical replacement procedure for microphone on left and right side.

  1. 4XCvYhjfDlcr3Ary
    4XCvYhjfDlcr3Ary
    yJ3MVc4QdeJ4YKAI
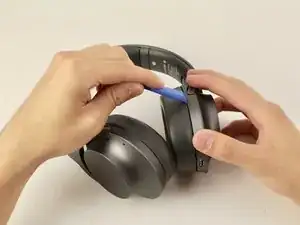
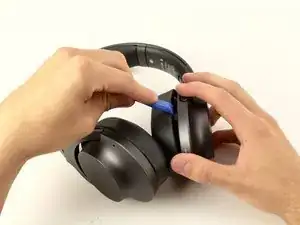
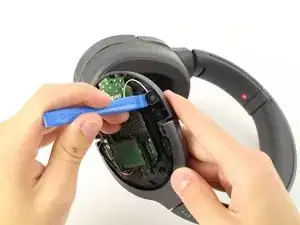
    • Start by inserting the iFixit plastic opening tool in the crease between the hard plastic and the ear cup, and then gently apply pressure until it separates. You may need to repeat the process on back until it is completely separate.

    • This may take a considerable amount of pressure, but do not force it.

  2. OATcGBXMfuHK1lWL
    OATcGBXMfuHK1lWL
    GUACGQmyRBlRa5QG
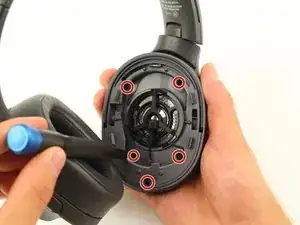
    • Use the JIS #00 Screwdriver to remove the five 6.4 mm screws holding the back plastic cover in place.

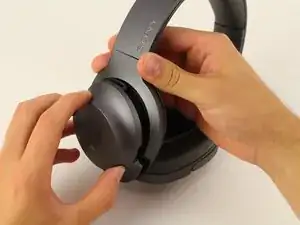
    • Then, turn the ear cup over and carefully lift the plastic cap off to reveal the internal components of the left ear cup.

    • This same process can be repeated on the right ear cup as well. Be aware the right cup is connected to the rest of the headphones via ribbon cable.

  3. Z26MRAH35LtVOwMu
    Z26MRAH35LtVOwMu
    POALtgQXMZRdpWYn
    dthaL3CYIiNtBBK1
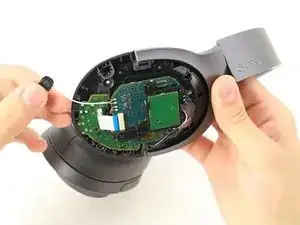
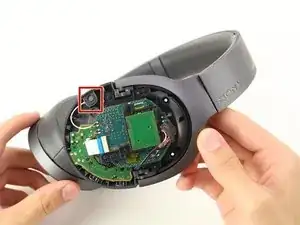
    • Use the iFixit plastic opening tool to lift the microphone out of its housing

    • Use gentle pressure to prevent damaging small wire connections

  4. HSxbboLrIEaVyBGs
    HSxbboLrIEaVyBGs
    rBMbYFaLoKlxmJJj
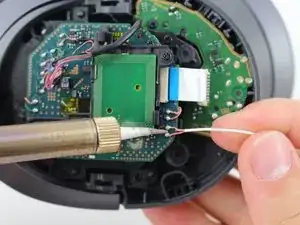
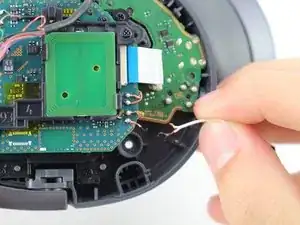
    • Use soldering iron to desolder microphone wires from motherboard

    • Please see How to Solder and Desolder Connections before you attempt to use the soldering iron.

    • Note: Do not overheat joints while de-soldering to prevent board damage

Conclusion

To reassemble your device, follow these instructions in reverse order.
Justin Ramirez

Member since: 15/04/19

127 Reputation

0 comments