Introduction
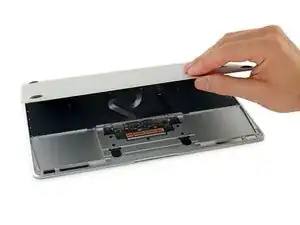
Use this guide to replace the trackpad assembly in your Retina MacBook 2016. This assembly includes the trackpad and the Haptic Engine.
Tools
Parts
-
-
Remove the following eight screws securing the lower case:
-
Two 1.8 mm P5 Pentalobe screws
-
Four 2.9 mm P5 Pentalobe screws
-
Two 6.1 mm P5 Pentalobe screws
-
-
-
Wedge your fingers between the upper case and the lower case, starting from the rear of the MacBook between the hinges.
-
Keeping a firm grip, lift steadily until the lower case separates slightly from the upper case.
-
-
-
While holding the lower case in place, carefully flip the MacBook over so the Apple logo faces up.
-
-
-
Lift the upper case and display together from the front edge and raise it to about a 45˚ angle.
-
-
-
Use the flat end of a spudger to press and hold the small gold 'battery disconnect' button.
-
If the power LED is lit up, continue holding the button until the LED goes dark, and then release. This may take up to 10 seconds.
-
If the LED does not light, release the button after 5-10 seconds. Press and hold it again for 5-10 seconds, and release. Finally, press and hold it a third time for 5-10 seconds, and release.
-
-
-
Disconnect the trackpad ribbon cable from the trackpad by pulling it gently through its slot in the frame.
-
-
-
Carefully close the MacBook and flip it over once again, so that the Apple logo faces up.
-
Lifting from the front edge, raise the upper case/display assembly to about a 90° angle, and prop it up against something sturdy so you don't have to hold it.
-
Add a piece of tape near the track pad to secure the upper case and prevent accidental movement.
-
-
-
As an added precaution, you may physically disconnect the battery by inserting a battery isolation pick between the logic board and the battery connector.
-
-
-
Hinge open the display just slightly to free the trackpad assembly from the upper case, and remove the trackpad assembly.
-
To reassemble your device, follow these instructions in reverse order.


IMPORTANT. You’re not removing the bottom, yet. This step is solely to separate the panel from its clips, permitting inside access.
Chris Leeds -
The screws go in tangent to the curve of the case. If you aren’t used to handling small hardware try turning the screw counterclockwise while you feel for the hole until you feel it drop, that means the threads have aligned. It takes only light finger torque when they are threaded correctly
abscate -