Introduction

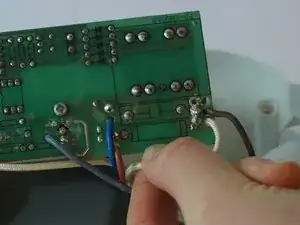
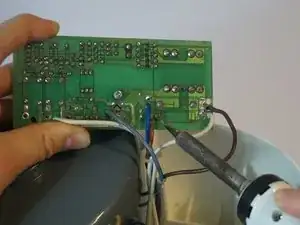
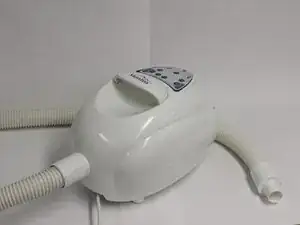
This electronic device has fallen into the water. This has caused the fuse to blow and the product to fail. In order to get the product working again, the fuse will be replaced.

  1. MaCELvnHZaHgKp4q
    • Place the product in front of you

  2. FdZgHAIFwRlBhgVf
    FdZgHAIFwRlBhgVf
    qhSYtraAHy62DT6p
    • Grab the tube, twist it and take it out.

  3. Vd2O4SSK5XHvMwXF
    • Turn the product upside down, you will see five holes, in which the screws are located.

  4. YsarCPXs1AxWNPHq
    YsarCPXs1AxWNPHq
    KmOXodQAbPqtQsgj
    cwBojEJelaAYPEIB
    • Use a Phillips screwdriver to loosen the screws, then turn the product right side up to get the screws out of the casing.

  5. TZobqljO2JVVZw3b
    • Place the product on its feet and place the upper part of the casing next to the bottom part.

  6. XcZXx5nsQMCDfXIy
    XcZXx5nsQMCDfXIy
    dBAAY2XYOVLhjGUs
    • An electronic wire is connecting the two PCB’s. Take off the PCB in the lower part of the case by gently pulling the plastic housing, the connection will slowly loosen.

  7. bwv6ZoWbhXOSrgfx
    bwv6ZoWbhXOSrgfx
    gArHrYntmZEWeAEF
    • Take the PCB out of the case. Here you can see the fuse you want to replace

  8. BTEaPZkulobyXUTW
    BTEaPZkulobyXUTW
    XgAc2xpRqPWaslxP
    G2QFhtFWcOZlJpjd
    • Desolder the two spots connecting the fuse to the PCB. If you have never done this before, use this guide from iFixIt.

  9. DCXYmJO2ETLRKuD4
    DCXYmJO2ETLRKuD4
    RLNWRXBXLD15HNVF
    • Take out the fuse with some pliers, since it will be hot because of the soldering.

  10. RRFGqA3J6hteLOTx
    RRFGqA3J6hteLOTx
    XuGUTVnMQJrjZn23
    • Put in a new fuse and solder it back in place. Now you can reassemble the product.

Conclusion

To reassemble your device, follow these instructions in reverse order.
Lisa Hoogeveen

Member since: 08/03/17

101 Reputation

0 comments