Introduction

If the speakers of your Hannspree Hannspad SN1AT71 have failed, you don’t need to get a new one. Follow this guide and it will be good as new. The speakers are a key component in your computer so this guide gives you step by step instructions on how to fix your speakers. When the sound coming out of your speakers becomes distorted or your speakers fail completely it is time to replace your speakers.

The speakers allow the sound to come from the computer to allow you to hear what is being said. This can be from a zoom meeting, a how to video or Netflix. Having speakers in your computer allows you to hear and respond to what is happening.

Be sure to unplug and power off your device prior to beginning your repair. You will be with this guide. If you are unfamiliar with solder/desoldering please check out our How to Solder and Desolder Connections guide.

  1. crTcDhXRZNBTsaSK
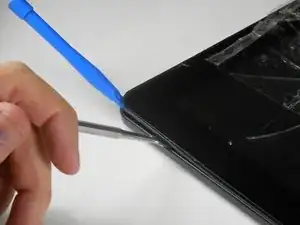
    • Place the tablet screen side up.

    • Make sure the device is turned off to avoid damage.

  2. gSRUtEKDofl4hBhl
    gSRUtEKDofl4hBhl
    6CHYhpR1QVtgRUn2
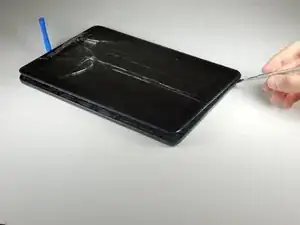
    • Use the metal spudger to press an opening between the screen and back cover.

    • The plastic tabs are located on each corner of the back cover.

    • Be careful, as the plastic tabs are delicate.

  3. mVBNelWYYH1aIfDF
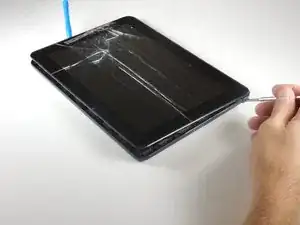
    • Wedge the plastic opening tool between the screen and the back panel to prevent re-engagement

  4. ni1ZWURpk3R6Wb1J
    ni1ZWURpk3R6Wb1J
    qXhK51xor5QV33Jc
    • Slide the metal spudger around the casing to separate it from the inside of the tablet.

  5. ZclvyJI6AVtMUUpG
    ZclvyJI6AVtMUUpG
    jGHJfaGIm1nAJIfc
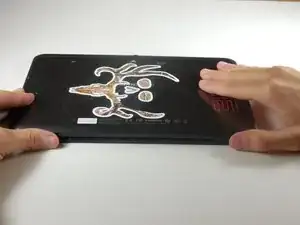
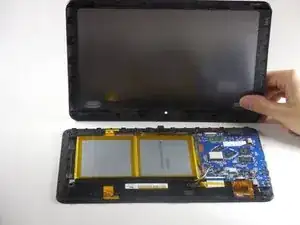
    • Flip the tablet over so the screen side is down after all the tabs are separated.

    • Remove the back panel by delicately lifting it straight up.

  6. B11OBycQTcpFojHZ
    B11OBycQTcpFojHZ
    hMwPcutvYtYtIgch
    • Remove the adhesive tape from the power connection cables.

  7. LS3WeLD6TnFYqbGQ
    LS3WeLD6TnFYqbGQ
    TSD5oAneSPp3h5DU
    BCIlRtDA2RpiJreE
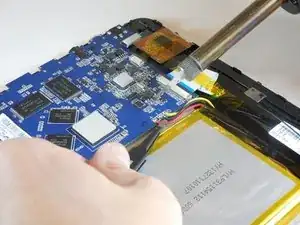
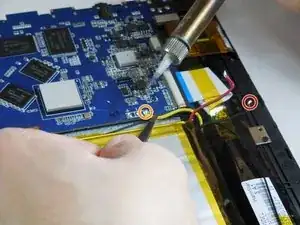
    • Instructions for desoldering can be found on the iFixit website.

    • The soldering iron is hot. It can burn you and it can cause damage to the wires and motherboard.

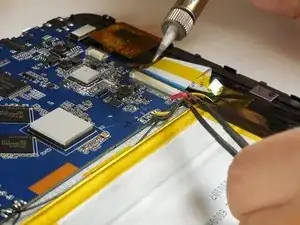
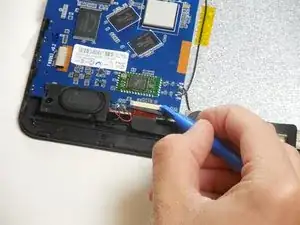
    • Grab hold of the red wire using the tweezers.

    • Desolder the red wire connection from the motherboard using the tip of the soldering iron.

    • Move the wire connection away from the motherboard.

    • Do not let the red wire connection touch other wires or the motherboard.

  8. BQnqsVJXiE2VxjTw
    BQnqsVJXiE2VxjTw
    UHbJ4ClHYLKAXKpZ
    keeG3i4kfKuobsOR
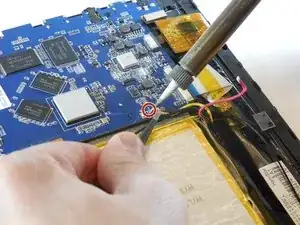
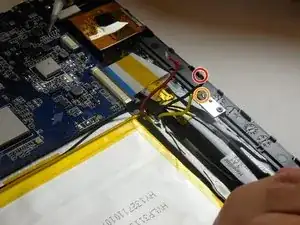
    • Desolder the black and yellow wire connection from the motherboard by following the previous step.

    • When moving the wire connections, do not let the red wire connection touch other wires or the motherboard.

  9. WXnDoRPD2WCf46VX
    WXnDoRPD2WCf46VX
    IiFkUwNOvER1N3xO
    qJiSnqXrKqlTGpQb
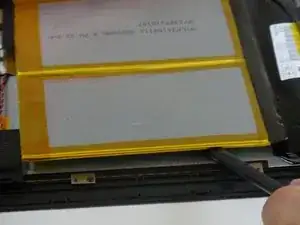
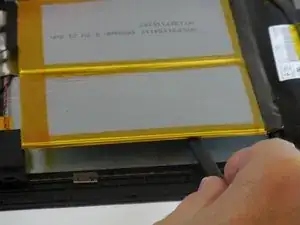
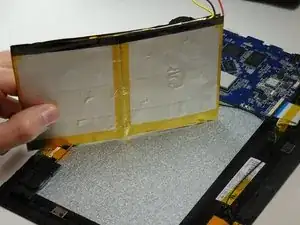
    • Insert the flat end of the nylon spudger between the battery and the case.

    • The battery is connected to the tablet with an adhesive tape and will come free slowly.

    • Do not puncture or bend the battery while removing. If your battery is swollen, take appropriate precautions.

  10. Dn1j2r64eINlvUEh
    Dn1j2r64eINlvUEh
    efDGkmIhTDGiMs4c
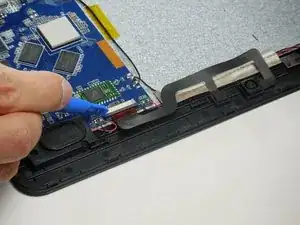
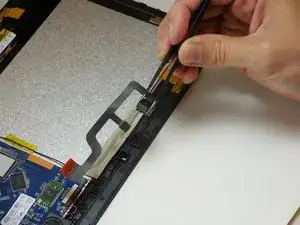
    • Identify the ribbon connecter attached to the camera and where it connects to the circuit board.

    • The two cameras are connected with one ribbon cable.

    • Zero insertion force connector.

  11. YPLJRfGMBiyAVjBn
    YPLJRfGMBiyAVjBn
    eHViRaUnyJ5SJ2Ug
    IPDn4fNXW3recDhy
    • Disconnect the sliding zero insertion force (ZIF). Use the plastic opening tool or a fingernail to slide the tab out, then pull the cable out.

  12. oTFEoKCxbEVkx3RK
    oTFEoKCxbEVkx3RK
    YDV1HDgbMLcSwnAC
    OIqwuVcadaN4vE5u
    • Pull the cameras out of their resting places in a straight upward motion.

  13. fBH5TCDPWPcX4mr1
    fBH5TCDPWPcX4mr1
    hJ2nHRI23M51UJJe
    2AhMHIOmdNCPjGi4
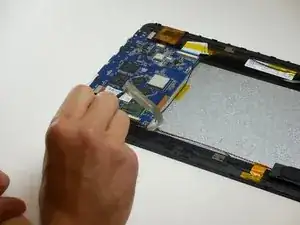
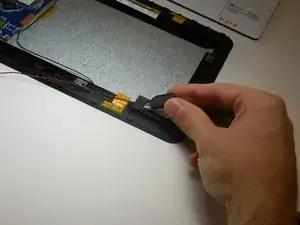
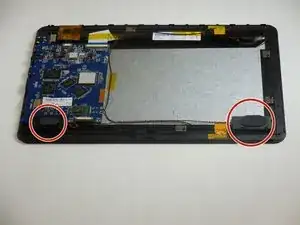
    • Identify the speakers.

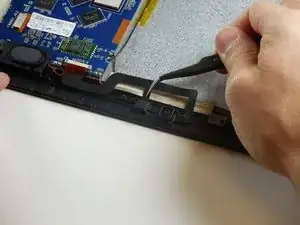
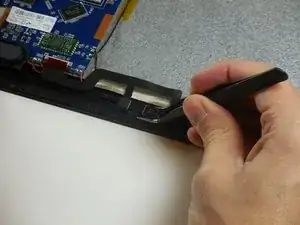
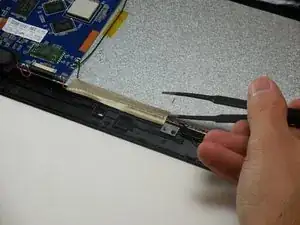
    • Use a pair of tweezers to peel the adhesive tape holding the speaker wires down.

  14. dqLN2ABBXdGNBjBD
    dqLN2ABBXdGNBjBD
    tuLvdjAxEonQ251M
    ybSdj2kTkODOcY4q
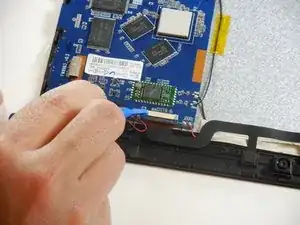
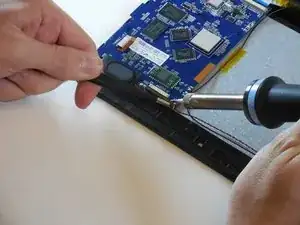
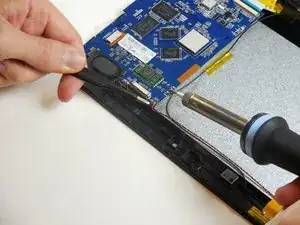
    • Desolder the red and black wire to the left and the right of the ZIF connector.

    • Remember the placement of both wires.

    • Both the soldering iron and the wires will be hot.

  15. B4IuS5n5IehhNBGI
    B4IuS5n5IehhNBGI
    L2vFGQSGv2GoLNbo
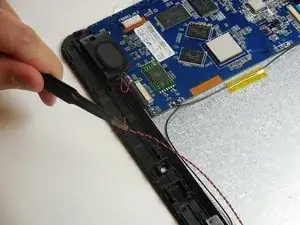
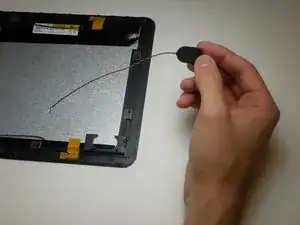
    • Remove the right and left speaker.

Conclusion

To reassemble your device, follow these instructions in reverse order.
matthew vandeventer

Member since: 11/03/15

950 Reputation

0 comments