Introduction

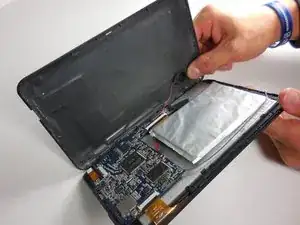
The battery in the A701 is located adjacent to the motherboard (the blue L-shaped piece) and has soldered wires. Before continuing, be sure you have all the necessary tools and safety equipment.

A guide to soldering can be found here.

  1. HVqX2Q5nmUjrcBEa
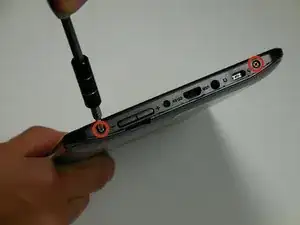
    • Remove the two 2cm screws on the bottom using the PH0 Phillips head screw driver.

  2. Qfh5iVcq6QbLdQEI
    Qfh5iVcq6QbLdQEI
    AfEUSfn36ugSyy2U
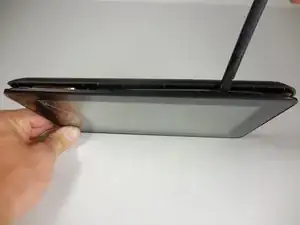
    • Pry open back piece with plastic spudger.

    • Remove the back piece of the device.

    • The back panel may be difficult to pry off, use gentle force.

  3. QHp1GtnImOcguQRs
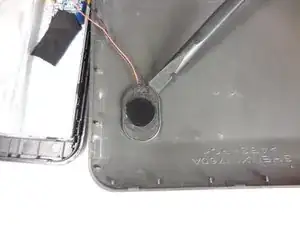
    • Disconnect speaker (which is attached by black and red wires) from back piece using plastic spudger.

  4. LTCOnSeHHD2iRykB
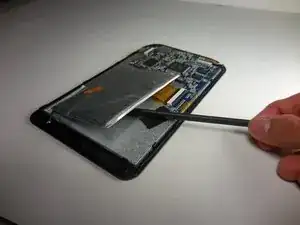
    • Gently pry the battery off of the device with the plastic spudger.

    • There is a large amount of glue holding the battery to the device.

    • Do not puncture the battery with the plastic spudger.

  5. TdHBTCMJeREyRy2W
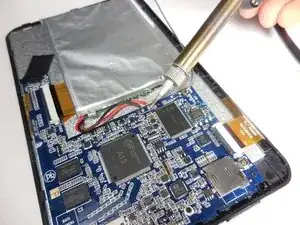
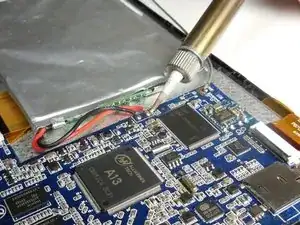
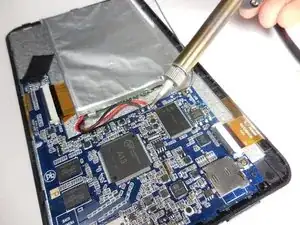
    • Remove red and black wires leading from the battery to the motherboard by heating up a soldering iron and applying to area and gently removing wires.

    • For more information on soldering, please refer to iFixit's guide here.

  6. X3ACxcAnASS4W5JO
    • Insert new battery by soldering red and black wires onto the motherboard.

    • Make sure to solder the wires back on in the correct configuration (as pictured).

    "No parts required."

    Hmmm.

    Does the replacement battery not count?

    A suggestion would be to mention a source for the plastic spudgers and replacement battery, or at least post the battery number. One could then search to determine if the part was even available, or the cost to determine if the replacement was cost-effective.

    Thanks.

    Tom W -

Conclusion

To reassemble your device, follow these instructions in reverse order.
Grant Harding

Member since: 11/03/15

249 Reputation

0 comments