Introduction
If your Asus F555LA-AB31 will not connect to the network or if you experience intermittent connections, it may be time to replace your network card. Your network card connects your computer to a local area network (LAN) or the internet. If the network card has a faulty hardware component, the operating system might not show it as a connected device. It may also not reliably connect to networks or recognize networks in specific situations; such as when the laptop is hot or during extended use.
Before using this guide, verify the issue is not software related before replacing the network card. Asus provides a support guide to troubleshooting wireless issues in this link.
Electronics are sensitive to ESD. Here is a link for using an anti-static mat and wristband. The laptop must be unplugged before servicing to prevent electrical shock and hardware damage.
Tools
Parts
-
-
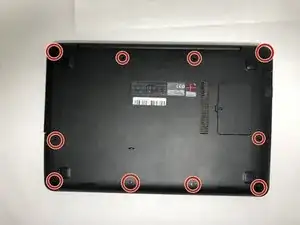
Use the Phillips #0 screwdriver head to remove the ten 18mm Phillips #0 screws on the laptop's bottom.
-
-
-
Flip the laptop over and flip the screen up.
-
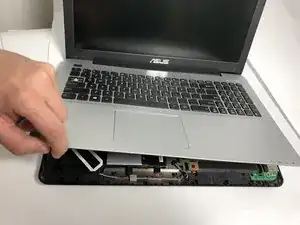
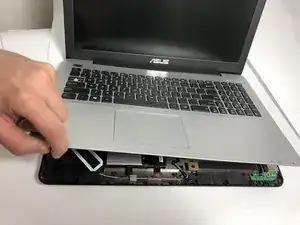
Pry upward on the edges of the faceplate in order to separate the keyboard and trackpad from the rest of the device.
-
-
-
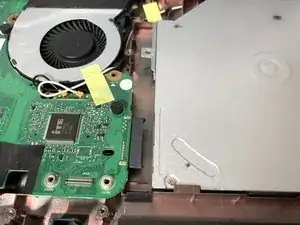
Use the Phillips #0 screwdriver to unscrew the one Phillips #0 screw that connects the CD drive to the motherboard.
-
Slowly slide out the CD drive, keeping it level, to remove it.
-
-
-
Carefully fold the device open.
-
Begin to pry upward on the edges of the faceplate in order to separate the keyboard and trackpad from the rest of the device.
-
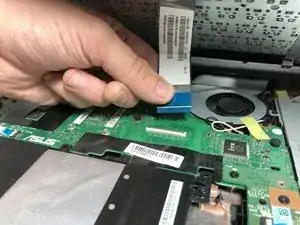
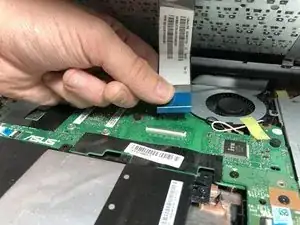
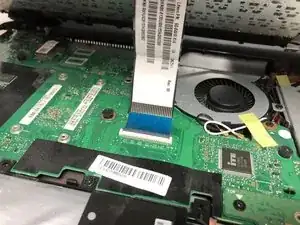
To remove the ZIF connector, gently lift upward on the blue tab to disconnect it from the motherboard.
-
-
-
Fold the keyboard section of the laptop up towards the screen to fully expose the inside of the device.
-
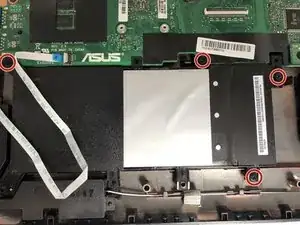
Unscrew the four 4mm Phillips #0 screws holding down the hard drive.
-
-
-
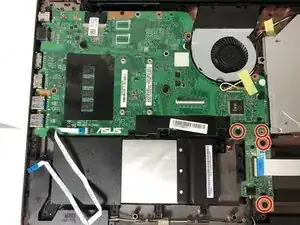
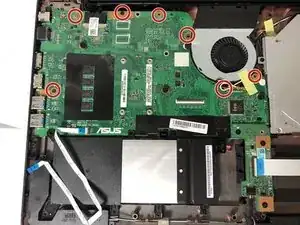
Remove the seven Phillips #0 screws holding the motherboard down.
-
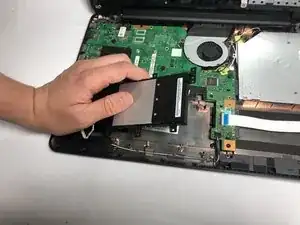
Lift the motherboard upwards, folding it towards the laptop chassis.
-
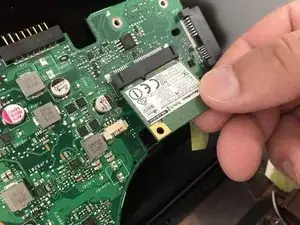
Unscrew the Phillips #0 screw holding down the network card, and slide it out.
-
To reassemble your device, follow these instructions in reverse order.


