Introduction

Outline what you are going to teach someone how to do.

  1. CWjLcVXgTFyDebKC
    CWjLcVXgTFyDebKC
    rbK2XueZgauWMlJR
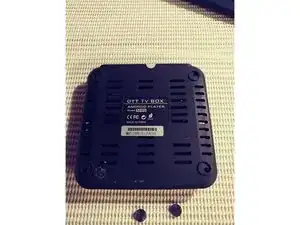
    • Remove 4 circle pads to access the 4 screws. Using a Philips head screwdriver, remove all 4.

  2. mvkgyUOWoRwEqnJK
    mvkgyUOWoRwEqnJK
    lODdb13q5GAPFMst
    eDVSrlxy1juG1SV6
    • Remove the 4 circular pads, then using a Phillips screwdriver. Remove the 4 screws.

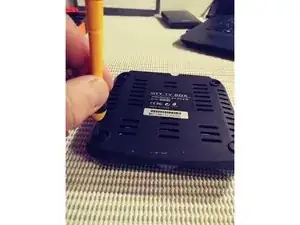
    • Using the metal spudger in the slits parallel to the Seal you will be able to separate the two piece's.

    • The piece should come off easily.

  3. VXKfqbWdmLqVkcEU
    VXKfqbWdmLqVkcEU
    PIgTPbAJcqrGIVhE
    Lf2EcsLUtnPBPcFG
    • With a firm grip at the base of the cable pull up and away from board.

    • Locate the 4 screws, then using the Phillips screwdriver remove them.

    • Before the board can be removed, be sure to use your tweezers to untape the antenna from the housing.

    • The board should come out with ease.

  4. DK5cge1SOmwiGgMJ
    • Using your Phillips head screwdriver remove the 2 screws that hold the unit to the housing

  5. 1rqJXlNUV6hEASMn
    1rqJXlNUV6hEASMn
    mTxE2IiPWpvRmuJI
    • With your Phillips head screwdriver, remove the 3 screws that hold it in place.

    • The device has been effectively disassembled.

    • Next I will guide you through a Detailed inspection of the main circuit board.

Austin Pollard

Member since: 05/02/17

1474 Reputation

0 comments