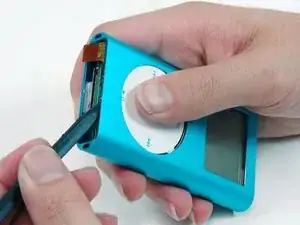
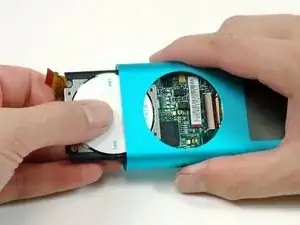
Introduction

The click wheel receives the feedback of your fingers and transmits it to the logic board.

  1. 64orHJOkjncKWkE5
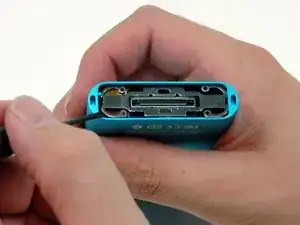
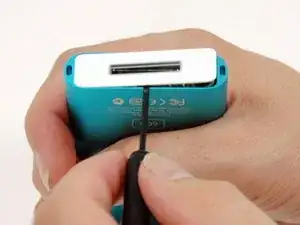
    • Carefully insert a small flathead screwdriver or Jimmy in the seam between the metal casing and white plastic bottom Use the screwdriver to pry up the white plastic bottom bezel. Be careful not to damage the soft plastic with your screwdriver.

    Again, be mindful and careful of the little white teeth on the underside of the plastic especially the two on the ends of the long sides.

    DITOSP -

    I used Stanley knife blade to gently prise both top and bottom plastic covers

    jimbo20039 -

    Like I do for the top, I use a thin plastic guitar pick to wedge between the plastic cap and metal case. Once it’s in, turn the pick horizontal (same as the cap) and work it around until you can get your fingernails under it. Also, I believe this cap is made to go on only one way, so maybe mark which edge is front or back

    Ken Mastri -

  2. vhqerDqLcLqmyc5S
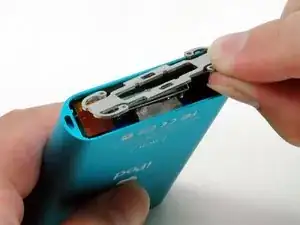
    • A small pair of snap ring pliers is the easiest tool to remove the metal retaining bracket.

    • You can also use a flathead screwdriver to pry out the metal retaining bracket beneath the bottom bezel as shown. You can free the bracket by first pushing in the metal arms on the corners and then lifting the bracket.

    Be *very* careful on the left hand side. It's almost too easy to scrape the click wheel cable and cause damage to it!

    LambdaCalculus -

    I used a circlip tool and for removal and reinsertion. It was fast and easy and avoids bending the part. They are also referred to as snap ring pliers.

    thezazupits -

    Quote from thezazupits:

    I used a circlip tool and for removal and reinsertion. It was fast and easy and avoids bending the part. They are also referred to as snap ring pliers.

    There are two kinds of snap ring pliers available. One pivots like regular pliers, one hinges in reverse (when you squeeze the handles, the tips spread). Use the first type.

    PZencak -

    My click wheel lost some of its functionality. The back button, and the touch sensitivity to scroll through songs isn't working. :(

    coombsnahuel -

    Hi,

    I have followed this very good tutorial as carefully as I could and I thank you very much for having posted it!

    However, my problem is not solved. After having connect-disconnect issues when used with car charger, the iPod started making faint noise when plugged and refused to charge or start-up. I thought it was a mechanical noise (hard drive?) but obviously it is not the case because battery and hard drive are now unplugged, and the board-screen assembly still makes the same noise when plugged in a USB socket (but of course I can't localize the origin of that noise).

    Do you have any idea what it might be due to?

    Thank you in advance for any advice,

    Maxime

    Maxime Gommeaux -

    I would definitely recommend either circlip pliers to take out the metal retaining bracket because using a screwdriver leaves obvious marks on he corners of the case. I have noticed many for sale on eBay that have these marks. There are now plastic 'lifters' available to remove the top and bottom bezels and these are brilliant if used carefully and go in easily on the click wheel / screen side but be aware that when removing the bottom bezel it may bend the case a bit but it is easily persuaded back into shape. I too have carried out 64 GB, 128 GB and 256 GB conversions to the mini with a compact flash to SD card adapter and before fitting I format the card in my Sony Alpha 350 camera and it works a treat. My daughter loves her 128 gb converted mini and it's almost bombproof with a solid state memory on board.

    ptrmayhew6 -

    Rather than pry the ends of the clip out, insert the flat screwdriver as shown ( maybe a little more straight up) and slide it toward the open end, lifting as you go, and the corner of the clip will pop right out.

    Human -

    This is possibly the hardest part of this job for me. Getting this metal spring clip out without damaging the ribbon cable that’s right under one side is tricky. Take your time and use care to avoid touching the cable.

    Ken Mastri -

    In my ‘repair’, I managed to do the above on the side away from the clickwheel connector. I pried it up, and gently wiggled it free from the space. That way you don’t need to go prying at the connector, at cost of causing some scrape marks on the inside of the casing. Rather have internal scrapes than needing to replace the clickwheel!

    Casey -

  3. YLtjQ6AqEsDF2DfT
    • Lift the metal retaining bracket out of the iPod.

  4. MYUtsHWKcQ3WKOB1
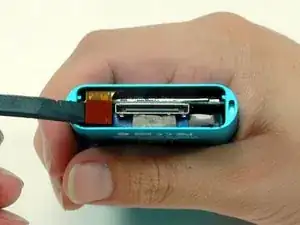
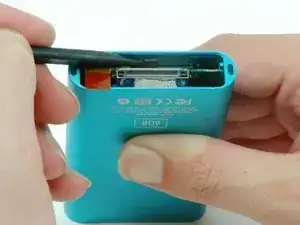
    • Use a spudger or the tip of your finger to carefully disconect the orange click wheel ribbon from the logic board.

    Ich würde nicht dort seitlich ansetzen, sondern vorne. Mir ist seitlich leider das Flachbandkabel von der Platine abgerissen – also kaputt :-/

    Das Bild ist also eher irreführend. Fürs nächste Mal weiß ich es besser.

    D K -

  5. GlwTaKEJSKyrHy6f
    • Use a spudger to pull back on the small black plastic tab holding the click wheel in place.

  6. RfIkCJ6mwI66QDPY
    • Continue to pull back on the black plastic tab, use your other hand to press down on the click wheel, and begin to slide it out of the iPod.

    • It's important to press down on the click wheel as you slide it out. Otherwise, the click wheel could be scratched by the iPod's metal casing. To prevent the click wheel from getting scratched during removal/installation, you can place some blue painter's masking tape over the click wheel. It can be easily removed with no residue after all is finished.

  7. rysVbTRcqQPQfN1f
    • Continue to slide the click wheel out until it is free from the iPod.

Conclusion

To reassemble your device, follow these instructions in reverse order.

iRobot

Member since: 25/09/09

0 Reputation

8 comments

Hi guys. I have problem with ipod mini click wheel. I allreadu order it new one, once i replace it its still problem with them. Once i press menu button or home button.My ipod reset.

See movie below:

http://www.youtube.com/watch?v=2tJurNl5q...

Is this are problem with Click Wheel, or iPod mother board ?

info -

I wonder if you ever got this resolved? I am trying to restore an old ipod mini and have the same issue.

martin8777 -

So, as soon as you press the menu or center button, it resets? Sounds more like a logic board problem. (Have you tried restoring it in iTunes?)

Daniel Korzhenevich -

yeah, tried that a number of times. also have swapped out the hard drive for a cf card with sd card in it and still get the same issue.

martin8777 -

I guess it must be the logic board as I can power it on by holding the menu button. With the original hard drive in, it just does nothing when I press buttons and with the cf card in, it resets as soon as I press anything.

It’s a real shame as its such a nice piece of hardware and I love to restore faulty gear back to working order.

Interestingly enough, it does work fine if I dock it on my stereo or ipod dock and I can move around the menus using that remote. Maybe it will just live in my basement docked on an old speaker I have down there.

martin8777 -

If you test the iPod and the click wheel is not working, try putting in the metal bracket, after putting mine in the click wheel started working again, I think that added pressure from the metal bracket is required to get the click wheel to work.

Sara Zielinski -

Hi, I just replaced the battery and the sd card of my ipod mini. So fine so good, when I connected it to my laptop I could transfer some music on my ipod. However, after unplugging and starting the ipod my click wheel doesn’t work anymore. No reaction at all. Is there somethibg important I missed when reassembling? I tried to unplug and plug the click wheel back in several times, but with no success.
Peter Griffin -

my click wheel stopped after breaking the cable when putting in a new HDD and battery, Every time I click it turns off …. anyone know how to fix this??

Matt -