Introduction

  1. vJIAQQqeEtoFddlI
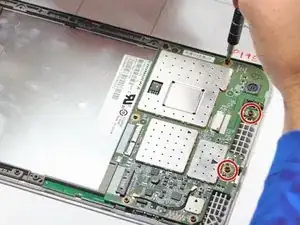
    • Remove the 4 – 4.5 mm screws from the motherboard assembly.

  2. ZrLWGTAjIGqoJQmK
    • Remove the 2 – 3.5 mm screws from the motherboard assembly.

  3. MEmymdGtNxbnGj26
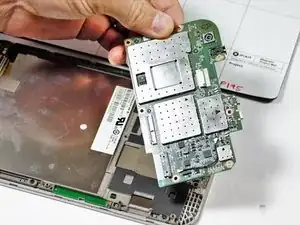
    • The motherboard should come free at this point.

  4. KRuAYjRhOPBYIm5i
    • Use small plastic opening tool for the following steps.

  5. ZEjsdwrWYkFyOJZQ
    ZEjsdwrWYkFyOJZQ
    xmkEMcfixwZFiulP
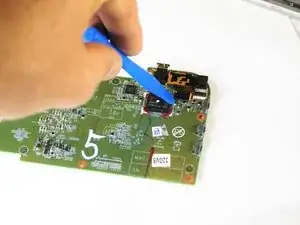
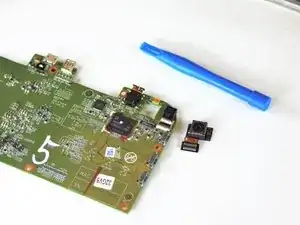
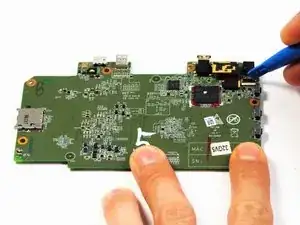
    • Use small plastic opening tool to pry rear facing camera flat top connector from motherboard.

  6. ATBKI1VEXVNoRAqv
    • The rear facing camera should come free at this point.

  7. sJxtW52CsupHADnB
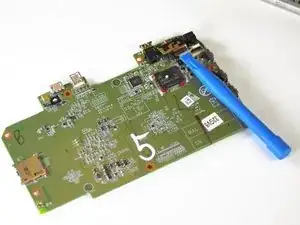
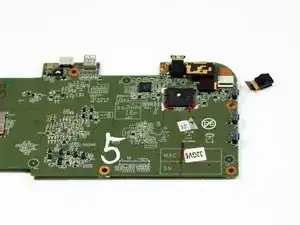
    • Use small plastic opening tool to pry front facing camera flat top connector from the motherboard

  8. CLEqWk1nPjApNy1c
    CLEqWk1nPjApNy1c
    WvdMEbfBPENmvxSh
    • The front facing camera should come free at this point.

Conclusion

To reassemble your device, follow these instructions in reverse order.

Melanie Mestre

Member since: 20/09/16

116 Reputation

0 comments