Introduction
Tools
-
-
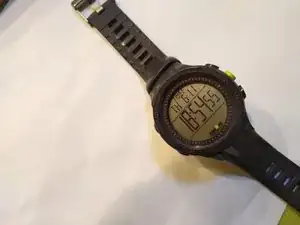
Here is your watch! Actually, this one is mine. Yours is the one with the dead battery. My battery was dead, not too long ago, but I replaced it, and now you can, too!
-
Your first job is to remove the watch band, which has flanges that overlap the back plate.
-
But wait! The watch band isn't quite what it seems. On the side of this watch, there are what appear to be screw heads holding on the band. These are not screw heads, they're just decorative. Instead, you must use a screwdriver or other thin blade to compress the spring pins and remove the band.
-
-
-
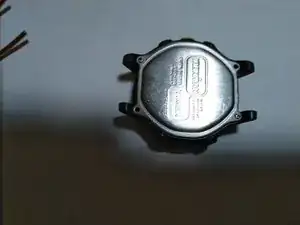
Remove the back plate by unscrewing the four small phillips-head screws at the corners of the back plate.
-
Put them in a bowl, or somewhere safe!
-
Remove the metal back plate.
-
-
-
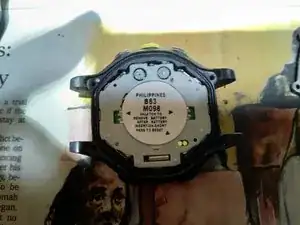
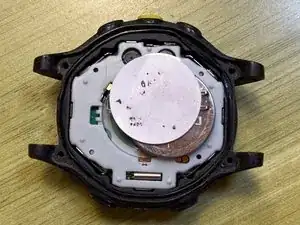
Yay, you got the back off!
-
Next, you need to release the metal strap under the sticker that holds the battery. This strap is wrapped around a pair of plastic horns on either side.
-
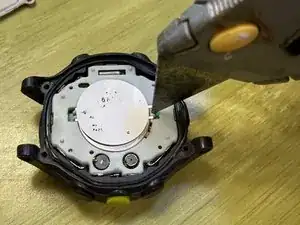
To release the strap, you will need to insert a narrow and sharp object into the slot between the pair of horns, and pry the loop of the metal strap off of the plastic horns.
-
(NB: The picture with the knife was taken several years after the earlier one, the sticker has faded quite a bit!)
-
-
-
Yay, we got the battery out! Replace with a new battery.
-
Replace the metal strap; hook one of the metal loops over one pair of plastic horns, place the other loop in the right position, and press down to snap the metal loop around the other pair of plastic horns.
-
If the display is blank after completing this, you may need to reset the watch by "shorting the pads" that the sticker points to.
-
In this picture, the "pads" referred to are the two small metal circles visible at the lower right, partly obscured by the battery. You can short them by touching both of them simultaneously using a copper wire or other conductive piece of metal that's small enough to fit in that little oval plastic window.
-
You are a wonderful person.
13 comments
Replaced battery per above, but screen is blank. How to reset? Sticker says “short pads to reset.” What pads? Short??
Lily Tom -
Oh! golly, is that necessary? I’m trying to remember whether I did that. Okay, explanation, apologies if you already knew all of this.
1) The term “short” refers to creating an electrical connection, sometimes known as a “short-circuit”, between two points.
2) The term “pads” refers to electrical contacts.
On the sticker (in the photo above), you will see an arrow (really more of a small triangle) at the lower right of the sticker, pointing to two circular metal contacts, or “pads”. In order to reset the watch, I believe you will need to create a “short” by touching both of these pads with a conductive object. A short piece of copper wire would work, or nearly anything else that’s conductive. Let me see… Actually, if you took any unplugged appliance, you could probably use one of the prongs of a 110VAC plug to bridge these. (Reiterating: NOT WHILE IT’S PLUGGED IN.) Maybe it would be safer to use a fork, spoon, or conductive screwdriver.
I’m guessing that I did this, and neglected to mention it. Yikes!
I just replaced my battery and didn’t have to short the contacts. I inserted the battery and reassembled the two halves, and when I turned it over it was already running.
Oh! Interesting! I should update the instructions to reflect that.
My Ironman is a bit different: The battery can be removed without removing "the sandwich" - Take the sticker off, unscrew the screw near the battery which releases the retaining metal strap and the battery.
Hugh -
Wow, that sounds delightful. Is there any chance that your procedure would apply to the watch in my pictures as well?
In light of your comment, I re-evaluated my own process, and realized that there is absolutely no need to disassemble the sandwich. I've completely revised the guide. So... your comment no longer makes sense, but digital archaeologists will know that your comment used to make sense, and in fact guided me to an overhaul of this guide. Thanks!
