Introduction
A three-way switch is a common type of light switch that is used in many homes to control a single light fixture from two or more locations. Over time, these switches may become worn or damaged, requiring replacement.
Replacing a three-way switch may seem like a daunting task, but with the right tools and instructions, it can be a simple DIY project. In this guide, we will provide step-by-step instructions on how to replace a three-way switch safely and effectively.
Whether you are a seasoned DIYer or new to home repairs, this guide will give you the confidence and knowledge you need to replace a three-way switch and restore proper functionality to your lighting system.
Tools
Parts
-
-
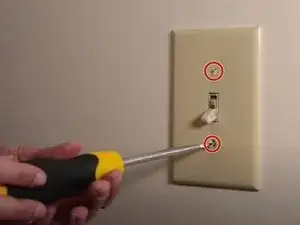
Use the screwdriver to remove the 15mm Flathead screws on the wall plate.
-
Remove the wall plate from the wall.
-
-
-
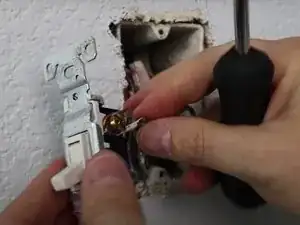
While wearing insulated gloves, gently pull out the switch and use a Duspol or any other Voltmeter to test if there is voltage at the contacts.
-
-
-
Label the black live or load wire which connects to the power or the device and usually on the down position of the switch.
-
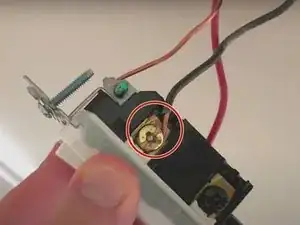
Use the screwdriver to loosen the 5mm Phillips #1 screw so that you can remove the live or load wire from the switch.
-
-
-
Use the screwdriver to loosen the 5mm Phillips #1 screws so that you can remove these two traveler wires.
-
After the wires are removed, disconnect the old switch.
-
-
-
Ground wire is the bare copper wire.
-
The white one is the neutral wire that may be in another outlet box.
-
Please label the neutral wire and the ground wire.
-
-
-
Using your new switch, link two traveler wires to the positions with gold screws of the new switch and tighten the 5mm Phillips #1 screws.
-
Link the live or load wire to the position with a black screw and tighten the 5mm Phillips #1 screw.
-
-
-
If there is a green 5mm Phillips #1 screw on the new switch, please link the ground wire to and tighten it.
-
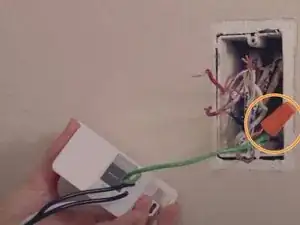
For the intelligent switch, there would be a green wire so that you can group the ground wire with the green wire and tighten them with a wire nut.
-
-
-
There is an extra white wire on the intelligent switch.
-
Group the neutral wire with the white wire and use the wire nut to tighten them.
-
-
-
Turn the power on and check whether the new switch works.
-
Gently push the wires back into the outlet box.
-
Secure the new switch with the 10mm Phillips #1 screws.
-
Finally, secure the wall plate.
-
To reassemble your device, follow these instructions in reverse order.

