Introduction
This guide will help the user remove the camera battery if it failed in operation. It is also a prerequisite guide for replacement of internal parts of the camera. Ensure the camera is powered off prior to battery removal.
-
-
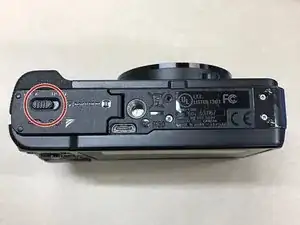
Place the camera upside down with the top sitting on a flat surface.
-
Using your fingers, slide the door lock to the unlock position.
-
-
-
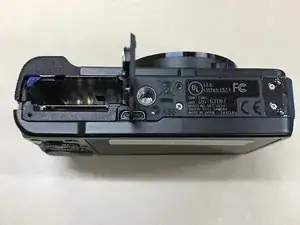
Open the battery compartment door.
-
Remove the battery from the compartment by turning the camera upside down and allow it to slide out. Be sure to catch the battery as it slides out.
-
If you are replacing internal camera parts, stop here. If you are replacing the old battery, continue with step 2.
-
Insert the new battery into the compartment matching the positive battery lead to the positive terminal and the negative battery lead to the negative terminal on the camera.
-
Close and lock the battery door and power the camera up. Ensure to check the battery charge levels and that all functions of the camera work properly.
-
To reassemble your device, follow these instructions in reverse order.
One comment
Hello @jetblast Thanks for this guide. Flash of my HX9V is not working properly. It actaully popus up but doesn’t throw the white light. I got it checked in the Sony Service center and this is what they suggested me to change: http://prntscr.com/qidtm4 Can anyone identity these two parts and from where I can get them? Also, any repaid guide available on how to change the flash?
Thanks in advance!
Raj -


