Introduction

Installing a new speaker fairly simple as it only involves opening the device casing and then removing the broken speaker.

  1. GPUDvUByxNvD3LIt
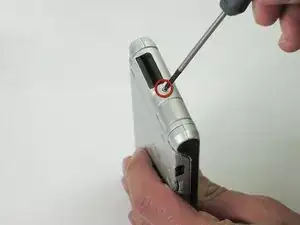
    • Unscrew the 1.9mm screw located at the top of the device with a Phillips #00 screwdriver.

    • It may be helpful to set up a piece of paper to keep track of where removed screws came from.

  2. PJ5PvWxEIibJcG2C
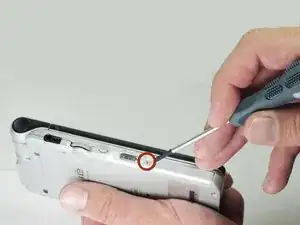
    • Unscrew the 2.5mm screw located on the left side of the device with a Phillips #00 screwdriver.

  3. 2KnaoVRq5gtqPSfL
    2KnaoVRq5gtqPSfL
    WaFRgGR1GNCf2LfQ
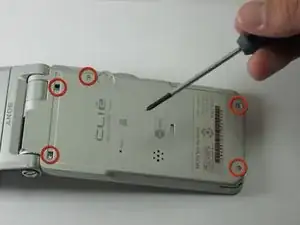
    • Unscrew the five 2.5mm screws on the back panel with a Phillips #00 screwdriver.

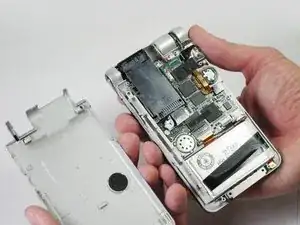
    • Remove the back panel by lifting it away with your hands.

  4. FNsKYgaBAUbXB1rU
    FNsKYgaBAUbXB1rU
    TsJKOD4DLIPxPMtw
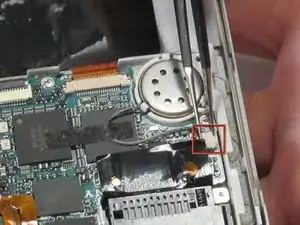
    • Use tweezers to unplug the speaker wire from the motherboard by pulling the plug (not the wires) down towards the speaker.

    • Be careful not to tear the speaker wires! They are very thin.

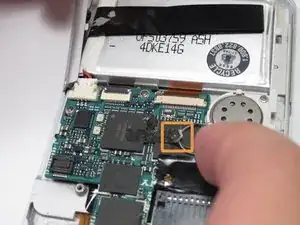
    • Remove the tape holding speaker wire by peeling it away.

  5. SfKZWI1NbHgWIYdi
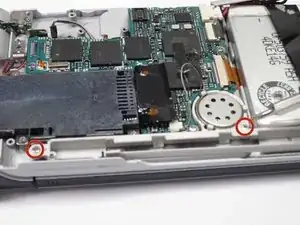
    • Holding down the speaker rail unscrew the two 2.5mm screws with a Phillips #00 screwdriver.

    • Remove the speaker rail vertically from the device.

  6. lILrwfufYWnWPqOm
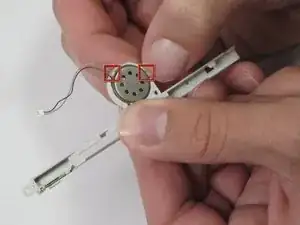
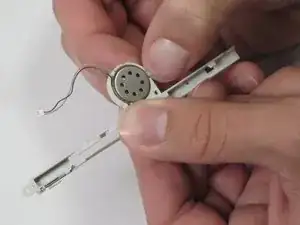
    • Hold back the plastic tabs to pop the speaker out of the rail.

Conclusion

To reassemble your device, follow these instructions in reverse order.
Daniel Soski

Member since: 19/04/13

57 Reputation

0 comments