Introduction

  1. LS2H3FsJ6ayBAEXO
    • Slide the lock towards the middle of the camera, in the same direction of the arrow.

  2. WEaOAJwtXdSSsbvT
    • Push the blue battery holder up in the direction of the arrow.

  3. XNhXSnVBZAOPmilP
    • Pull the battery out of the battery slot.

  4. WdlmgNXkP2mgIOOR
    WdlmgNXkP2mgIOOR
    OxgKByoxdlA34Vwn
    • Use tweezers to remove the four rubber screw covers.

  5. AHPdiTNqFISFu3b1
    AHPdiTNqFISFu3b1
    ssY4Tyj2FiJZcEEs
    • Remove the four Phillips 2.381 mm screws on back side of camera and one Phillips 2.381 mm screw on the bottom of the camera, using a Phillips #00 screwdriver.

  6. 3EBmE3IYHO1baCYC
    • Remove the back casing by just carefully pulling the casing off of the camera.

  7. OKWr5Ed2j2KZGw1E
    • Use the Phillips #00 screw driver to remove the four 2.381 mm screws next to the screen hinge.

  8. LK1gJRaDoxsIbonA
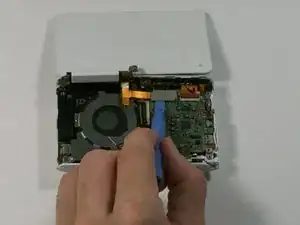
    • Use plastic opening tool to disconnect screen connector from the control board.

  9. U6FWFbXcZkVXhcYB
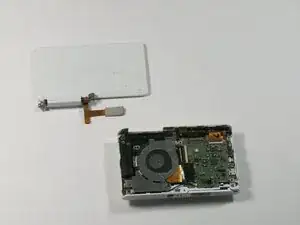
    • Remove the old screen.

    How to replace lcd in the old screen? How to open it?

    lynda_myself -

  10. e1UE6WIRUniTfarM
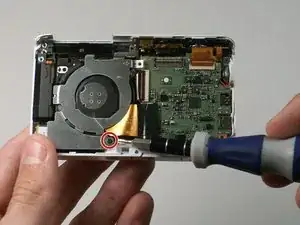
    • Remove the 2.381 mm screw with a Phillips #00 screwdriver.

  11. PwUhmNOy1EF6NRKx
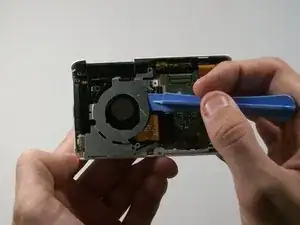
    • Use the plastic opening tool to remove the silver metal lens cover.

  12. GKMfMBiMVByDugU4
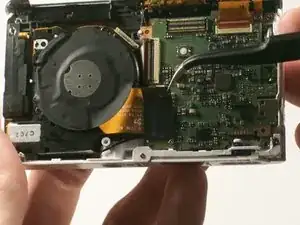
    • Use the tweezers to remove the black electrical tape covering the copper connector to the control board.

  13. vAIv6dIlaItxVRPH
    • From the front of the camera, push the lens through the back of the camer.a

  14. e4ibChKsxORjPpsB
    e4ibChKsxORjPpsB
    cSBT5xSJFaGZdgFP
    • Use a pair of tweezers to flip up the black retaining bar on each of the two ZIF connectors.

  15. ihFZJkXQyWaZAFNx
    ihFZJkXQyWaZAFNx
    ysK1Kguc6p2vUZPB
    • Remove the lens assembly from the camera.

  16. RTPcayPXBSIMTUPJ
    • Remove the 2.381 mm screw that is holding the copper to the control board with a Phillips #00 screw driver.

  17. ytvKB12TkaxIDPTY
    • Use tweezers to pull copper connector from the control board.

  18. Xaj6fbXs6BdCNMv3
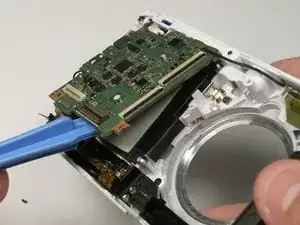
    • Use the plastic opening tool to pry the control board up, thus allowing the flash bulb assembly to be removed.

  19. ykSWOZLTtBGvypHD
    • Beginning with the battery on the side, gently pull upwards to remove the entire flash bulb assembly.

Conclusion

To reassemble your device, follow these instructions in reverse order.

Justin Smith

Member since: 03/03/15

110 Reputation

0 comments