Introduction

  1. EbaTBQtaIeWOwpdR
    EbaTBQtaIeWOwpdR
    hLg3tYnwVcTO4sSG
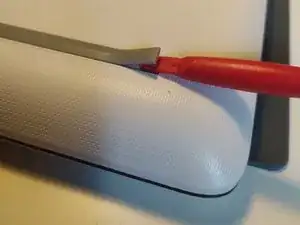
    • remove the feet with a spudger

  2. nC2KXXjDhsfunSKI
    nC2KXXjDhsfunSKI
    dMdB2IodjA52KH6T
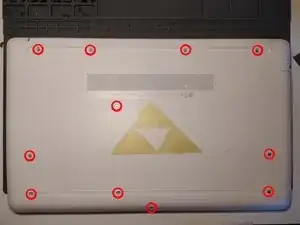
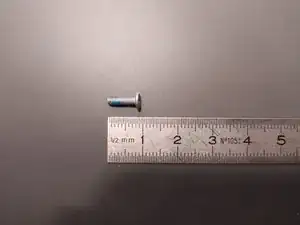
    • Remove the 11 screw with a PH0 screwdriver.

    • The screws are identical

  3. yXsI2OGTfbyLMUuR
    yXsI2OGTfbyLMUuR
    otgBrjCmMCfuWCtc
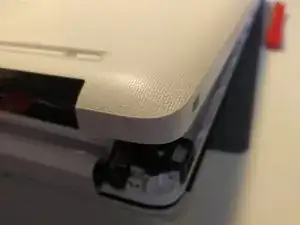
    • Insert a spudger between the bottom cover and the keyboard module, then go around the whole cover to uncip everything.

    • Remove the bottom cover from the computer.

  4. s2bTOnY2gW1ZSgHh
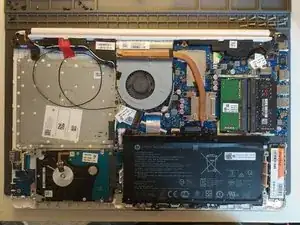
    • You now have acces to the inside of the machine.

  5. HHEqOAH5Xr1JYlxt
    HHEqOAH5Xr1JYlxt
    JywZfBKSCfb6Rxfu
    fvJSQTsIM3m5xHX3
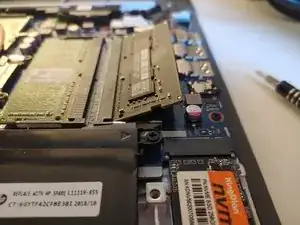
    • Flex the metal retaining clips on the side of the RAM away from one another.

    • If done correctly, the RAM will pop out of its lock.

    • To insert a module, angle it as shown in the third picture, then insert it and push it down until it locks.

Conclusion

To reassemble your device, follow the steps in reverse order.
Léo FRAYSSE

Member since: 03/09/18

1212 Reputation

0 comments