Introduction

They keyboard allows users to interact with their PC. Having a keyboard that does not work makes it harder for users to do simple tasks like look things up or write documents. This guide will show you how to remove and replace the keyboard of your Razer Blade Stealth 2016 computer.

Before starting this guide, power off your laptop and unplug it from the power adapter.

  1. hdbyoBWNB6HCkOsL
    hdbyoBWNB6HCkOsL
    ahbJNwaE14yqxhoJ
    LlvEjesZiBwLkZgW
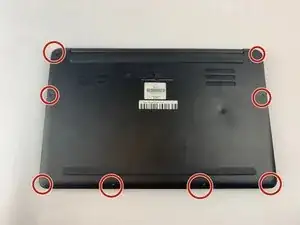
    • Use a Torx (T5) screwdriver to remove the eight 3 mm screws on the back case.

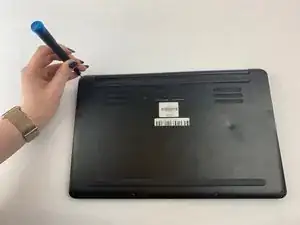
    • Remove the rear cover by prying up lightly starting in one of the corners.

  2. qosKrZwqGwThRWXx
    qosKrZwqGwThRWXx
    pjeAgo1U6BfVFjZe
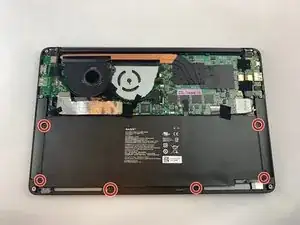
    • Use a Phillips screwdriver to remove the six screws securing the battery.

    Phillips* screw heads not T4 Torx based on the photo.

    Sean Christiansen -

    You’re right! Thanks for the catch—I’ll fix that step.

    Arthur Shi -

  3. Qt4xQYIaS6rerRxH
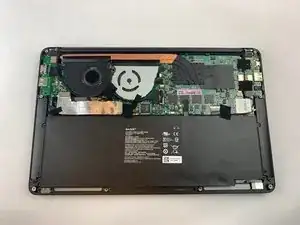
    • Unplug the battery connector from the motherboard.

    • Remove the battery from the device.

  4. fDiXTkNbCDqJJYSk
    • Remove the red and black cables that are attached to the motherboard.

  5. AF513jpC5dmIKUOO
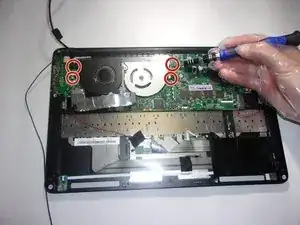
    • Remove the four 3.4 mm screws around the black square using a T4 Torx screwdriver.

    • Remove the heatsink.

  6. p1SNEEDXKZJIZKRa
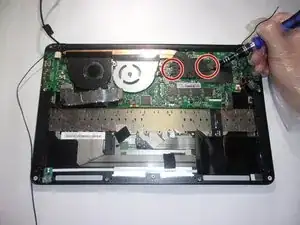
    • Remove the 3.4 mm screws to the cooling fans using a T4 Torx screwdriver.

    • Remove the cooling fans.

  7. nMDqFBsjb5tqmM4d
    nMDqFBsjb5tqmM4d
    wxR2yBYmeW45KpB2
    WTrgJfTxU45bCXv3
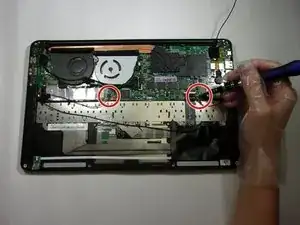
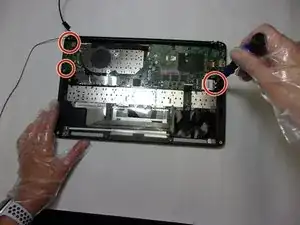
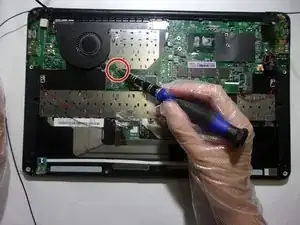
    • Remove the 3.4 mm screws on the perimeter of the motherboard using a T4 Torx screwdriver.

  8. td6AjZXWhvouK3RK
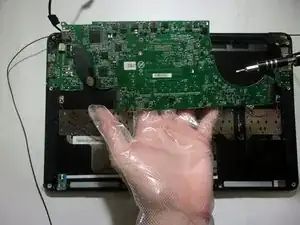
    • Remove the motherboard.

  9. y1EcvBNZGZbHNoqL
    y1EcvBNZGZbHNoqL
    XFCN2K1gE3JNHROQ
    TpuWkT2HJVDJAW33
    • Flip all white tabs up to unlock three ZIF connectors using the opening tool.

    • Flip all black tabs up to unlock the three ZIF connectors using the opening tool.

    • This is how the tabs look in the flipped up position.

  10. sONMLtJLAuM3E5J2
    sONMLtJLAuM3E5J2
    3fJP6GcHYiq2s2Vo
    dp6VPTVPhOtgfZ4h
    • Pull the cables out gently.

  11. dMtc62c2PUalNsTr
    dMtc62c2PUalNsTr
    oOXPHSedJ4ytr4xC
    mGsSlR5GNEZAfPeb
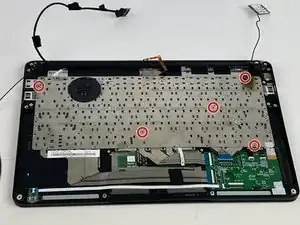
    • Remove fifty-five 3.4 mm keyboard screws with the T5 Torx screwdriver.

    • 5 screw locations are highlighted but locate all 55 screws and remove them.

  12. w4fRiNPhavVraXAb
    w4fRiNPhavVraXAb
    2JEn6RsBOHj3VWAG
    QuIBhBgdrkfWHcaG
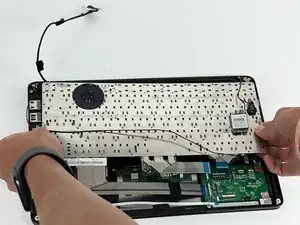
    • Remove the keyboard from the laptop.

Conclusion

To reassemble your device, follow these instructions in reverse order.
Gabby Strevay

Member since: 18/01/22

127 Reputation

0 comments