Introduction

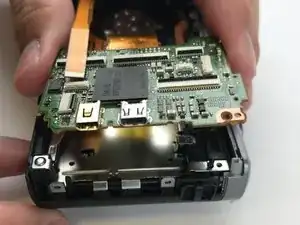
If your Panasonic Lumix DMC-ZS40 wont turn on and your battery is fully charged then replacing the motherboard is what you'll need to do in order to get your camera back up and running.

  1. i6FBrrjb2U1efb5o
    i6FBrrjb2U1efb5o
    SHHkVOb6YIdRncqW
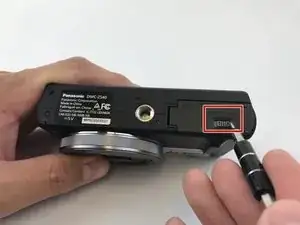
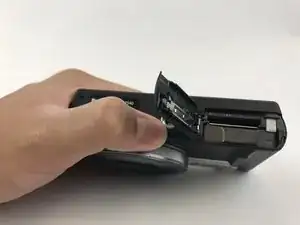
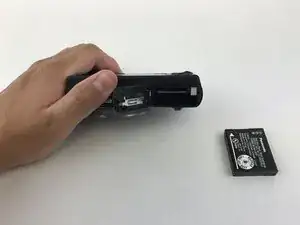
    • Find the battery/memory card door on the bottom right of the camera.

    • Use your finger or screw driver to slide the grey latch from the locked position to the open position. This will swing open the door.

  2. fKIWFvwoTu1XeyP6
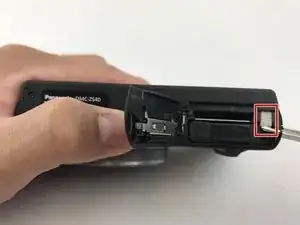
    • Push up on the right-hand-side tab to release the battery.

    How do you operate the functions

    David Miller -

  3. TYWgBQOZ4fG66bgp
    TYWgBQOZ4fG66bgp
    WStOt6BPIbTBkUor
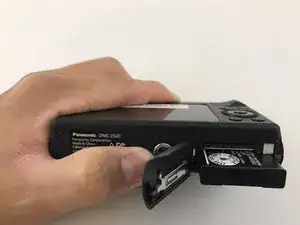
    • Remove battery from camera.

  4. alZoLfKDV1xInHOL
    alZoLfKDV1xInHOL
    ZxjB2kNVRuVxoBbp
    sRo2kPpsyPjMd4HJ
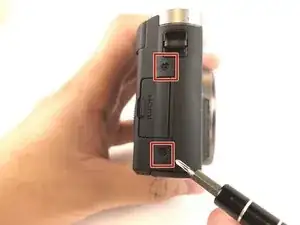
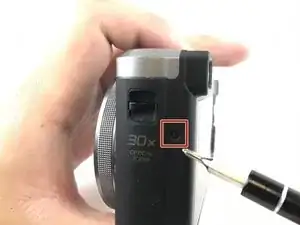
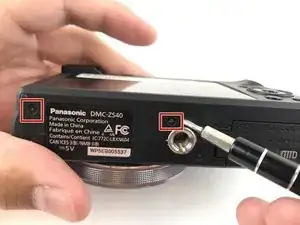
    • Unscrew the five 3mm screws located around the sides of the camera using a PH000 bit or Phillips 000 Screwdriver.

  5. PDxEpSxIMqARSekQ
    PDxEpSxIMqARSekQ
    TmEQQcGZLUGHJyT5
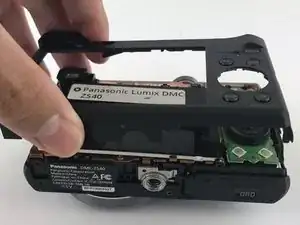
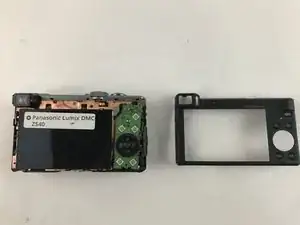
    • Pry off the back casing of the camera and place the camera face down.

  6. qnLCMWAHyXyQoBFS
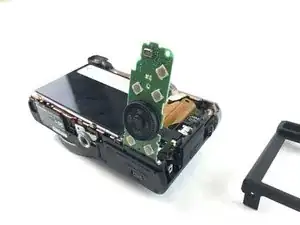
    • Flip the right hand side control dial circuit board up.

  7. GMPdeRYAoYVGPqyu
    GMPdeRYAoYVGPqyu
    EEmrRHFrRIksflfa
    iUL4KNWOfMPriFbY
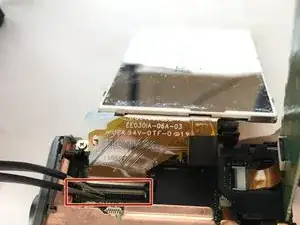
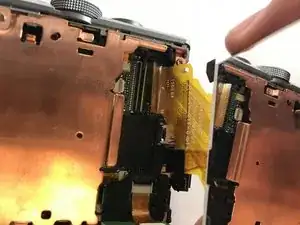
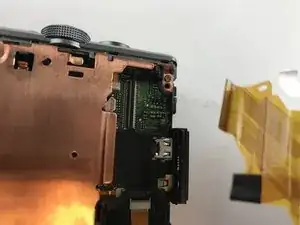
    • Turn the LCD screen over to the side exposing the connection to the motherboard.

    • Remove the display data cable connecting the LCD screen to the motherboard. Using tweezers, pry up the black retaining flap then gently pull the display data cable free.

    • Be careful when handling any display data cables in the camera as they are prone to tearing.

    • To close for reassembly, slide the display data cable back into the ZIF connector and close the retaining flap.

  8. UPJUgQ16EZmJb1CI
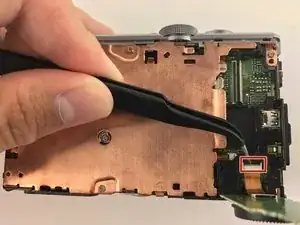
    • Disconnect the control dial from the motherboard. Locate the ZIF connector for the control dial. Use tweezers or screwdrivers to lift up on the retaining flap to remove the ribbon cable.

    • The connector ribbons are prone to tearing so use care during removal.

  9. uF6baqKT12fSYOc4
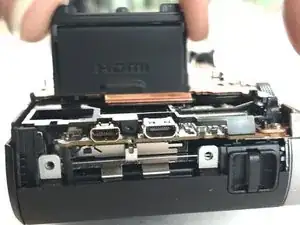
    • Pry the HDMI cover off the side of the camera.

    • No tools are required for this step.

  10. ThH6IvWmpS2ZBjZF
    ThH6IvWmpS2ZBjZF
    y5PSGjibU2QlODWK
    5e6LRKnTcajOFijO
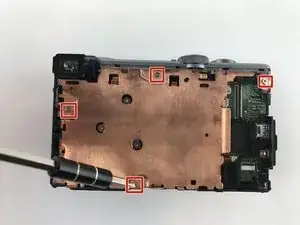
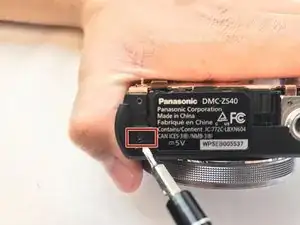
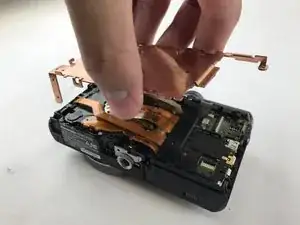
    • Remove these four 4mm on the top of the plate cover and the 3mm screw on the side of the camera using a PH000 bit head. Once the screws are removed, the plate cover should lift right up.

    • Keep track of the different screw lengths and do not mix them up.

  11. HJRW5svAsgRawFVZ
    HJRW5svAsgRawFVZ
    L1G1I5PHO41i6aJQ
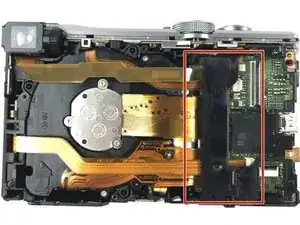
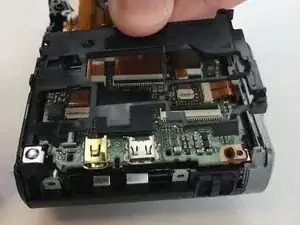
    • Pry the black cover shielding the ZIF connectors off with your hand.

  12. QjCKMvUq6NBnaKH3
    QjCKMvUq6NBnaKH3
    JukwfOFPKB5eEHwC
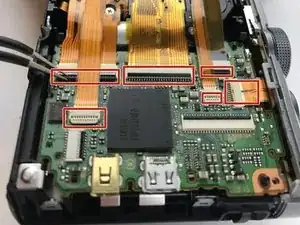
    • Disconnect these 6 ribbon cables from the motherboard. Use tweezers or a screw driver to lift up on the retaining flaps for each ZIF connector.

Conclusion

To reassemble your device, follow these instructions in reverse order.
Kevin Tran

Member since: 14/02/17

215 Reputation

0 comments