Introduction

Directions are given as if you were holding the camera to take a picture.

  1. AFHAgVcOa2VkX6rq
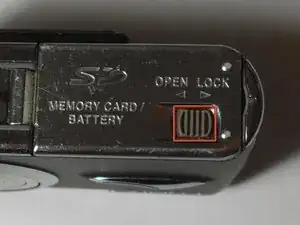
    • Locate the memory card and battery card latch on the bottom of the camera.

    • Slide the latch to the open position.

  2. DaC4xP1oNRDSJFuP
    • Open the battery latch, and slide the battery release lever to the right.

  3. IuAgNtphQpXZgbOw
    • Remove the battery from the camera.

  4. HZWy5DZCtaf3K4oM
    • Remove the three 4.6 mm screws on the bottom of the camera using a Phillips #00 screwdriver.

  5. pZalWsmMJDkXNcZL
    • Remove the single 3.2 mm screw on the left side of the camera using a Phillips #00 screwdriver.

  6. 4CHFUKhQHVjVdbHI
    4CHFUKhQHVjVdbHI
    FxQ6mCETMtTdgil6
    • Remove the left side casing.

  7. buDLx5ofwLWpYNMT
    • Remove the two 3.2 mm screws on the right side of the camera using a Phillips #00 screwdriver.

  8. MSSdvXFH1UO2Tnli
    • Remove the bottom right panel.

  9. bCDk6feXdHXExMLu
    bCDk6feXdHXExMLu
    3UjKjFOYHpwiY4Ca
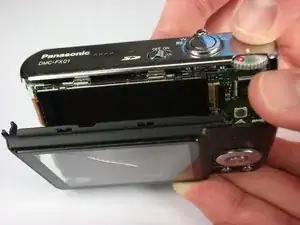
    • Gently remove the back casing.

    • Start at the bottom and carefully pry towards the top to get this piece free.

Conclusion

To reassemble your device, follow these instructions in reverse order.
Andrew

Member since: 11/10/10

396 Reputation

0 comments