Introduction

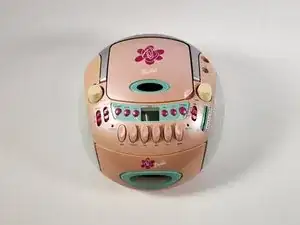
If your 2003 Mattel Barbie CD Cassette Radio Boombox Portable BE-466 isn't playing when switched to radio, it could be a faulty antenna issue. After some time, these extendable antennas can break from heavy use. As a result, the radio becomes static and loses range. If the problem is the antenna, follow this guide to replace the antenna for your Mattel Barbie Boombox BE-466.

This guide demonstrates how to remove and replace the radio antenna for a Barbie Boombox model #BE-466. This guide aims to help you maintain the functionality of your radio, so you can keep using this vintage technology.

Note: The radio used in the guide is missing the lid for the battery compartment and power cord. Before you begin the repair, make sure your device is off and unplugged from the power adapter.

  1. Q5c1PuQshYCblx1p
    Q5c1PuQshYCblx1p
    WSD3ohEgaZd6sFuU
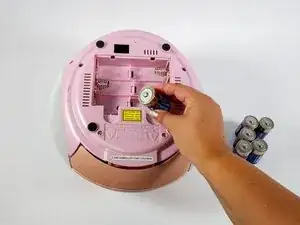
    • Flip radio upside down.

    • This radio is missing the lid for the battery compartment. If you have a battery cover, you must use a screwdriver to remove the screws before you can take off the cover.

    • Remove the batteries.

  2. jaCqnkuiODYwKqKN
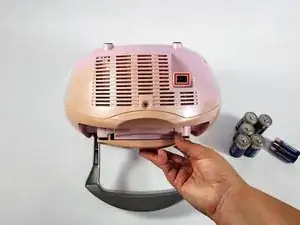
    • Flip radio so the back facing up.

    • The radio shown is missing the power cord. The power cord is a black cord attached to the back.

    • Unplug power cord.

  3. iFpGOZ4W2sYXOkn3
    iFpGOZ4W2sYXOkn3
    dUHgQBS2DcWmOOLL
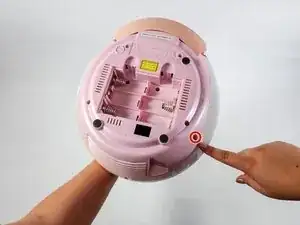
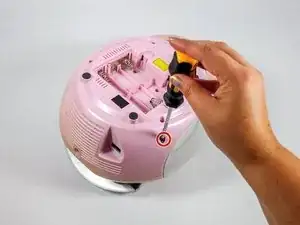
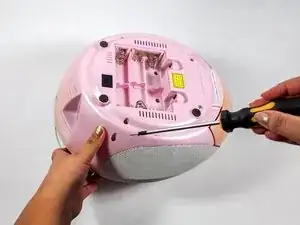
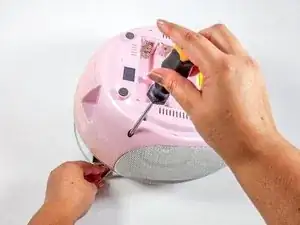
    • Flip the radio over so the bottom of the radio is facing up.

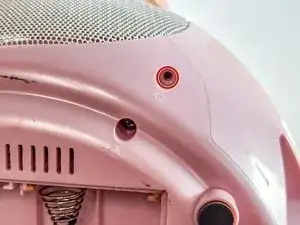
    • Insert the Philips #2 screwdriver into the antenna screw hole.

  4. 1OexAJTOhFwcmctZ
    1OexAJTOhFwcmctZ
    DIZMvwdnOkPKgu6g
    B1Aqdfhhi4opOfaI
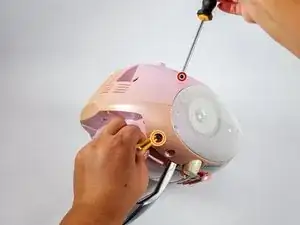
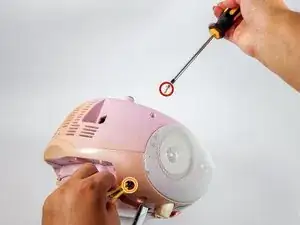
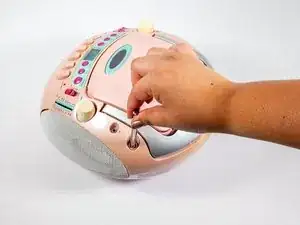
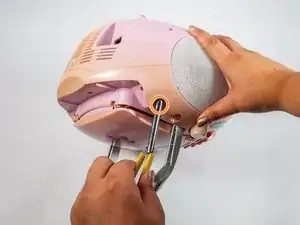
    • Use a Phillips #2 screwdriver to remove the screw securing the antenna.

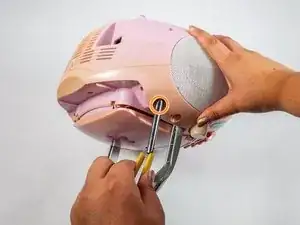
    • Remove the antenna.

    • Use tweezers/pliers if your antenna is broken off or too short to hold.

  5. eI6GIes16ViVGiUb
    eI6GIes16ViVGiUb
    kTPRPIaFZGhQItb1
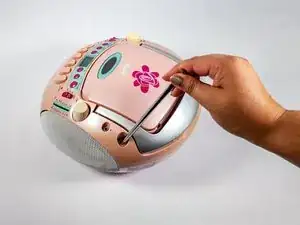
    • Insert the new antenna into the antenna hole on top of the device.

  6. NlV1geettFHTRH2F
    NlV1geettFHTRH2F
    uHJUjQrnipIcZKPj
    SRVJRLTFlP2bTXZp
    • The new antenna is slightly bigger than the original. Use a 2.5mm x 8mm Phillips screw instead of the original screw.

    • Hold the antenna and insert the screw into the antenna screw hole.

    • Use the Phillips #2 screwdriver to secure the screw.

Conclusion

To reassemble your device, follow steps 1 and 2 in reverse order.
Sarah Nguyen

Member since: 25/04/24

133 Reputation

0 comments