Introduction
Use this guide to replace the volume control wheel in your device. You won't be needing any special skills for this guide.
Tools
-
-
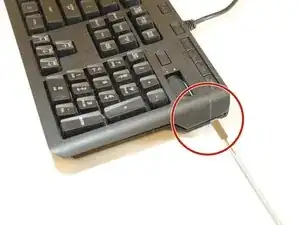
Push the metal spudger underneath the two layers of the keyboard. Using your hand to add pressure, push it downward revolving it to open.
-
-
-
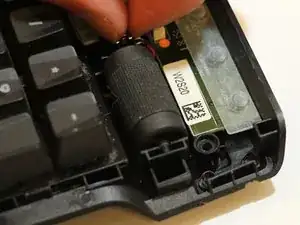
The old version has the 5mm decoder soldered on a small PCB which is connected to the main board by a 3-wire ribbon. You have to de-solder the wire connected to the small PCB side to complete the remaining work.
-
On the new version, the 5mm decoder is directly connected to the roller. It is recommended to use a small plastic spudger to unlatch the right side of roller shaft first, then carefully take out the encoder and roller together. Use a spudger if needed. There is a tinny shaft connects to the encoder tends to break.
-
After replacing the encoder, either solder it back to the small PCB for the old version, or three wires to the three pins of encoder. It doesn't matter if Red is on the left or right. However, make sure the encoder hexagon hole is facing the roller.
-
For the old version, make sure the encoder is soldered in the same way when you took the old one out. The worst case is the volume control function will be reversed.
-
For the new version, the 3-pin JST ZH 1.5mm connector has three wire colors, Red, Black, and Blue. The Blue wire is for the GND, and make sure it's connected to the encoder middle pin. Solder the other two wires to the remaining two pins.
-
Insert the roller tiny hexagon shaft to the encoder. For the OEM parts, the plastics side of encoder is facing the roller.
-
-
-
Connect the keyboard USB cable to a running PC. Test the function of the volume control before putting the roller back to the slot. If the volume control is reversed, no need to rewire the encoder pin connections, just flip the encoder, and insert the roller shaft from the other side.
-
If the volume control function works properly, then carefully put the assembly back to the roller slot, and similar to de-assemble process. Click in the right side first, and then left side. Make sure the force is applied to the roller bulk shaft not to roller itself when seating the roller.
-
To reassemble your device, follow these instructions in reverse order.
2 comments
Where can I get the replacement part to fix it? I found this german tutorial but it involves completely dismantling the volume control unit and I would rather avoid having to do that. Here’s that tutorial I mentioned earlier. https://www.youtube.com/watch?v=9MDrfD9I...
Tom Sid -
Too many steps skipped.


You skipped all the steps of unscrewing….
Richard Baranski -