Introduction

The Lenovo Ideatab A1107 Front Camera Replacement guide will show users how to safely remove the front camera component from the Lenovo Ideatab A1107. Included in the guide are the proper tools needed to complete the replacement, as well as photos with mark-ups.

  1. yp6TqAIMSrXZhRrJ
    yp6TqAIMSrXZhRrJ
    ZGPJyAJfsASLRRHd
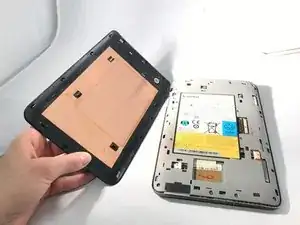
    • Insert a plastic opener in-between the black back panel and the silver body of the tablet.

    • Use the plastic opener to pry the back panel off by moving the plastic opener around the outside edge of the device.

  2. knT3OLaNeKhN4SBD
    knT3OLaNeKhN4SBD
    fTK54joB6t2DbS4P
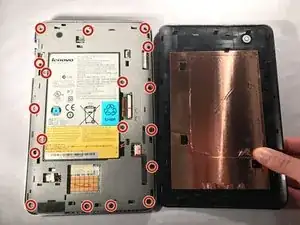
    • Use a Phillips #000 screwdriver to remove the seventeen 4mm screws.

  3. EEIFINdHvKyMAWR3
    • Lift up and remove the interior casing to expose the inner components.

    • Do not be alarmed if the volume button and lock button fall off when removing the interior casing.

  4. ANcrksWH22RYGHCH
    • Use tweezers to remove the tape covering the battery's wiring.

  5. RgaonSGcAYVnwskg
    RgaonSGcAYVnwskg
    NMISkWNcoJGLhUwv
    • Do not puncture the lithium-ion battery. Ruptured batteries can catch fire or explode.

    • Do not use metal tools to remove the battery wire. They present the risk of electrocution.

    • Use a plastic spudger tool to push the battery's wire harness and disconnect it from the device.

  6. 4J1pJAswUrvWEYCR
    • Do not puncture the lithium-ion battery. Ruptured batteries can catch fire or explode.

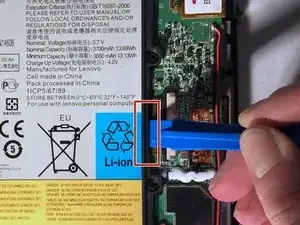
    • Wedge a plastic opening tool in between the battery and the internal components of the device.

    • Use the plastic opener tool to remove the battery from its casing.

  7. 4CXBFORJZVqTgWEf
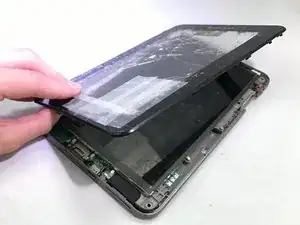
    • Using you hands, lift off the digitizer.

  8. XF1PK6REALANjGJn
    XF1PK6REALANjGJn
    DmFYaTYmZMbpruJ3
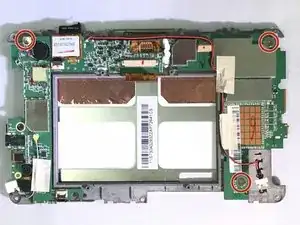
    • Remove the three screws that are 2.0 mm in length and have a 5.25 mm head width with a Phillips #00 screwdriver.

  9. vmLNxeoVV4hMhrUO
    vmLNxeoVV4hMhrUO
    nMUnpaEVnuySeEk4
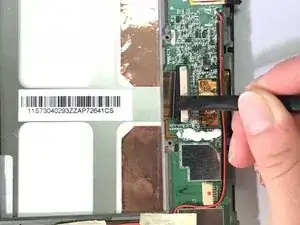
    • Use a spudger to remove the plastic piece securing the zero insertion force (ZIF) cable connector.

    • Use tweezers to grasp the ribbon cable, then pull the cable to disconnect it from the device.

  10. RYMgXtwDHUNk55SD
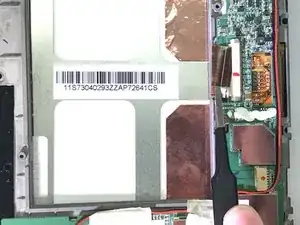
    • Locate the black electrical tape strip on the side of the device.

    • Gently remove the tape from the device using the tweezers.

  11. yMTuqwJjcmPQITjx
    yMTuqwJjcmPQITjx
    me1Y4plloHxE3DQE
    jYVMBcZrueKZmWse
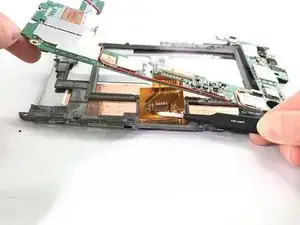
    • After removing the electric tape, gently lift up the green control panel.

    • Taking the tweezers, remove the ribbon cable from the control panel.

    • Once the ribbon cable is removed from the panel, the display should separate with ease.

  12. fRkJQTtYbcM6WLUf
    fRkJQTtYbcM6WLUf
    UMdALSjW3oH1tCJ3
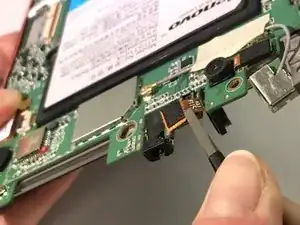
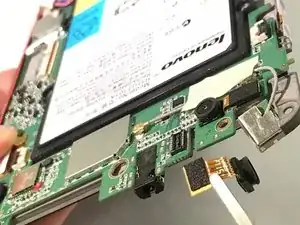
    • Using the tweezers, pull and remove the front camera component.

Conclusion

To reassemble your device, follow these instructions in reverse order.

Katherine Enders

Member since: 18/01/17

445 Reputation

0 comments