Introduction

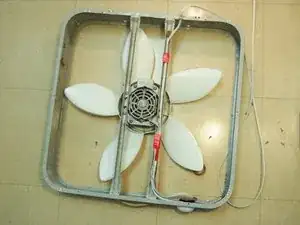
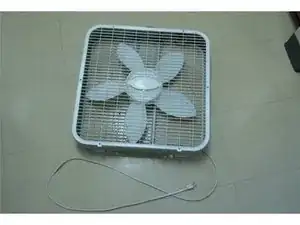
Over time, the wire that runs up the back of the fan behind the blades may come into contact with the blades, and become damaged or severed. This guide is meant to show how to repair the damage.

  1. i5wjlrg4fPpi5Q3K
    i5wjlrg4fPpi5Q3K
    DCX3WDCQcEHdTiGM
    CKCZUeZlEbTZIKSf
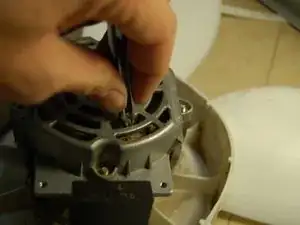
    • Make sure the fan is unplugged.

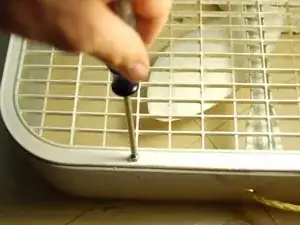
    • Unscrew the 6 screws on the front of the fan.

    • Remove the face plate.

    • Flip the fan and repeat for the 6 screws on the back. They are in the same position as the front.

  2. gVPJdktOlucPxjug
    gVPJdktOlucPxjug
    fno3DclejZERd3dZ
    • Unscrew the screws attaching the motor/blades to the frame.

    • Unscrew the screws attaching the plastic frame to the motor.

    • The blades cannot be removed from the motor.

    "The blades cannot be removed from the motor."

    Incorrect. The moulded plastic fan blade can be removed fairly easily.


    Once the fan's plastic grills have been unscrewed and removed, grasp the round centre of the daisy-shaped fan blades and gently pull it directly away from the motor shaft. It can also be pushed off from behind, once you get it started. Note that the motor shaft has a flat edge along one side that corresponds with the shape of the hole in the plastic fan blade part. These need to be re-aligned before (gently) pushing the fan blade back on to the motor shaft when re-assembling.

    Over time, airborne particulate accumulates on the fan blades' edges and inside the unseen hollows at the back of its round centre, which faces the motor. The fan's grills also grime up, so it's good to take all the plastic parts off to clean them occasionally. I power wash them with hot water.


    Note: Re-posting this comment with minor edits after it was mislabelled as 'spam' and deleted by the site's robot earlier .

    ian_c -

  3. hgnlCwmFnjVdOVXM
    hgnlCwmFnjVdOVXM
    RWWqH4X2flJUPh2N
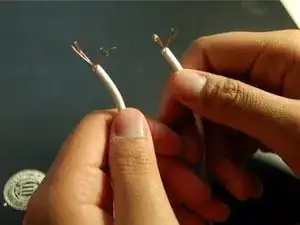
    • Strip the wires using wire strippers.

    How do you do that?

    spectators turner -

  4. SWJOKDy4lt4FhWOk
    • Twist the ends of the wire together

    • Place wires in soldering kit arms.

  5. eidlKWxUyDSmKMqM
    eidlKWxUyDSmKMqM
    1IWbnD42R4uttPJh
    • Plug in the soldering iron.

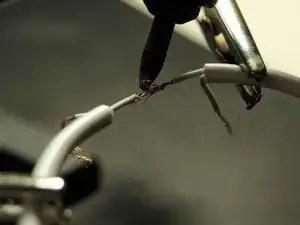
    • When the soldering iron is hot, solder the wires together.

    • Place the tip of the soldering iron on the wires directly.

    • Place the solder on the wire.

    • Remove the solder and soldering iron from the wire

    • Repeat this step with the second wire.

    • Soldering irons are very hot!

  6. HIOKS2Qr1HLZuHui
    HIOKS2Qr1HLZuHui
    BBfSbQUWSad4KiyO
    QEaH4xLbAQMU4y4G
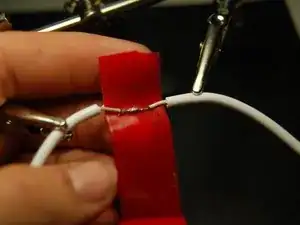
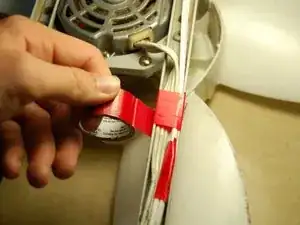
    • Use electrical tape to insulate the wires.

    • Wrap the tape around each wire.

    • Wrap tape around the outside of all of the wires.

    • Make sure to completely cover any exposed wire.

  7. xGRamoLeIsJefKoM
    xGRamoLeIsJefKoM
    RFZw6VaeaOibFNnR
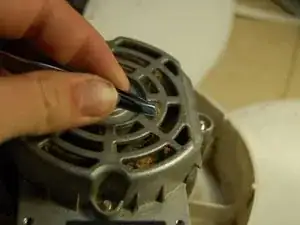
    • Clean out the dust from the blades and motor using tweezers.

  8. M3AlbFa35RVZEePC
    M3AlbFa35RVZEePC
    sLRQOZCwmcXrY5Au
    ryOGCN4bZVYTyvAm
    • Tape wires along the frame to prevent further damage.

    • Put the face plates back on and enjoy!

Conclusion

To reassemble your device, follow these instructions in reverse order.

Zach Emard

Member since: 29/09/15

227 Reputation

7 comments

Any tips for replacing the "Blue Plug" fuse after it's mysteriously blown in a Lasko box fan?

https://www.amazon.com/fused-safety-Lask...

I could hillbilly wire up a new plug to minimize the wire work, but don't want to start a fire either.

Zac Appleton -

I would also like to know how to replace the plug end after the non-replaceable fuse inside the plug is blown.

Gung Ho -

I don't know bout you but I was able to “pop" my fan blades right off of motor. Now I'm just going to replace plug end and see if it'll work since fixing wires didn't help.

(Yep found fuse was blown. Why would they make the fuse non replaceable when they eventually blow? Wonder how many fans people have thrown out all because of a blown fuse??
Steff Lusher -

Not one thing worked

zakkerycastine876 -

So can i replace/wire on different plug?

J Case -

Many fans made today are designed to last about a year or two depending how long you use it and under what conditions. Fans built 50-years ago had oil ports which allows you to periodically to oil the motor. If a fan is kept clean and lubricated regularly it will last a long time.

If you disassemble most fans and look into the bearing cup, you will see foam rubber or a small piece of felt. Older fans used felt ro fully pack the bearing cup. If you kept the felt moist with oil your fan life will increase.

Japan made fans were the best. They had oil ports. Japan then started to have their fans made in other asian countries. Then oiling became impossible. Thus the life of these fans were shortened.

Alvin Nip -

I've fixed a pile of these. For cord repair I use insulated red crimp solder-less connectors. I wouldn't rely on electrical tape since it is prone to unwrap over time due to heat. the cords are held in place by gobs of hot melt glue in the fan supports. A heat gun softens this quickly for removing and re setting the wire. I do my splice between the two gobs of glue the fans come with. Regarding the in plug fuse. Christmas lights have the same plug with a replaceable fuse. Or add an inline fuse inside the fan and use a normal lamp cord or inexpensive extension cord for the repair. These fans are not grounded so if you have a stray piece of wire strand sticking out or the splice is not well insulated the steel box could become electrified causing a shock hazard. for added safety I also use heat shrink over the already insulated butt-splice connector.

John Fagan -