Introduction

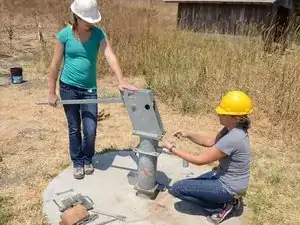
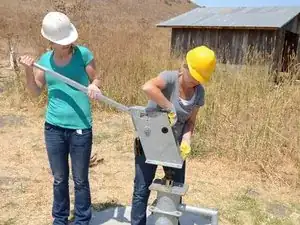
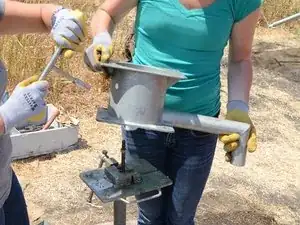
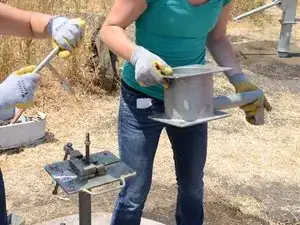
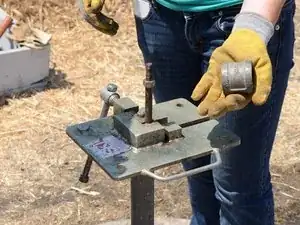
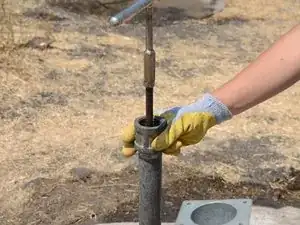
This guide will show you how to replace the riser main with the help of a tripod.

The riser main can, alternatively, be replaced using lifting spanners, but a tripod allows the process to be done by two people. Still use caution when using a tripod.

  1. knxaBegnqXhMVOJP
    knxaBegnqXhMVOJP
    6FLXjZRrK3VCdh52
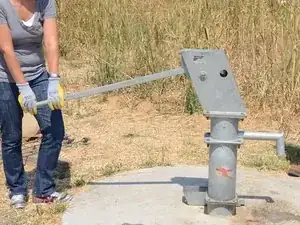
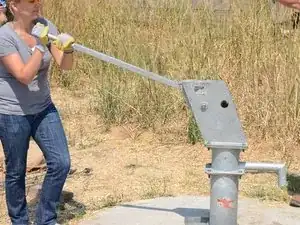
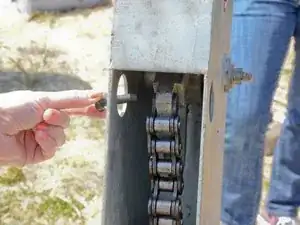
    • Before performing any repairs, perform a water test on the pump by raising and lowering the handle a full 40 strokes. A properly performing pump will yield greater than 10 liters.

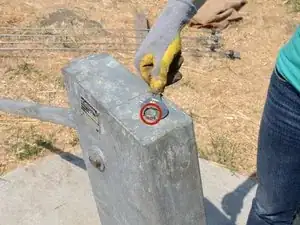
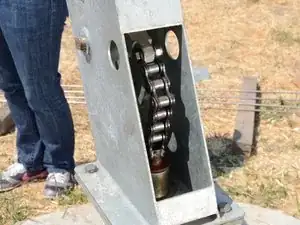
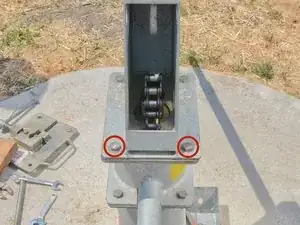
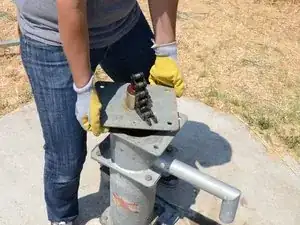
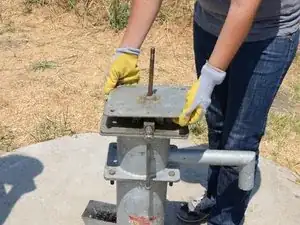
    • Remove the hex head bolt from the top of the access door on the pump head.

    • On reassembly, this bolt should be hand-tight.

  2. kc2lU4ebqKFBw1qN
    kc2lU4ebqKFBw1qN
    RnQHnIhOOpsDGOxf
    xOfQglAwmagVWqOA
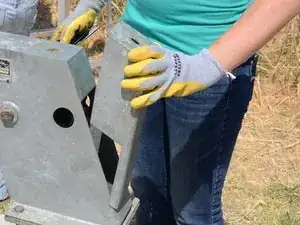
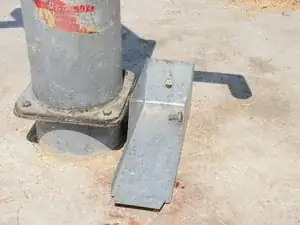
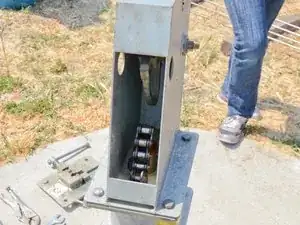
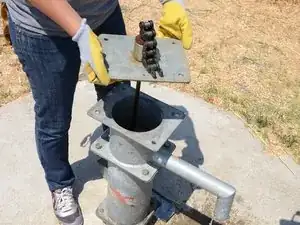
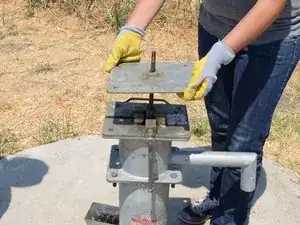
    • Pull the access door straight up off the pump head.

    • Store the access door in a sanitary place to prevent contamination.

  3. JoFFylEdtWmtoaVd
    JoFFylEdtWmtoaVd
    EWeXySTTDWTlrIdC
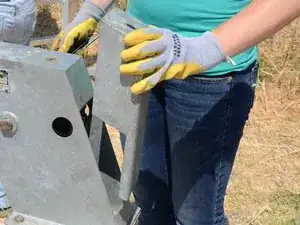
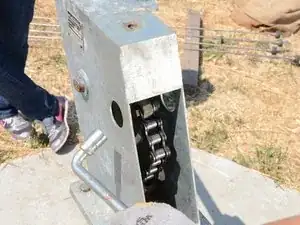
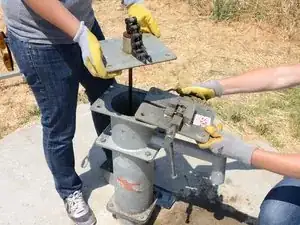
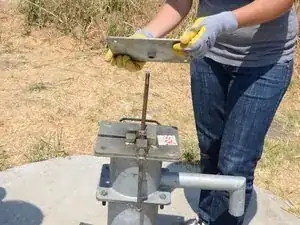
    • The access door has a tongue that fits into the base of the pump head.

    • The access door makes a convenient tray to hold nuts and bolts during the disassembly.

  4. ZLyVQlSriGIPKxlb
    ZLyVQlSriGIPKxlb
    cE4kCkHEeyGF2Z33
    dFnMSifarrKBA2Py
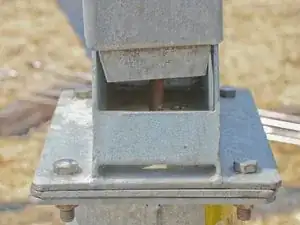
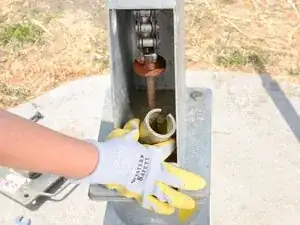
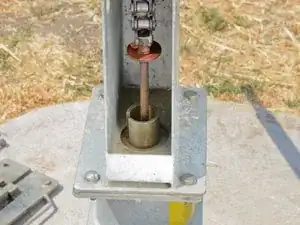
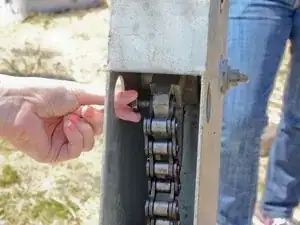
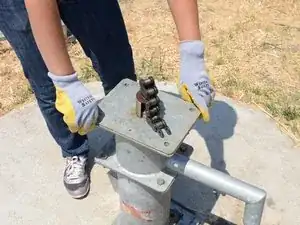
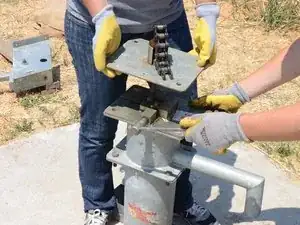
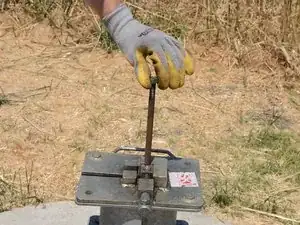
    • Place the spacer collar around the pump rod below the raised chain, with the beveled side down, and the flat side facing up.

  5. jmjPoMTClufyYHRg
    jmjPoMTClufyYHRg
    ilaDGuKR5gNU4oXh
    otydbJoQoRkXb2Eb
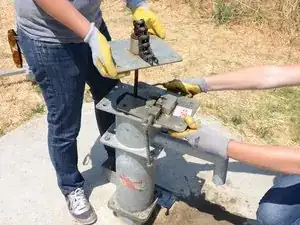
    • The following procedure requires two people. If you attempt to do this alone, you risk injuring yourself and damaging the pump.

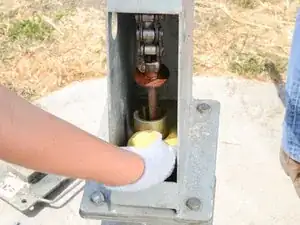
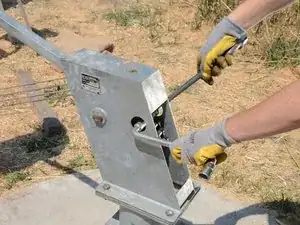
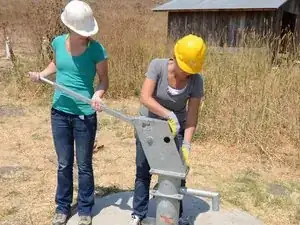
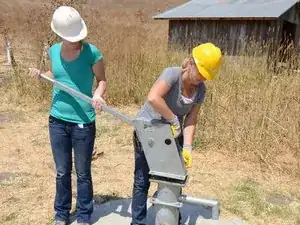
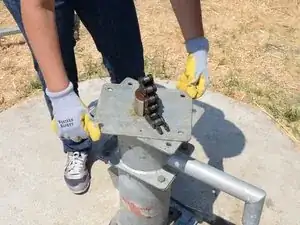
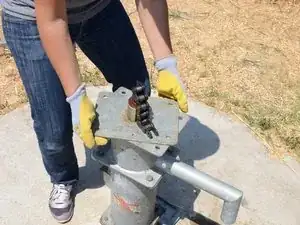
    • Lift the pump handle until the base of the chain comes to rest on the spacer collar, and the chain is slack. Hold the handle in this position while the chain is being detached.

  6. nganIEDqQwYTW1bG
    nganIEDqQwYTW1bG
    fDEoPsAF4IGJN1hN
    UOEYfclHQGql4MKv
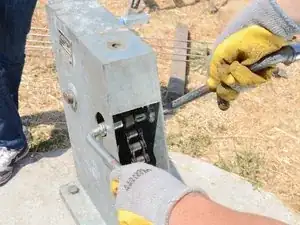
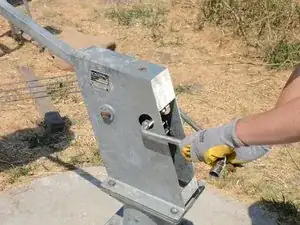
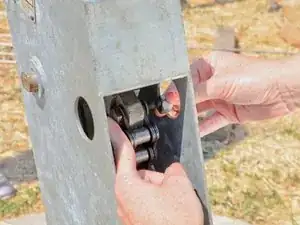
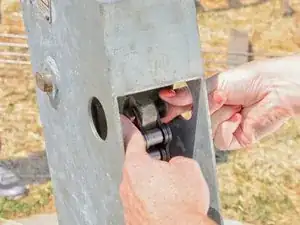
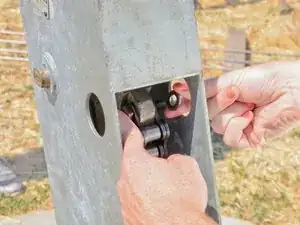
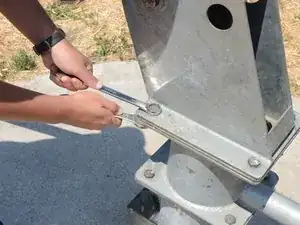
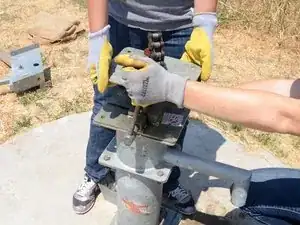
    • Using the two access holes, place an angled socket wrench on the bolt and nut attaching the chain to the pump handle.

  7. wMxHBO5NN4iLT6W2
    wMxHBO5NN4iLT6W2
    yt3EcteQG1QO5x6M
    yWTHPjfWm1A5blFC
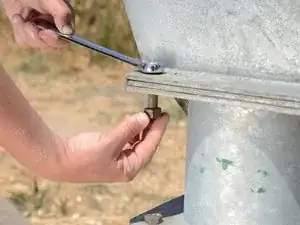
    • Hold the wrench on the bolt stationary.

    • Loosen the nut.

  8. BbMrLL1NYZ1Py1OV
    BbMrLL1NYZ1Py1OV
    rGRfQYBIxUvRieBY
    CL2VfUlxpEkiFZ4a
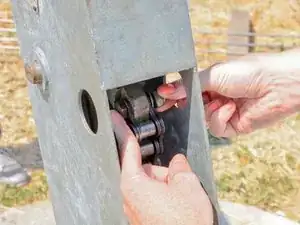
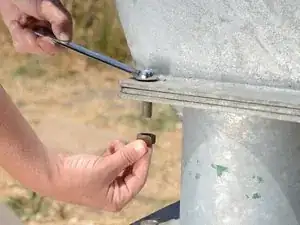
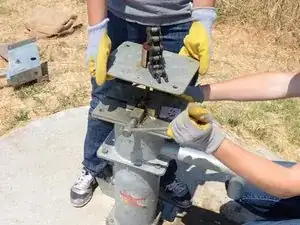
    • Remove the nut from the chain bolt.

  9. L2PxN3LCJESbIObN
    L2PxN3LCJESbIObN
    xsjVCgKRRRdTMRDR
    • Remove the washer from the chain bolt.

  10. NqcotAWFnyxiFXwx
    NqcotAWFnyxiFXwx
    h24eMFUR4mQ5JwnC
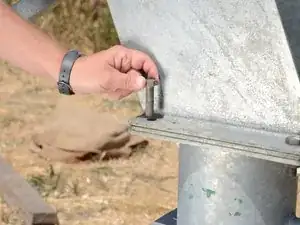
    • Remove the chain bolt.

  11. tXEBpJUxjYvmSfIq
    tXEBpJUxjYvmSfIq
    eYRLASOYRcjpDlvp
    udcSSChydYn2GRbd
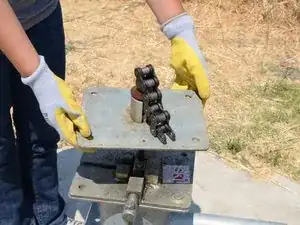
    • Pull the top of the chain straight off of the pump handle.

  12. GJxwqLAEANxLtUXX
    GJxwqLAEANxLtUXX
    UTEf23lXEmFQyDUK
    Ex3gCFs3NbCTTE3g
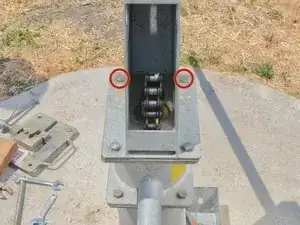
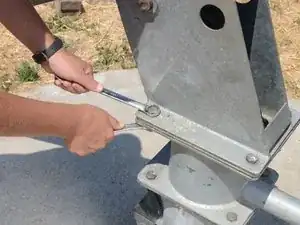
    • Remove the two bolts from the handle side of the pump head.

    • Use one wrench on the bolt and another on the nut beneath. Hold the bolt stationary and loosen the nut.

  13. HhUh4mhCk1JWbNnY
    HhUh4mhCk1JWbNnY
    M4aJhE4fVSbuF5TM
    oITGrcZ5ybGfC4OD
    • Remove the two bolts and nuts from the handle side.

  14. DNvokHC6LZoMB5rR
    DNvokHC6LZoMB5rR
    LDlWCWKQQWSDCl1G
    • After removing the two handle side bolts, have your partner support the weight of the handle.

    • Remove the two remaining bolts in the same fashion.

  15. UY3elijHKIGTfwdq
    UY3elijHKIGTfwdq
    bG4MLdoJ5APVVpX6
    fbJKXe55tW5KpGXl
    • Lift and remove the pump head from the pump.

    • Store the pump head in a sanitary place, preferably above ground, to prevent contamination.

  16. 4bXYCZRoyJ1fdPAG
    4bXYCZRoyJ1fdPAG
    FIZJFX1hlIP1S4Ht
    • Slightly twist the head flange, until the corners overhang the top of the tank far enough to grab.

  17. l5ncAlNyKew6FItl
    l5ncAlNyKew6FItl
    NHhWrr2ji4o4YceH
    oBfBvSJsFlltNTho
    • Lift the head flange up about one foot above the tank.

  18. JJRjLRwXUmtHKHdD
    JJRjLRwXUmtHKHdD
    GAERVBviXLAIqf5f
    vbLVIqhYO2YjLHSN
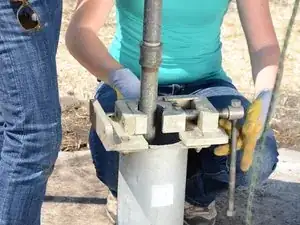
    • Slide the rod clamp around the pump rod, and support it on the tank base.

    • Make sure the pegs in the base of the rod clamp fit into the appropriate holes in the top of the tank.

  19. H1rBYRCAtUKwDFJ6
    H1rBYRCAtUKwDFJ6
    6Efc46MMDgGNPLEA
    • Tighten the rod clamp against the pump rod.

    • Be sure the pump rod is centered within the jaws of the clamp and held securely.

  20. QQXeFxl531QbsLhU
    QQXeFxl531QbsLhU
    gQEluTLutxObYIlX
    • Lower the head flange.

  21. QjMFNmaPcbuLNd3J
    QjMFNmaPcbuLNd3J
    NeKlsiQA35DXGBfj
    GqR1vwoRtvExsrrd
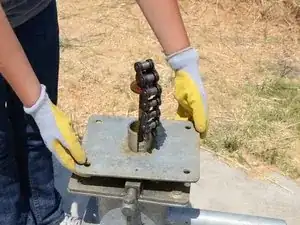
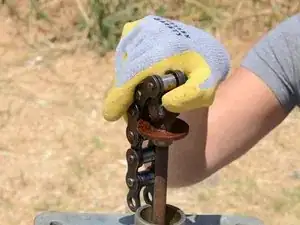
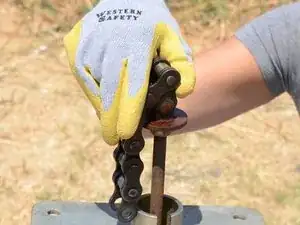
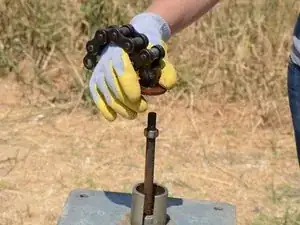
    • Unscrew the chain from the top of the pump rod.

    • Remove the chain.

    • Check the chain for signs of wear or damage.

    • Set the chain in a sanitary place, such as the access door that was previously removed.

  22. YaLSAXawGw2bFbiL
    YaLSAXawGw2bFbiL
    Dbr5r45UTNBYTUr2
    QQIGwoNVi2ILsZJh
    • Remove the chain support from around the pump rod.

  23. Z25OlnRqyEDdHGkS
    • Remove the jam nut from the top of the pump rod.

  24. UOyRNaXVNx3EGYOV
    UOyRNaXVNx3EGYOV
    tLLmcEQEB3lIqDS6
    jjfpiRQscjFZvYJp
    • Remove the head flange.

  25. HPuTxhGOvSkLyJnN
    • Screw the jam nut back onto the top of the pump rod.

  26. dqYgNuq4SgF3gdW3
    dqYgNuq4SgF3gdW3
    41RydIc4kaCGlRSf
    dZ5YYiXgQXr1HJO1
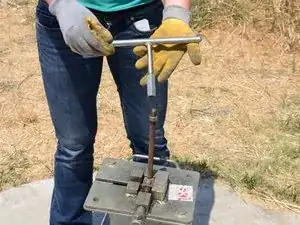
    • Screw a T-handle onto the top of the pump rod. Tighten the T-handle up against the jam nut.

  27. 5JKf3ufOZBD5DIUN
    5JKf3ufOZBD5DIUN
    Qh1uKkFYikF5cDFN
    • Loosen the rod vise.

  28. TP2DgRPq21yEPiDW
    TP2DgRPq21yEPiDW
    VbsxtYd5HQRLvJeX
    KOapMgUNLadvIIng
    • Remove the rod vise from the tank.

  29. LYDG1FyWTmI3kenR
    LYDG1FyWTmI3kenR
    WI5dcik2fKQQjAmK
    ehYiymSMGejMwcJW
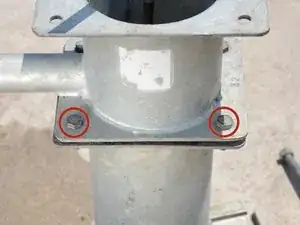
    • Remove the four bolts connecting the tank to the top flange.

    • Use one wrench on the bolt and a second wrench on the nut beneath. Hold the bolt still and loosen the nut.

  30. tCUlgBybXy3g3Dmw
    tCUlgBybXy3g3Dmw
    fZZg5L4jHi2yqBYV
    • Twist the tank 45 degrees in order to get a better grasp on it.

  31. xD3jKEkPuNTDpcXx
    xD3jKEkPuNTDpcXx
    hgA2Chwt1oHVDPYS
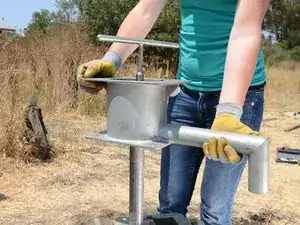
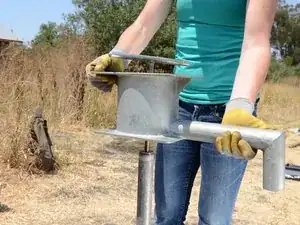
    • Lift the tank straight up, about one foot.

    • The tank is attached to the riser main, and the two must be lifted as a unit. Be careful and get help, as this can be very heavy.

  32. HCepAWGyJCmYAwZv
    HCepAWGyJCmYAwZv
    h6FEGGoaHGXCpqj3
    pHOJv3GJaAotxPmj
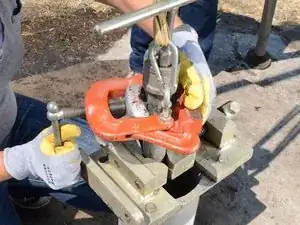
    • Have a third person place the pipe vise around the riser main, on top of the top flange.

    • Tighten the pipe vise securely around the riser main.

  33. P5RGnKPJhJVfSTDa
    P5RGnKPJhJVfSTDa
    w6mywsPJcCXxNDJD
    rxHweXDTn1Ape1sy
    • Secure the pipe vise to the top flange with two bolts and nuts to hold the pipe vise in place.

  34. OAiAR1bmL2Ct33cZ
    OAiAR1bmL2Ct33cZ
    JxaAcUgjUk12kITL
    tS6IQ6UQHeBSqiGW
    • Unscrew the tank from the riser main.

  35. nPIq1udLZUiONTKq
    nPIq1udLZUiONTKq
    CFNJbaRaknS1rEFG
    • Lift the tank up a few inches above the top of the riser main.

  36. RehH6NO4AgHKbxAI
    RehH6NO4AgHKbxAI
    AImIRoEEyNNmJJne
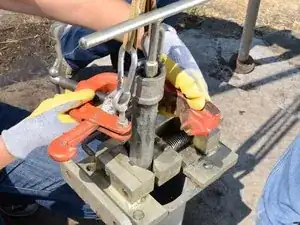
    • Insert the rod vise between the riser main and the tank, around the pump rod.

    • Tighten the rod vise onto the pump rod.

  37. cDO3QIYoDCCHA5oa
    cDO3QIYoDCCHA5oa
    GHrRaaRH1xrbJTLb
    b4L5jKdKTomchYkF
    • Unscrew the T-handle from the pump rod and remove it.

    • Keep the T-handle ready to reattach to the pump rod after the tank is removed.

  38. ZeibGKyuQjXCVTqQ
    ZeibGKyuQjXCVTqQ
    C1r1mU6cxocXlOba
    SIFS4ApnGD3DjRh4
    • Remove the tank.

  39. C2gdyBEHmGg4VdYF
    C2gdyBEHmGg4VdYF
    GGwAhg1kDvXALLr5
    • Place a coupling over the pump rod, on top of the rod vise.

  40. eXQLh5H2CkEMLVH1
    eXQLh5H2CkEMLVH1
    a6gPoVfkTqgZU2yO
    wCibYBuieBTvagiP
    • Reattach the T-handle to the top of the pump rod.

  41. nCtnRckHvaZJSmFJ
    nCtnRckHvaZJSmFJ
    OuMqDgJH6LEQgVUy
    FFrNIlRjc5CVT2fF
    • Loosen and remove the rod vise from the pump rod.

    • The coupling will drop down onto the riser main.

  42. GOsbrClpKS6qWJYE
    GOsbrClpKS6qWJYE
    MD3UOjOoJRimQOIK
    • Screw the coupling onto the end of the riser main.

    • Use a pipe wrench to tighten the coupling onto the riser main.

  43. jLJyDFCK3N2gLYdb
    jLJyDFCK3N2gLYdb
    QpaKK1F4NHdZecVT
    O2xXkQ1Y6heITAAx
    • Lower the tripod pipe vise to the top of the riser main.

    • Close the tripod pipe vise around the riser main, and lock it shut.

  44. sbeLEbmieMHbv1WP
    sbeLEbmieMHbv1WP
    DGxEaeKBEI6DWYjZ
    • Tighten the tripod pipe vise.

  45. DTSRHSmQfBYQaAlJ
    DTSRHSmQfBYQaAlJ
    SkOhLFCDwKpLNkgv
    • This procedure requires an important communication dialog between the rope operator and the pipe vise operator.

    • The rope operator's job is to pull hard on the rope to take up the slack, and announce that they've "got it," to let the vise operator know that they're holding the weight of the riser main.

    • The vise operator will then announce "loosening," and loosen the pipe vise.

  46. ZBfEZ2wGnAmPt3Pa
    ZBfEZ2wGnAmPt3Pa
    NhNEO3LJNsD4OWsZ
    A1WfpnihLFc5AWmW
    • With the pipe vise loosened, pull the riser main up out of the well.

    • Pull only as high as the tripod vise operator can comfortably reach.

  47. Jmqp2QIXfHLtXOXG
    Jmqp2QIXfHLtXOXG
    ePKsbIXuyqwwYGCk
    AWPUCvPhxlkM6XRe
    • The pipe vise operator then announces "tightening," and tightens the pipe vise.

    • It is now safe to loosen and remove the tripod pipe vise.

    • Be sure to loosen and then fully remove the tripod pipe vise from the riser main. Sliding it down the riser main will scratch the pipe, creating dangerous sharp grooves and causing rust.

  48. 2DCBSlOgYVSPrVnH
    2DCBSlOgYVSPrVnH
    xNuZdg42ktnBfgLH
    • Lower the tripod pipe vise down to the bottom of the exposed section of riser main pipe.

  49. Dp2qqQkYra1efVn4
    Dp2qqQkYra1efVn4
    up3pTnCAVCf5CiDk
    ducWnACL4dLm3Qjs
    • Secure the tripod pipe vise to the riser main pipe and tighten it securely.

  50. NSsWGNLPYuthNmTY
    NSsWGNLPYuthNmTY
    OHMPolvNLifYvMSQ
    3sWd1Y3OvUPAGCLJ
    • Repeat the lifting procedure: loosen the pipe vise and pull on the rope to raise the riser main another few feet.

  51. he1WEEWSXHpeBuuj
    he1WEEWSXHpeBuuj
    ZJ3cFPJEUrW3s1gr
    nDrHpPISJ4ESG3Ag
    • The tripod has an indentation built into its top to guide the riser pipe.

    • As you're raising the riser pipe, guide it into the indentation.

  52. PDnYQCtJqlONywBu
    PDnYQCtJqlONywBu
    echuDTRQIMME6yQV
    RKynUhhq2MUWp5Zl
    • Lift the riser pipe until the first coupling clears the pipe vise.

    • You will need to open the pipe vise wider to accommodate the coupling.

    • Once the coupling is through the pipe vise, tighten the pipe vise.

    • Be sure to raise the riser main pipe high enough that you can attach the tripod pipe vise to the section of pipe beneath the coupling.

    • From here we have pictures for loosening a coupling with the tripod?

Conclusion

To reassemble your device, follow these instructions in reverse order.
Andrew Optimus Goldheart

Member since: 17/10/09

505446 Reputation

0 comments