Introduction
If your lens cover does not open or close properly, there might be several reasons for that. This guide is primarily for defects caused by dust, sand, salt, etc. It is possible that the same guide will work if it is caused by shock-damage, but be careful. If there are broken parts is the lens, this guide could cause them to fall off and worsen the condition.
Tools
-
-
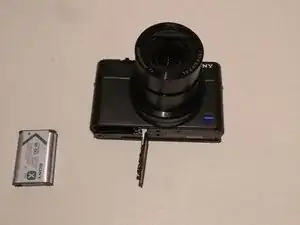
Turn on the camera so the lens comes out. With the lens extended, remove the battery so the camera will not shut down.
-
-
-
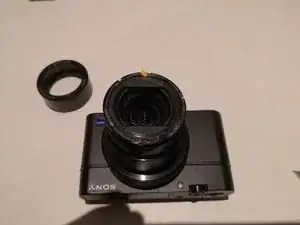
Usa a thin metal blade of some sort to loosen the metal cover from the tip of your lens. It is attached with an adhesive tape. Move the blade gently around the lens, it should come off quite easily. If you have problems, consider using a hairdryer or heat-bag to heat up the lens cover.
-
When you have gently moved the blade all around the lens a couple of times, gently tilt the blade, forcing the cover away from the lens.
-
Note the direction of the lens cover for the reassembly. There is a tiny notch on the bottom of the cover, so it will only fit this way.
-
-
-
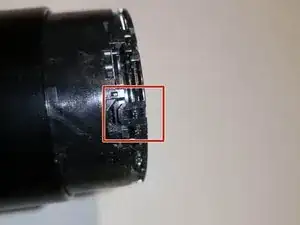
Gently lift up the four clips holding the lens cover in place by using a nail, or a plastic opening tool.
-
Release all four clips before you try to lift off the lens cover.
-
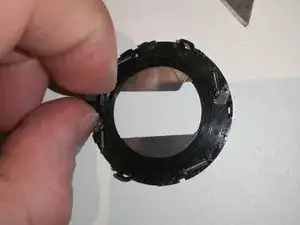
Note that the long plastic tip on the cover should fit in the whole marked orange when reassembling the lens.
-
-
-
Now it is time to clean the lens cover. First use a brush of some sort to brush away any visible debris. I use a lens pen, but any soft, clean brush will do. If you have some canned air etc, you can use that to clean up the cover.
-
Personally i used a straw to blow away debris from the hidden parts of the cover. If you choose to do so, be aware that the humidity from your breath will condense on the cover.
-
to properly clean the curtains, you need to access them. By squeezing the plastic tip towards the clip marked with arrows the curtains should close. By repeatedly squeezing and letting go while blowing, the rest of the debris should come loose and the curtains should move freely.
-
-
-
When the lens is already fully exposed, this would be a good time to clean up the lens as well, using a lens pen or a cloth.
-
Using a brush to clean around the lens while holding the camera lens down will remove some dust and debris that has been stuck there for a long time.
-
To reassemble your device, follow these instructions in reverse order.
3 comments
Thanks for this guide!
I was able to replace the lens cover with a new one I got from e-bay for about $25.
Thanks so much for this guide. It solved the sticking lens cover problem that had stopped me using the camera.
I tried returning it twice under warranty without solving the problem, and it took a bit of Googling to find this.
much appreciated!
I never could complete Step 2, Removing the Metal Cover. BUT -- apparently sliding the blade around did something that helped. I've put the battery in, and the stuck lens cover is now unstuck! We'll see how long it lasts...


