Introduction
Mac OS Extended Journaled (also known as HFS+) is the default file system that has been used on Mac computers since 1998, and is used as the default file system on mechanical drives and hybrid drives.
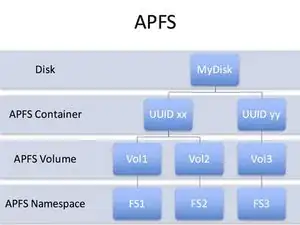
However, since the introduction of more advanced file systems APFS file systems became the default on newer models of Macs.
Why do people choose HFS+?
Pros of Apple's HFS+
- Supported on all versions of Mac OS X and macOS
- Encrypted volumes are accessible by any version of Mac OS X and macOS
- Supports Fusion drives
Cons of Apple's HFS+
- Concurrent access of the file system by a process is not allowed.
- No snapshots
- No support for dates beyond February 6, 2040
- Limited native file support for other file systems
- Timestamps do not use the nanosecond standard.
- Checksums for data integrity is missing
Why do people choose APFS?
Pros of APFS
- Allows for clones or multiple copies of the same file, with only changes stored as deltas, which reduces storage space when making revisions or copying files
- Can create point-in-time snapshots
- Full-disk encryption with single or multi-key encryption for added security
- Uses checksums for data integrity of metadata
- Metadata corruption prevention due to creating new records instead of overwriting existing ones, which can become corrupt due to system crashes
- Increases performance on some devices by eliminating the need to write changes twice compared to HFS+ Journaled file systems
- More efficient management of storage typically yields additional free space.
Cons of APFS
- Checksums are only for metadata integrity–not user data
- Compression is not available.
- Encrypted volumes can only be accessible by other computers running macOS High Sierra
- Does not support Fusion drives
- Cannot utilize NVRAM for data storage
Important notes before starting
While converting your drive shouldn't affect your files, there are the incredibly rare exceptions that may occur that could endanger your files. Therefor, it is highly recommended that you create a backup of your drive to prevent data loss.
It is also worth noting that this process might take a while depending on the size of the drive. A drive that is only 256GB won't take nearly as long as a drive that is 3TB large.
-
-
As a preventative measure, it is highly recommended you create an external backup drive to backup your files to
-
-
-
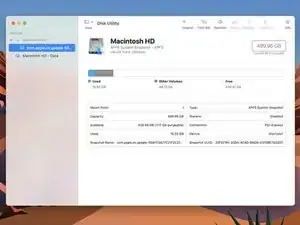
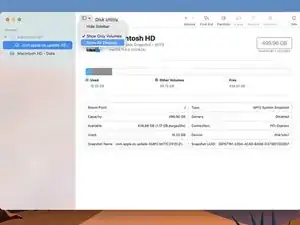
Open the Disk Utility application and click the View option in the left hand corner.
-
From the drop down menu, choose the Show All Devices option from the list.
-
-
-
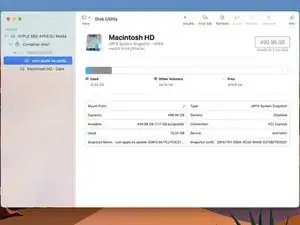
You should see a list of all your containing drives within each of their respective volume. Select the drive you want to convert and click the Partition button from the buttons in the upper right hand side of the window.
-
-
-
Select Mac OS Extended (Journaled) from the "Format" dropdown menu.
-
Make sure the settings are correct, and click the Apply button.
-
Congratulations! You have successfully converted your drive to APFS. As stated previously, your files should have not been touched, always make sure everything is correct.


