Introduction
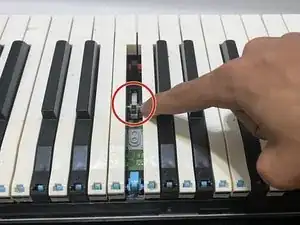
A jammed or weighted key may disrupt or ruin your piano playing. This guide demonstrates how to fix a stuck or sticky key on your Williams Allegro III digital keyboard.
It is common for a key on a digital piano to get stuck or sound softer. Electronic keyboard keys may stick or become unresponsive due to dust or grime buildup underneath, or if a key becomes misaligned. In some cases, the key might even become bent.
Before you begin this repair, unplug the keyboard from the power source and make sure the keyboard is off.
It is best to avoid drinking or eating near your keyboard as crumbs and liquids could contribute to the problem.
Tools
-
-
Unplug the keyboard from the power source.
-
Flip the keyboard over so the bottom is facing up.
-
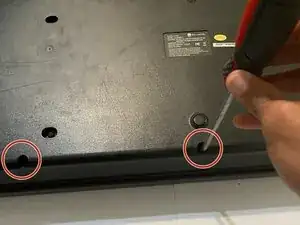
Use a Phillips #0 screwdriver to remove eleven long screws from the back case.
-
Use a Phillips #0 screwdriver to remove 27 short screws from the back of the keyboard.
-
-
-
Check the underside of the key(s) for a build-up of dust, dirt, or crumbs, and brush it off using an anti-static brush.
-
-
-
Check that the hammer (gray piece) and clip (blue piece) are in line with each other.
-
If the rubber pad is loose, misaligned, or falling off, it is important to superglue it back into place similar to how the other key pads look.
-
-
-
Use your fingers to carefully bend the key alignments until they are parallel with each other.
-
-
-
Plug the keyboard back into the electrical source and test the sound of the key you are fixing.
-
To reassemble your device, follow steps 7 and 9. This guide can be used for multiple key repairs as long as you repeat the necessary steps for each stuck key.
One comment
@jaydons82612 I've noticed your phone number on your about page. Sharing is cool but oversharing can lead to a lot of unwanted Spam and phone calls. You do want to do yourself a favor and remove the phone number. BTW, cool guide


