Introduction
This guide will walk you through the process of replacing a faulty ventilation fan in your HP Omen 15-CE0XX laptop. A malfunctioning fan can cause overheating and system instability, leading to potential permanent damage to your device. It is important to take appropriate precautions before beginning the fan replacement process to ensure a successful outcome.
Before starting, make sure to power down your laptop completely and disconnect from any external power source. It is recommended to back up your data and review any troubleshooting steps to ensure that the fan is indeed the root cause of the issue.
Throughout the process, you will need basic tools such as screwdrivers, prying tools and a replacement fan that is compatible with the HP Omen 15-CE0XX. You should follow the instructions closely and handle the internal components with care to avoid any damage.
Once you have completed the fan replacement, it is important to test your laptop to ensure that it is running correctly and without overheating. This guide is intended for individuals with basic technical skills, but if you are unsure or not confident in your abilities, it is always best to seek professional assistance
Tools
Parts
-
-
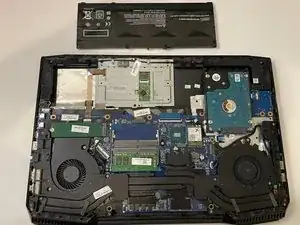
Use a plastic opening tool to gently separate the bottom cover from the main chassis, and pull the cover upwards.
-
-
-
Unscrew the four 5.5 mm screws that connect the battery to the main system, and gently detach the battery.
-
-
-
Remove the trunk outlet for the replacement fan. This is done by unscrewing the three 5.5mm screws on the trunk outlet and then sliding it outwards to remove.
-
-
-
Use a Phillips #00 screwdriver to unscrew the five 5.5 mm screws that secure the bracket to the frame.
-
After all screws are loose, gently lift the bracket upwards.
-
-
-
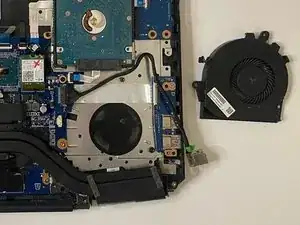
Carefully pull the fan out, clean the dust if required.
-
Finally, you can now replace the faulty fan with the new fan by following the above steps in reverse order.
-
To reassemble your device, follow these instructions in reverse order.


