Introduction
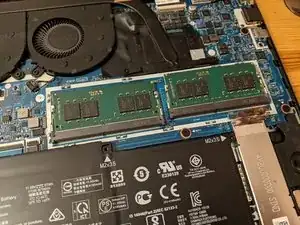
HP ENVY x360 15-ee0003ca comes with 8GB of ram. For those that need to replace this or upgrade it this guide will help. Other parts of the repair process can also be seen, such as replacement of the battery and SSD.
Tools
Parts
-
-
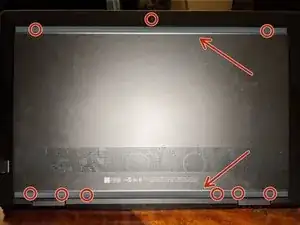
Remove the rubber strips on the bottom of the laptop. These will need to be replaced so make sure you have replacements before starting. The part number is L93198-001 but I needed to contact support for a replacement.
-
There may be a transparent piece of adhesive that will also need to be removed. Remember to use plastic tools to avoid scratching the plastic cover.
-
The screws are philips M2.0 and Torx5 M2.0.
-
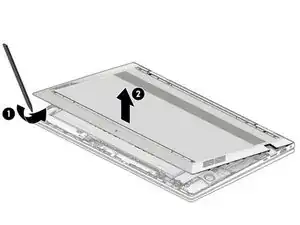
With all 6 philips screws and the torx screw removed, use a plastic pick to separate the bottom cover from the case. There are small plastic clips that need to be popped open, be gentle.
-
With the pick move around the entire cover separating it then simply lift the cover off.
-
-
-
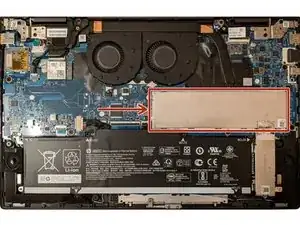
The RAM/memory is located under the metal shield.
-
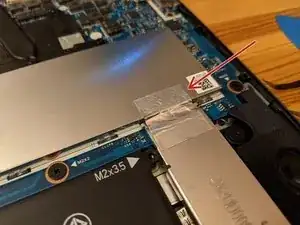
Remove the metal tape, being gentle to not tear it, leave it attached to the other shield.
-
Pull up the shield using a plastic tool or other sharp object. There are small metal clips all around the shield, these don't need to be touched, gently force will pop the cover off.
-
-
-
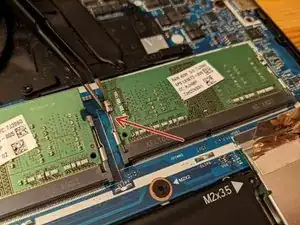
With the memory exposed, actuate the clips on either side of the modules. The stick will pop free.
-
Remove the sticks and put them somewhere safe. Put the replacement sticks in as the others were found.
-
Use gentle downwards pressure until the clips make a sound and the RAM is all the way down, as the other RAM was.
-
-
-
Replace the cover, making sure to place it back into the small metal clips
-
Put the tape back so that the shield is grounded.
-
Place the cover back onto the device and using gentle pressure, go all around the edge pushing until the cover clips back to the case.
-
Once the cover is clipped back to the case, put the 9 screws back in.
-
Then using the new rubber feet, peel off the adhesive and place them in their grove.
-
To reassemble your device, follow these instructions in reverse order.
