Introduction

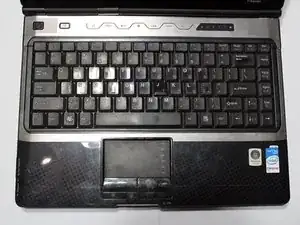
This repair is needed in situations where your keyboard stops working. If you have checked that all the keys are properly seated and that there is nothing blocking key movement, replacing the keyboard should correct the issue.

  1. 5TqvjXHP1QgSNVQh
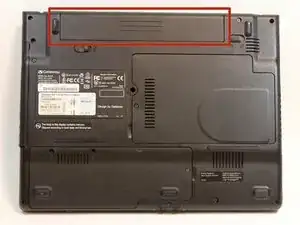
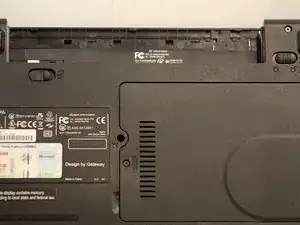
    • Turn the laptop upside down and position it as shown in the image.

  2. N2NrZeXSfNttXMut
    N2NrZeXSfNttXMut
    WVBncLF5U2STH1nJ
    Ypcdv4wPqOOPMprR
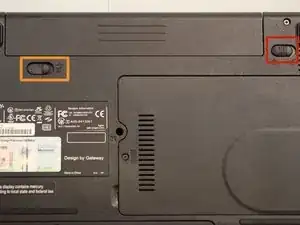
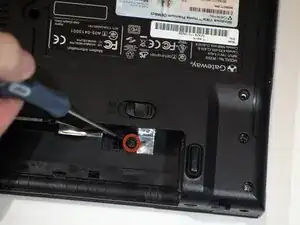
    • Slide the locking switch towards the open lock picture.

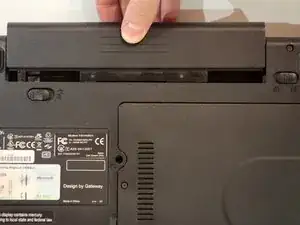
    • Hold the release switch in the unlocked position while simultaneously pushing the battery away from the laptop.

    • Once the laptop is disengaged, completely remove the battery from the laptop.

  3. paIlOUBUKgFFYoY5
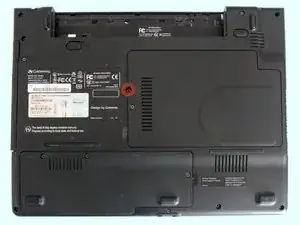
    • Remove a 4mm Phillips #0 screw just beneath the battery that holds the speaker cover panel.

  4. XqnaRv1vXcAiCjmX
    XqnaRv1vXcAiCjmX
    THuX3MoHfvhXHIIk
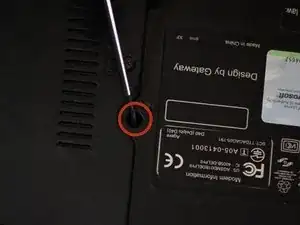
    • Remove the 4mm Phillips #0 screw that secures the keyboard.

    As I mentioned in another guide, seeing the battery in place here is a bit confusing.

    Dan Brown -

  5. 5nAyCqPJEoVmR6gT
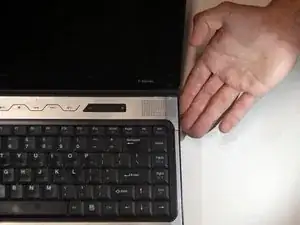
    • Reposition the laptop so that it is upright with the display open.

  6. hqTAnW4XPRpMFbZE
    hqTAnW4XPRpMFbZE
    AIPULqQDYPq5Blpw
    sUhFSkP2fZauD3lV
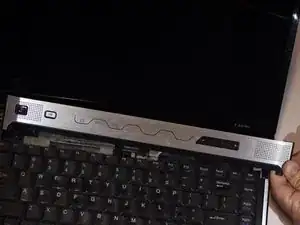
    • Carefully pry up on the right and left sides of the speaker cover panel.

    • The panel has a cable that connects it to the laptop, so do not pull the panel completely away from the laptop. Instead, disconnect the panel and move it slightly so that it does not interfere with the keyboard.

  7. PqjI2uLZeEIU4TAF
    PqjI2uLZeEIU4TAF
    r5F5fFyhcnp41KLQ
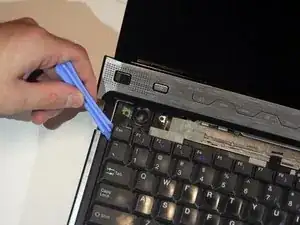
    • Gently pry up on the corners of the keyboard with the plastic opening tool to free the keyboard.

  8. dbAqP5NGtKnAcoY2
    dbAqP5NGtKnAcoY2
    R3DBRUFAI1B6eRKr
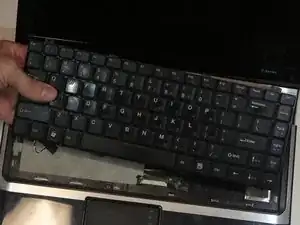
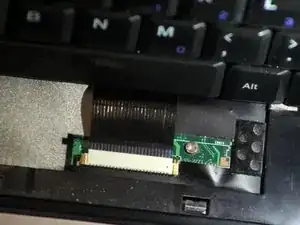
    • Pull on the cord connecting the keyboard to the computer until it slides out.

    • Be careful while removing the cord as it is very delicate.

    Thank you! This is a first time repair for me, and it worked!

    As for step 8, my Gateway W350I has a cable retainer. The first time I tried the repair, the keyboard wouldn't work. Sure enough, the cable got loose after I tried putting it in. On the second attempt (after some research on my phone), I carefully nudged the tabs on the retainer 2 mm away from the connector, put the cable in, and nudged the tabs back into the connector. After the cable was locked, the keyboard worked perfectly.

    JasonMath -

Conclusion

To reassemble your device, follow these instructions in reverse order.

Spencer

Member since: 22/09/14

278 Reputation

One comment

Great guide guys!
Stephan Williams -