Introduction

  1. cEByRpwIKsaV1DDS
    cEByRpwIKsaV1DDS
    4yZmcErLKZdLKMYB
    ODys6KM6tu6TiCXf
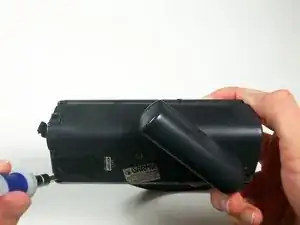
    • Orient the GPS V backside up.

    • With a #0 Philips screwdriver, remove six M2x0.4 black screws on the back of the unit.

  2. CLOeDkSsn1VCXOCL
    CLOeDkSsn1VCXOCL
    G4OMShADUTSGKPMv
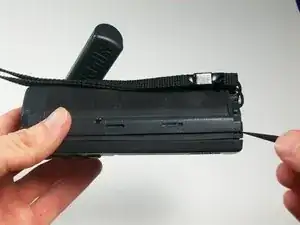
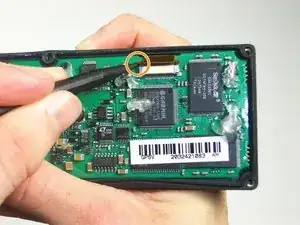
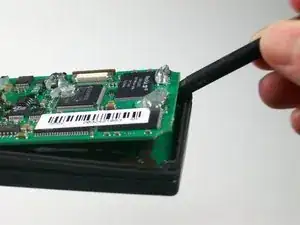
    • With the spudger, gently pry the back plate off the unit starting at the corners.

    • Open the back plate about 35°, use the antenna side act like a hinge.

    • Do NOT remove the back plate all the way, there are cables connected to it.

  3. hBRmhuGoUOJT5cIQ
    hBRmhuGoUOJT5cIQ
    OyGCRmRpZC1GiRDV
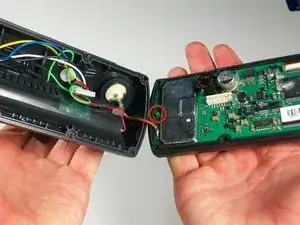
    • Locate the white 8-pin connector on the logic board and disconnect it.

    • Open the device all the way, making sure to not disconnect the brown antenna wire.

  4. RsV1fFPO5ebgS41S
    RsV1fFPO5ebgS41S
    YisQBjMGTGA4bPgH
    • With a #1 Philips screwdriver, remove the silver M2x0.4 screw on the logic board near the brown wire.

    • You may need to rotate the device to get better access to the screw.

  5. 3TX2P1JDk2dpUVJY
    3TX2P1JDk2dpUVJY
    bSOPAib3iUDCbJOp
    e6pkKbCxkbofRbkn
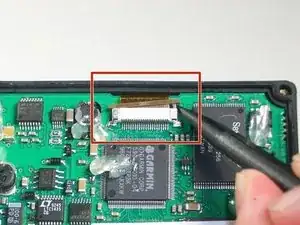
    • Locate the ribbon connector on the logic board.

    • With the spudger, gently apply pressure to both sides of the brown connector lock until it pushes out.

    • With the spudger, gently work the ribbon cable out of the connector until it is free.

  6. JcF4Ec5TOxxDy1uN
    JcF4Ec5TOxxDy1uN
    2oZrgHKrNkOENLhB
    • With the spudger, gently pry out the logic board.

    • Be careful to not disconnect the brown antenna wire as you remove the logic board.

  7. PqK6uwaLpmnajUT2
    • Locate the brown wire connection on the logic board.

    • Carefully apply heat with the soldering iron while gently pulling on the brown wire.

    • It may take some time to heat the flux up before the wire can be pulled out.

    • Pull brown wire free of the logic board.

  8. ZX5OwY4nKbySTnFt
    ZX5OwY4nKbySTnFt
    GWJtE5oNteiYLBiF
    Q5dZj2SQLAxKjOIC
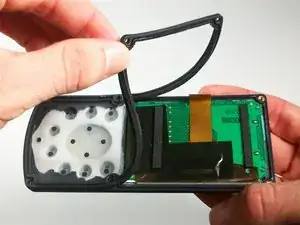
    • Gently pry the button pad off of the front plate.

  9. ikk2ICalQLGHWZjQ
    ikk2ICalQLGHWZjQ
    HIdJkDnSalcc2UFj
    13SMeRhi3ZCDjcit
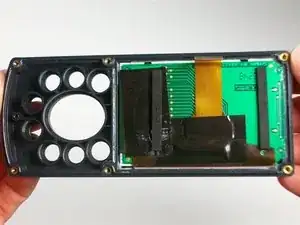
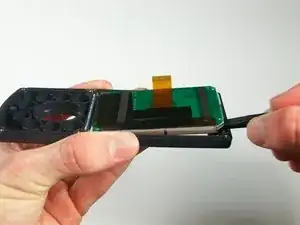
    • Orient the front plate of the device so the display board is facing up.

    • With the spudger, gently work your way around the display assembly.

    • NOTE: The display assembly is composed of three parts and is glued to the case. Be careful to not separate it when prying it out.

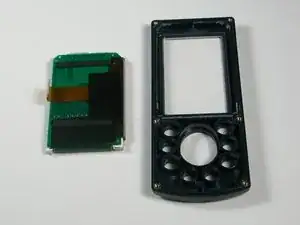
    • Pry the display free of the front plate.

  10. mPLfBmiOnSEkN3d3
    • With the display removed, the front case of the Garmin GPS can be replaced.

Conclusion

To reassemble your device, follow these instructions in reverse order.
Connor

Member since: 23/01/12

194 Reputation

0 comments