Introduction

  1. XRkXdJXHlSBtWNkn
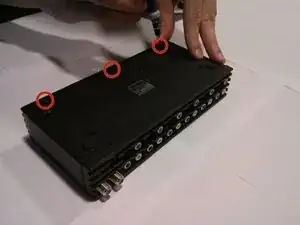
    • Disconnect the DC 6V IN power cable from the device.

    • Remove the three front panel screws on the bottom of the device.

  2. OZLOVjRVOQGVmSKY
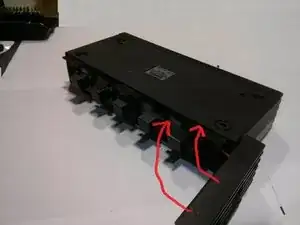
    • Carefully pry off the front panel of the device to reveal the button in need of replacement.

  3. 2tdUGPPhquAISGYT
    2tdUGPPhquAISGYT
    mMtJpFCaRHy1thKX
    • Pull firmly on the button in need of replacement to free it from its housing.

  4. bKWgQvWB6by2NZMa
    • Push the replacement button into its new housing.

  5. WDGtDRXoJfhjJCeP
    • Snap the front panel back into place and re-insert the 3 front panel screws, completing the replacement.

Conclusion

The system selector button should now be working properly.
Jared

Member since: 28/10/13

201 Reputation

0 comments