Introduction
I have a X100S camera, which is completely dead , and a X100 with a bad working iris; iris was moving, but sometimes reamained fully open, and most of the times was fully closed (no autofocus, very dark pictures).
I did not want to tear down the camera from the back, so I decided to try from the front, starting with the dead X100S, as a “safe” trial.
Later I did the same on the X100, and noticed that the lens is the same, also inside.
When I reached the iris, I realized that the motor was not moving correctly, closing the iris a bit more at each shutter actuation. I then decided to remove the iris gear, and fix the iris at around f:4, which is for me a good compromise. DOF is acceptable on this lens, and AF works well.
You can try to do the same if you have a bad working iris, or you can use this guide to clean the lens inside, or change the lens front element, if damaged.
I hope you can find this guide useful.
-
-
Place the camera with lens up on a flat surface , without lens cap. Switch it off, but you can leave the battery inside, it may help later.
-
-
-
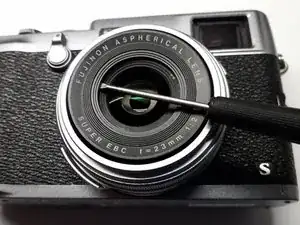
Carefully insert the tip of a small flat screwdriver in the middle of the 6 grooves, as shown in the picture. Turn it a bit, you will feel the adhesive inside , loosing its grip. Move the tip along the whole gap until the ring will be free. Remove the ring. The cap has a notch on the top, so that it can be mounted in only one position.
-
-
-
Remove the adhesive ring shown in the picture, if present. I found it in the X100S, but not in the X100.
-
-
-
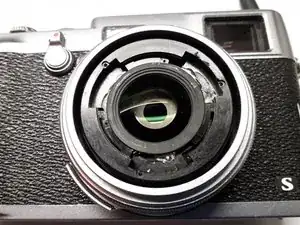
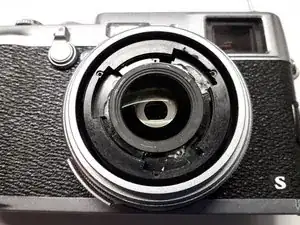
The front lens element is mounted on a bayonet plastic ring. Turn it counterclockwise (it requires some strength, it has some glue inside) and then you can remove it. You can then clean it, if needed. 1st picture is with ring locked, 2nd picture is with ring released.
-
-
-
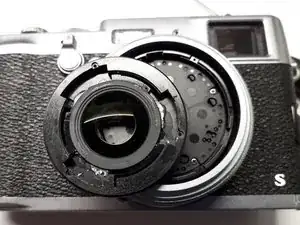
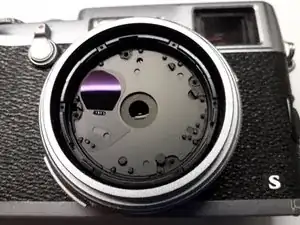
You now see the first cover plate, locked with 4 screws. Here you can act on 2 pins, with a small screwdriver. The left one moves the ND filter. The right one moves the lens curtains.
-
Remove the 4 screws, and then remove carefully the plastic plate.
-
-
-
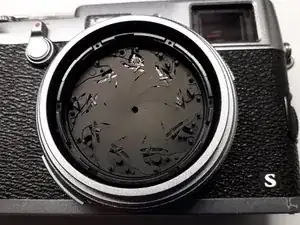
You can see the lens curtain blades . Remove them and then the 3rd shim plate. In the 3d picture you can see the blades (in mounting order; the blade on the top has to be mounted first) and the 3rd shim plate , disassembled.
-
-
-
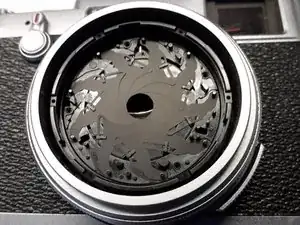
You have now reached the iris assembly. The blades are fixed in position, they do not jump out easily, but be careful when touching them. Look at the 3rd picture, on the top you can see the irs gears. The metal gear is moved by the motor, and it moves a second small plastic gear , and this one moves the iris plastic ring.
-
You can check if the blades are sticky, and if the gears are damaged. You can switch on the camera, and push the shutter button , you will see the blades moving and check if all is ok (don't touch them while moving, they are very thin).
-
If you fully open the iris, you can clean the lens, if needed, without removing the iris.
-
-
-
If you want to lock the iris at a fixed F-value (as I did), you don't need to remove the iris ring.
-
Take out the blade over the gear from its pin, turn it to have space and then you can remove the small plastic gear with small tweezers . Put back the blade on its pin.
-
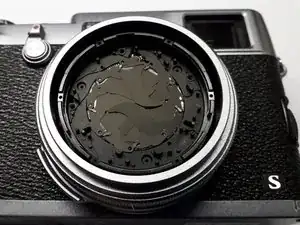
I suggest to lock the iris ring with some small pieces of adhesive tape. You can see 3 of them in the 1st picture.
-
I decided to set the iris at around f:4. The fully open iris (f:2) has a diameter of around 13.5mm, so I closed it to 6.7 mm to get f:4 (I used a digital caliper to measure it) and then I locked the ring with some tape. In the 2nd picture you can see the final result.
-
If you don't need to remove the iris ring, you can stop here , go back and reassemble all parts. If you want or need to remove the iris ring, go further.
-
-
-
If you want to remove the iris ring, you need a lot of care and patience. You have to take out the 9 (!) iris blades from the pins , and turn them as shown in the 1st picture. They stay attached to the ring, but you have to move them very carefully.
-
The ring can come out only if turned fully in one direction, until it stops, then it can come out. I think it has to be turned counterclockwise, but I am not 100% sure. Try both, in case.
-
When you will mount the iris back, you have to insert the blades on the pin. The blades will mix one on eachother, and you wll need several trials to find the correct positins of the blades. Look at pictures in Step 8 to see whch is the final result that you have to get. This step was quite tricky for me, a lot of care and patience is needed.
-
-
-
You can now see the 2 gears, and the bottom of the iris seat. I see no way to go further from this side, and I have stopped here. The inner lens is fully visible and can be cleaned easily.
-
If you decide to lock the iris in a fixed position, you have to remove the plastic gear, so that the motor will not move the iris anymore. See Step 9.
-
To reassemble your device, follow these instructions in reverse order.
13 comments
Super helpful, thank you!
Thanks a lot for this. Very interesting, but too advanced for me..
I have a question about the OVF/EVF lever on the front of my x100T. It has become loose on my camera, in the sense that the top of the lever can be moved ca 3mm out from the body. Is it possible to take off the circular plate on the lever and tighten some screw behind there. Or some other way too make the lever again only move firmly along the body and not out from it? Thanks in advance to anyone answering!
Hello, thank you for looking.
I have not removed this lever, but look at this video:
https://www.youtube.com/watch?v=bVvJ_uAM...
at time 9:31, you see that he unscrews a little screw in the middle of the lever. The "cap" in front of it is missing (also at the beginning of the video), so I think it's just glued in, maybe with adhesive tape. Try to lift up the cap with a small blade, or a small flat screwdriver, I think it will come out, then you will reach the screw. Let me know if it works. Good luck !

