Introduction

If a stepper motor damper becomes worn or damaged it can cause a misalignment of the stepper motor and can cause the belt to slip. Slipped belts can cause layer shifts and other printing problems. Follow this guide to replace the damaged stepper damper.

  1. CSTj1tPtyb4LTExl
    • turn off power

    • unplug from wall

  2. rauMXp66Ycb3pvTw
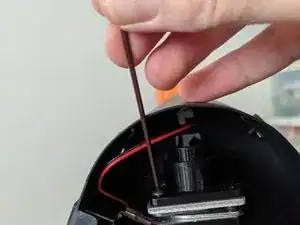
    • Use 2.5mm hex key to remove 6 screws from base of printer

    • save screws for later

  3. 2mctmloxg14FKApP
    • visually inspect all dampers for damage

    • most likely damage is to the rubber section

  4. Rkn5ZjYinC2IGDeB
    • unscrew thumbscrew that tensions the belt

    • save thumbscrew for later

  5. xY4rrfllCQPRdH1S
    xY4rrfllCQPRdH1S
    DMaQOptNNvaPAgjs
    • use 2mm hex key to remove belt cover

    • remove belt from stepper motor

    • use 2.5mm hex key to remove stepper motor bracket from the top side

  6. cAwnyv13aaKtRyeN
    • measure the position of the geared pulley so that you can put it back later

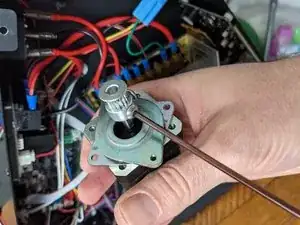
    • use 2.5mm hex key to loosen set screws

    • slide geared pulley off of stepper motor shaft

  7. DrL4D6naRY6coodb
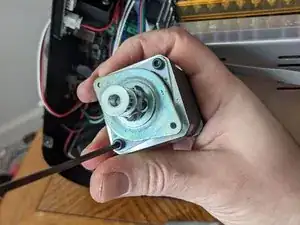
    • use hex key to remove last screw from the stepper motor mount

  8. PE4NRrkO1CtEctBj
    PE4NRrkO1CtEctBj
    jBVYHYRBHGJfFiFK
    e6In4TFCDcKUeBLj
    • use hex key to remove 2 screws holding the damper to the stepper motor

    • use Phillips #1 to install new damper

    • alternatively, use hex key to install new damper with old screws

  9. dB4u2aa2Zjf5mPr4
    dB4u2aa2Zjf5mPr4
    UbsKAjTH6vRYAwAE
    • re-attach geared pulley

    • re-attach stepper motor mount/bracket to the damper

    • Remember the screws you saved when removing the motor mount?

    • re-attach stepper motor bracket with screws from above

    • re-install pulley / tensioner to top of frame with thumb screw

    • re-tension belt

    • finally re-install the belt cover

    • Some people have suggested that this belt cover is not needed. It is possible that you could re assemble with one of the screws left over from replacing the damper to secure the damper to the mount.

Conclusion

To reassemble your device, follow these instructions in reverse order. If you have no screws left over, you win!
Daniel Green

Member since: 08/02/15

1137 Reputation

0 comments