Introduction
Although the alcantara finish and glued body might look a bit daunting, you wil see, that a disassembly of the EVE V keyboard is actually possible without distroying it.
Tools
-
-
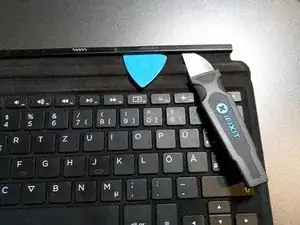
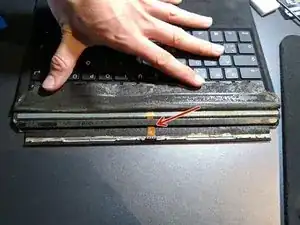
We start the opening process at the connector side. It consists of 2 parts: the top which is made from plastic and the bottom which is made from aluminium. They are hold in position by pins (so don't use a lot of force when you feel a resistance) and glued together.
-
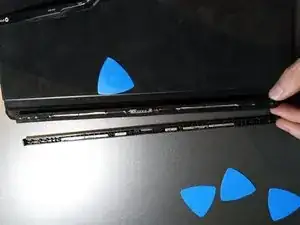
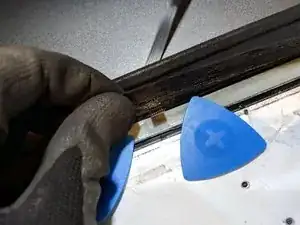
Heat it up and gently cut between the top and the alcantara. Watch out not to tilt your opening tool, otherwise you will likely cause permanent damage on the alcantara. Keep it open with the opening picks and work your way along the top until it pops up.
-
-
-
Now let's peel off the alcantara which covers the connector cable! You will need a lot of heat. Try to cut between the metal and the fabric as shown in the picture. When the first few millimeters have come off, continue peeling with your fingers or a tweezer.
-
Proceed to the next step when you see the cable run below a white sheet of plastic.
-
-
-
Next we will remove the bottom plate. The alcantara is glued on a plastic frame. You don't need to remove the alcantara.
-
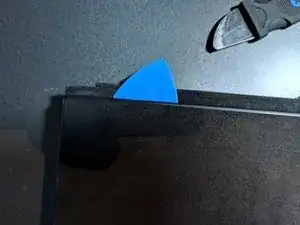
Start at the connector side. Use your hairdryer / heatgun to weaken the glue. Cut between the frame and the alcantara. Don't tilt your opening tool. 'Save' your progress with the opening picks.
-
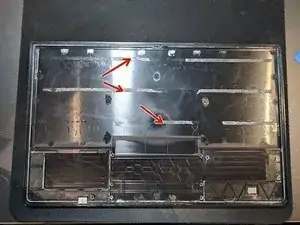
The keyboard an the back plate is separated with a white plasic foil. Try to keep it on the keyboard side. See those 3 stripes of glue? That's where it's attached to plastic frame. The connection can be unstuck with heat and your opening tool.
-
Move to the next step before reaching the trackpad side.
-
-
-
Proceed like done in step 3 but now don't cut so deep into the keyboard preventing damage to the battery and the trackpad.
-
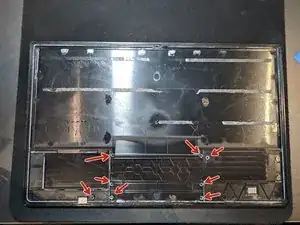
Now the trickiest part comes: there are eight spacer located around the trackpad. This glue is extremly hard to loosen. First make shure that the rim of the frame is parted from the keyboard. Heat up the area around the spacer. Use the spudge to apply the pressure right at spacer. This should prevent a breaking of the frame.
-
-
-
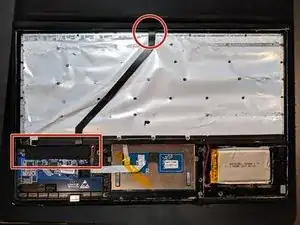
The ribbon cable is probably the biggest flaw of the keyboard because it easily breaks when flipping the cover - which is what you do with a flipcover...
-
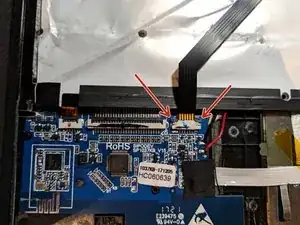
Remove the tape an pull the cable out of the slot. Don't forget to push back the little black clamp.
-
Peel off enough of the alcantara at the top to pull through the cable.
-
-
-
Remove the pogo pin contact with your heatgun / hairdryer and your opening tool.
-
Now you should be able to remove the cable.
-
To reassemble your device, follow these instructions in reverse order.
