Introduction

This guide provides step-by-step instructions for disassembling the base and locating the power cord of the Dyson Pure Cool AM11. This teardown is useful for understanding the internal components of the power cord and can be helpful for troubleshooting or repair. Remember, this process should be approached with care to avoid damage to your device.
  1. kxqEr6ftbY1JyZni
    kxqEr6ftbY1JyZni
    Opxb3bwySNVx5xAO
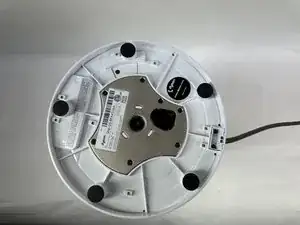
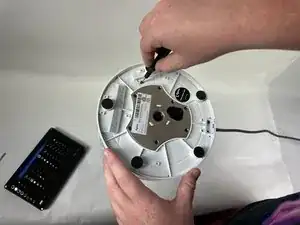
    • Using a Phillips screwdriver, carefully remove the screws securing the base.

  2. IRn1IHSAME6HLtL1
    IRn1IHSAME6HLtL1
    QgMTm2YfMxhFvGLY
    • Gently pry open the base.

    • Be cautious not to apply too much force.

  3. y6r5TORifkxorohH
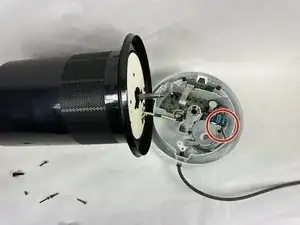
    • Inside the base, you'll find the power cord connected to the motherboard.

  4. UKqidTfV4MAvKqgP
    UKqidTfV4MAvKqgP
    Udy1SOLqyKKKSAIt
    • Place the base back onto the device. Make sure it fits snugly.

    • Reinsert the previously removed screws and tighten them using the Phillips #00 screwdriver. Ensure they are tight, but do not over-tighten as this can damage the plastic.

    • Turn on your Dyson Pure Cool AM11 to ensure it's functioning correctly.

Zepei

Member since: 01/11/23

255 Reputation

0 comments