Introduction

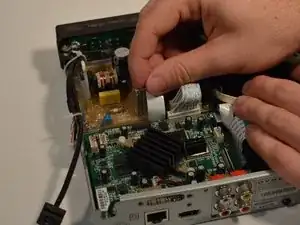
The motherboard is found below the WiFi antenna inside the device. This guide will take you through the steps of removing the motherboard for replacement.

  1. IGF5LNU6eXfW2v5f
    IGF5LNU6eXfW2v5f
    J4GOPGxQMKnm1IWU
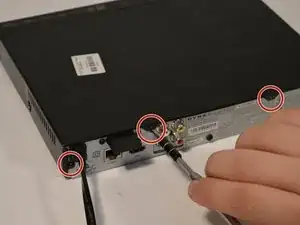
    • Remove the four 5mm Phillips #1 screws that connect the black outer shell to the silver back of the device.

  2. ZTcpZSHGEmCOJqZE
    • Remove the two 5mm screws on the left and right side panels.

    • There is one screw on each side that secures the cover to the body of the device.

  3. SyRXUdFC4Kxj6QFb
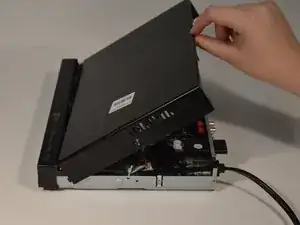
    • Lift the black cover to a 45 degree angle from the rear of the device and pull the cover away entirely.

    • Check that the power cord is not preventing the device from opening or closing.

  4. PmRxhpAMJGcv2SRn
    PmRxhpAMJGcv2SRn
    NudLoF6hhADsNXnS
    kCkoEWMNd2MOctA3
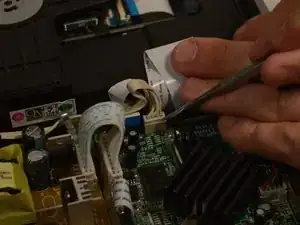
    • Use the metal spudger to remove the white clip from the antenna by prying the clip away from the antenna.

    • Use a pointed tool and press down on the indents on both sides of the clip to loosen.

  5. hTWrUCu3djTTXBcy
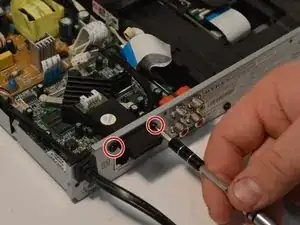
    • Remove the two 7mm screws from both sides of the antenna.

  6. rHKlHd4pFulSERZx
    rHKlHd4pFulSERZx
    I5iLA4qpMrKyqMBB
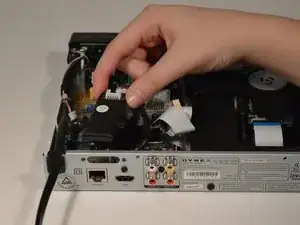
    • Slide the antenna inwards and gently remove.

  7. OJDtMFMsy2lRRBKv
    • After removing the antenna, remove the hdmi screw (5mm)

    • Fine threaded

  8. b3eOXHCUBTpVvqHP
    • Remove component screw (7mm)

    • Corse thread

  9. HnYEXgR53ZwjwnqZ
    • Lift power cord and move to the side

  10. dRMFVr4sZCWOZEkf
    dRMFVr4sZCWOZEkf
    gQbnteSYqhtYydrM
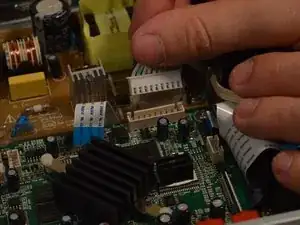
    • Remove the white clip with colored wires from mother board.

    • Use a pointed tool and press in on the sides of the clip to release.

  11. ar1WhElhQHJS5xln
    ar1WhElhQHJS5xln
    HJbnRDMPGtUgkbbo
    R1MqeJWBU6ELXhAX
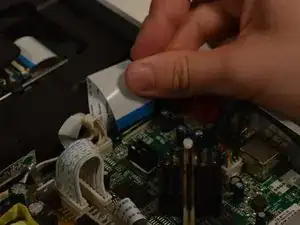
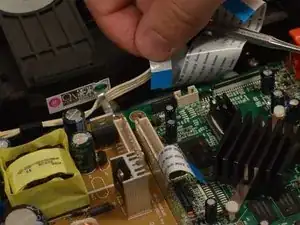
    • Lift up and out to remove the large white plastic wiring strip. Lift lightly on the back clip holding it to loosen.

  12. UL2haWlPMo2bEQhr
    UL2haWlPMo2bEQhr
    FlTxbiFRcljbJbqD
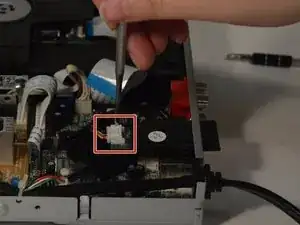
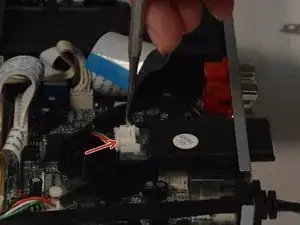
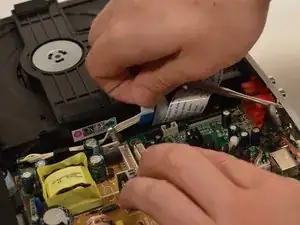
    • Remove the power connection to the motherboard small white clip with 4 white wires coming out.

    • Press sides and pull up the edges with sharp tool

  13. po3wbDDuendqYWHd
    po3wbDDuendqYWHd
    f1kYZomdKVKvWNSd
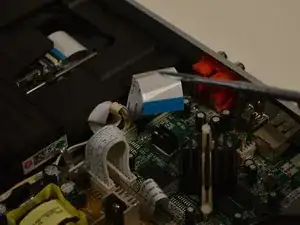
    • Pull the 1cm white tab straight up and out.

    • The side with exposed wires points towards the face plate.

  14. ibf3e15JOtDYnQqn
    ibf3e15JOtDYnQqn
    PAj4fn3Op1DSnINq
    • Pull the larger white 9 pin power cord that connects the power board to the motherboard.

  15. CInMTismSKQQbNd3
    CInMTismSKQQbNd3
    nbJbMRSCT1wen2r5
    iGpyvrHW4aMC3BOC
    • Pull the second white 1cm wide tab between the motherboard and power supply board.

    • The side with exposed wires points towards the disc drive.

  16. 2NFZ2FUJLkugFZQm
    2NFZ2FUJLkugFZQm
    XQsLAyFs6TRRXtij
    • Remove the two 5mm screws that connect the mother board to the device.

  17. VIyHlb1U6ibNG5VZ
    VIyHlb1U6ibNG5VZ
    OWXNBdBcFIWtfoFE
    4oOBKNX2NbQkAecg
    • Slide board up and out at a slight angle

Conclusion

To reassemble your device, follow these instructions in reverse order.

Harrison Williams

Member since: 05/04/18

499 Reputation

0 comments