Introduction
Dear iFixit community,
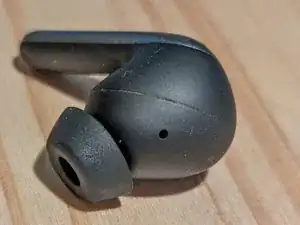
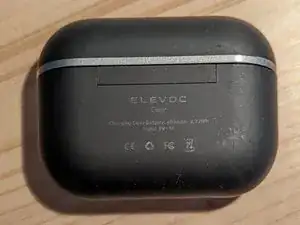
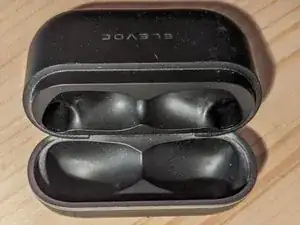
I'm writing to share with you all my experience with disassembling the Elevoc Clear pair of True Wireless Earbuds.
I havent seen any disassembly content online so i thought this could help some member of the community.
The reason why i needed to disassemble them is the most obvious one: the battery of one earbud was dead and lasting a couple of minutes at best when fully charged.
Tools
-
-
I havent seen any disassembly content online so i thought this could help some member of the community.
-
The reason why i needed to disassemble them is the most obvious one: the battery of one earbud was dead and lasting a couple of minutes at best when fully charged.
-
-
-
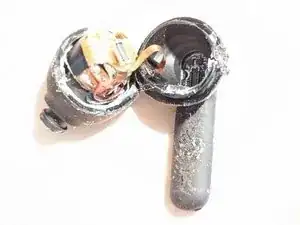
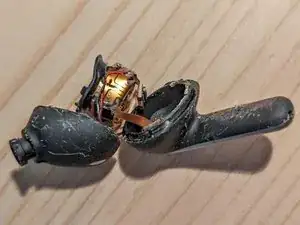
The assembly line of the earbud is completely glued so you will have no chance at being able to put it back together once it has been thoroughly cut. You will also probably deeply skratch the surface which will make it uncomfortable to then wear in your ears.
-
You may try to pry through what seems a second access point on the stem of the bud. Unfortunately that is just aesthetic and will not help you access the inside at all.
-
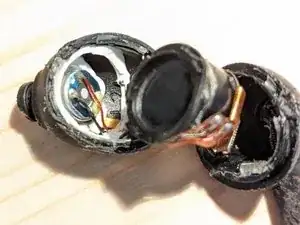
Once inside you will notice that there is a very short ribbon cable connecting the motherboard of the bud with a daughter board on the stem. In the stem there are 2 of the 3 microphones and the proximity sensor.
-
The cable is so short that you probably already ripped it away in your effort to open the bud. The connector looks robust, however due to the extremely short length you will have no chance to re-attach it in position during re-assembly. Assuming you will be able to reassemble the bud at all you will not be making calls with it anymore.
-
-
-
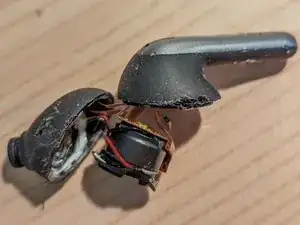
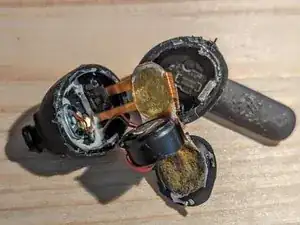
Moving to the core of the bud. More prying is necessary to access the remaining components which are, again, glued so you are not putting them back in place ever again.
-
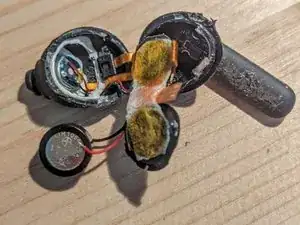
The actual speaker is glued in place and the cables are soldered to the speaker and to the motherboard, however the cables here are long enough that, if everything else wasn't so anti-consumer, it would be possible to safely work on it to solder a different motherboard and/or a different speaker.
-
-
-
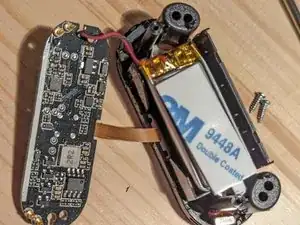
At this point the core of the bud is composed of the motherboard, a big battery, and a plastic cup that probably helps with the physiscs of the sound but (being glued) will never go back quite correctly in place.
-
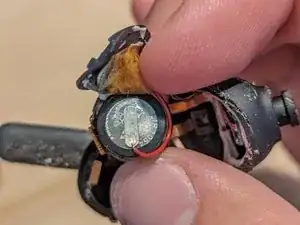
Prying the core we finally observe something that is not glued. The battery is a Lithium Polymer 1054 soldered in place (of course). Assuming that somehow you managed to get to this point without destroying everything, desoldering the old battery and re-soldering a new one should be quite feasible.
-
It looks to me that it would be safer and faster to operate directly on the motherboard to replace the battery.
-
Moving back to the stem. It is completely glued. The only way i can conceive to get to that doughterboard is to slice through the entire stem, which would not be really economically feasible.
-
In conclusion these earbuds are completely at "Apple Levels" of unserviceability and irrepareability so, if I can dare to give a score, they would score a 1/10 iFixit repairability score.
-
They are not scoring zero because if the shell wasn't so stupidly build several components could be replaced.
-
I dare to say that if somehow they did not have glue, and if the daughterboard was accessible, they could score a lot higher (maybe 6 or 7), because at that point you could conceive to replace the speaker, the battery, the motherboard, the plastic cup, the daughter board, and the shell with minimal additional equipment.
-
-
-
Moving to the charging case we observe something completely different as if it was designed entirely by a different company.
-
I pried the inner lining very carefully as I didn't know the position of the battery. The back of the case on the hinge side has solid plastic protecting the battery so you can safely pry on that side and completely remove the entire "functional" part of the case from its outer shell very easily.
-
I accidentally broke the hinge but it's not that fragile. It's just that at this point having already disassembled them, I knew I was not going to be able to use it ever again. I continued basically for the purpose of sharing the experience with others.
-
-
-
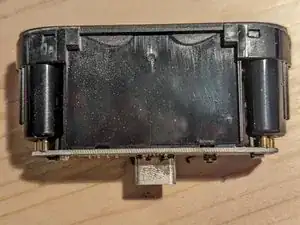
The internal part of the case is refreshingly glueless and held on by screwes. The only real bummer of this case is the USB-C port. Why would someone ever solder a port that is inherently prone to getting brocken? To make it more disposable. Everything else can be very easily maintained.
-
The two halved of the case are connected with a ribbon cable that is not subjected to stress and is easily disconnected if needed. The pairing button has solder pads that look big enough to easily replace it. The PCB is held on with screwes that are easily removed. They thread through a plastic thread so be careful to not overtighten them.
-
The Case probably scores a decent 7/10 for repairability.
-
-
-
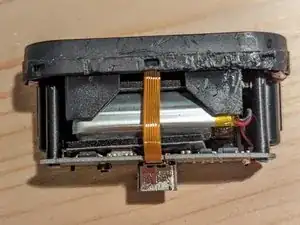
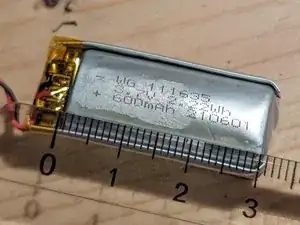
Moving the PCB out of the way shows that the battery is not glued in place and it is decently protected on 3 sides. The shape of the battery is not the most common but given the space we are working with, it should be possible to easily adapt many batteries to work inside this case.
-
On the Battery it is engraved WG 111635, classic 3.7V, 2.22Wh, 600mAh, 210601 (this is probably the serial number). The battery measures 3x1.4x1cm and is easily replaceable.
-
On top of the phisical repairability score a note has to be added about elevoc: they managed to stop supporting their earbuds in the elevoc app after less than a couple of years. This is just unacceptable and i cannot suggest any elevoc product to anyone as it would be a highly disposable one.
-
I hope this was helpful to someone. I wish you all a nice day.
-
To reassemble your device, follow these instructions in reverse order.
