Introduction

  1. CVYmmYXBjY4gbZM3
    CVYmmYXBjY4gbZM3
    Rb1fLIfr5CGPjBIP
    JCHH4cLPDeRN6n3G
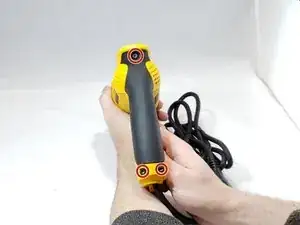
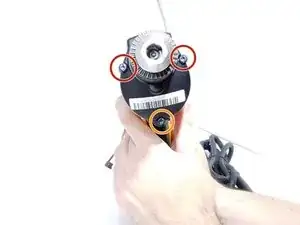
    • Remove three 19 mm T20 Torx screws from the back of the drill.

  2. jvOUgOEU2SV1hZHm
    jvOUgOEU2SV1hZHm
    BDm4rVK22JuLtYlw
    dUd6Gocg3avQpDdT
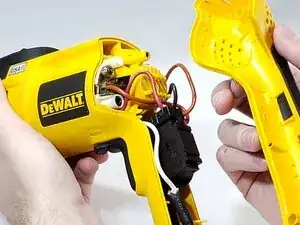
    • Place an opening tool in the groove line of the handle and pop the back loose.

    • Grab the drill with two hands and pull the cover off.

  3. y1EndtlkNQPNfBAO
    y1EndtlkNQPNfBAO
    WNq2TrPZMoqCAdmt
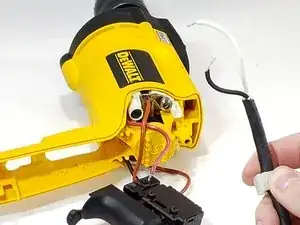
    • Firmly grab the body of the trigger.

    • Slowly pull the trigger until the entire body is out and only attached by wires.

  4. FrlnP1wKlWu3wiru
    FrlnP1wKlWu3wiru
    35KkefyTklP1Osu3
    BygmZCJSF4viUJ63
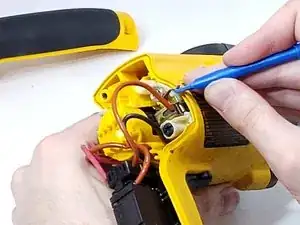
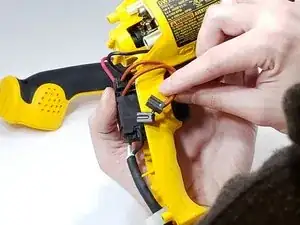
    • With sharp point tweezers, push the little metal flap up in the hole holding the wire.

    • Clamp the wire with blunt tweezers, and slowly pull the wire out.

  5. fJwbZef6OUZlUdD1
    fJwbZef6OUZlUdD1
    2TCIuBt3AJGSdZrk
    hOPOb61uYNk3JLAd
    • With a pair of blunt nose tweezers, grab the white wire.

    • Carefully wiggle the wire loose.

    • Pull the wire slowly until it comes out.

  6. AkMATgPGHkxtSNML
    • With both wires free, the power cord is free from the trigger body.

  7. TO5mWIRFnYWHmn3f
    TO5mWIRFnYWHmn3f
    gx6CIxpL1xEODSeh
    xMIOMUNQFoShCmuG
    • Use an opening tool to lift up the spring holding down the brush.

    • Remove the brush from its holding.

  8. kxCxpBXBlh2cmEqK
    kxCxpBXBlh2cmEqK
    DtuTAbYNKsKMQqqb
    • With a pair of blunt nose tweezers, grab the red wire.

    • Carefully wiggle the wire loose.

    • Pull the wire slowly until it comes out.

  9. Yk1QfXgS5TsnvlVC
    Yk1QfXgS5TsnvlVC
    dyTtQiN6cLJ1Tdsb
    BHu5xxJAemIGMpXS
    • Remove two 45 mm T20 Torx screws.

    • Remove one 30 mm T20 Torx screw.

  10. K6eLMnqHvNODKZls
    • Pull off the top case and set it aside.

  11. YOasscaXxlHeVfWT
    YOasscaXxlHeVfWT
    lUuKZgRdhNZbaYpb
    TmmQfNRLqcSjLQPb
    • Grab the gear case cover and gently pull it out just enough to where it exposes the lever assembly.

    • It is important that the brushes are removed before you do this step or you may damage your brushes.

    • The lever assembly can now be lifted out.

  12. 1x14MXgRncgPgUV2
    • With the old lever assembly removed you can now replace it with a new one.

  13. X2rEuZAJpMNcjNnJ
    X2rEuZAJpMNcjNnJ
    nluplVOnmmaFsrxc
    YfjbsXJnnqKneUKv
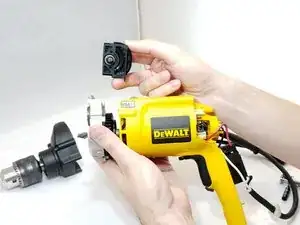
    • Hold the hammer drill tool firmly by the handle.

    • Gently separate the gear case unit from the hammer drill body.

  14. 65CpUqbZEkHP13Of
    65CpUqbZEkHP13Of
    6EJ6EDJG5aDCmVvB
    • The motor is attached to the metallic alloy gear case and removes as a unit. Separation of the motor from the gear case requires specialized hand tools.

Conclusion

To reassemble your device, follow these instructions in reverse order.

Andrew Grayson Crawford

Member since: 01/10/20

241 Reputation

0 comments