Introduction
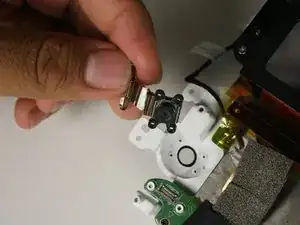
Some reasons you would want to replace the camera in the Dell VRP100 are screen image drifting, image freezing, or tracking/calibration issues. You should be cautious when removing the camera, so the camera lens does not get scratched in the process.
Tools
-
-
Remove the black foam padding by peeling away slowly.
-
Remove the front and back padding from the headset by peeling away slowly.
-
-
-
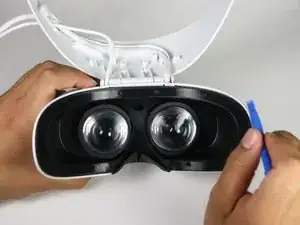
Remove the cover using one of the plastic opening tools, and then carefully pull it from the casing.
-
-
-
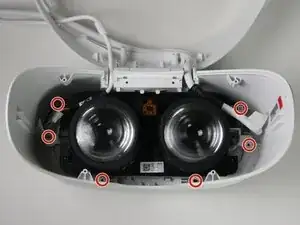
Remove the six 5.5mm PH000 screws from the cover by rotating counter-clockwise.
-
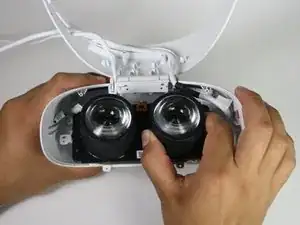
Carefully remove the lens and motherboard assembly from the white casing.
-
-
-
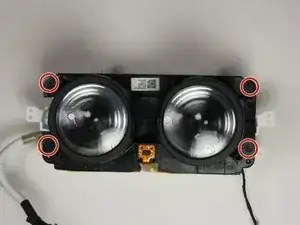
Remove the four 2.5mm PH000 screws by rotating counter-clockwise.
-
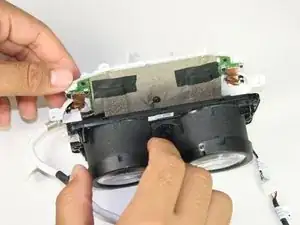
Separate the lens housing from the motherboard panel.
-
-
-
Remove the two 2.5mm PH000 screws from the motherboard by rotating counter-clockwise.
-
Remove the four 3.9mm PH000 screws from the white casing by rotating counter-clockwise.
-
To reassemble your device, follow these instructions in reverse order.








Parallel structure
Andres Ikaika Elzaurdia -