Introduction

Are you experiencing issues with your computer overheating, generating loud noises, or crashing frequently? If yes, you may have a problem with your CPU fan.

The CPU cooling fan plays a crucial role in cooling down your computer, preventing it from overheating and slowing down. Replacing your PC's old fan will not only help prolong your CPU's lifespan but also the life of your Dell OptiPlex 9010.

Follow this guide if you need to replace the CPU fan of your Dell OptiPlex 9010.

Before you begin, turn off your computer and unplug from the outlet.

  1. qXcP6NUZDQtqflgX
    qXcP6NUZDQtqflgX
    VWjWnuNSWEs14mpX
    wtRFcRnjJTKHOF5t
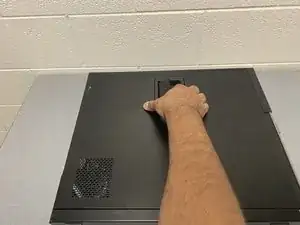
    • Ensure the PC is physically unplugged before beginning any disassembly procedures!

    • Place the PC on a flat surface.

    • Turn the PC over so that the panel side faces upward.

  2. jwPYZJufLJiUn2Na
    jwPYZJufLJiUn2Na
    xvIFsKqyfHHMPmiN
    6lFTvYNxPHS1Jt4E
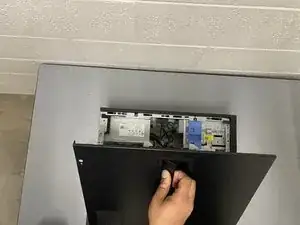
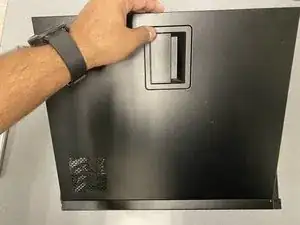
    • Use your hand to lift the handle upward to access the hardware.

  3. XLIjgHXkAmjcG4nv
    XLIjgHXkAmjcG4nv
    NowjRu25Up4CmPI2
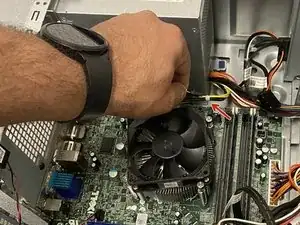
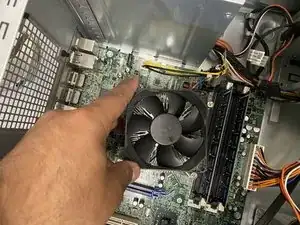
    • Locate the CPU fan

    • Locate the fan header

  4. ew4SjOgTtNIRkeCM
    ew4SjOgTtNIRkeCM
    f3jocGE6SlPtmTfE
    VmjQ5SJXKdgvvKmj
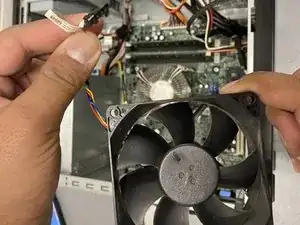
    • Unplug the fan header by pressing the little button and pulling upward.

  5. DNNmHCImSKbRjMc2
    DNNmHCImSKbRjMc2
    wpWVsQ6PkZHkxBCR
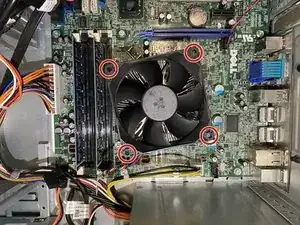
    • Unscrew the 1.2 mm screw using a Phillips #1 screwdriver by turning it counterclockwise (left)

    • Repeat the second step for the other 3 screws

    • If necessary, apply downward pressure on the screwdriver while turning to ensure the screws are fully removed

  6. pfjDgeRCPPEtgDZi
    pfjDgeRCPPEtgDZi
    qe6yLBFX1eAbr2KI
    ZARVsUMVWEHQbmsd
    • After disconnecting the fan from the frame, carefully lift the fan up.

    • Be sure to store the screws safely, as they will be needed later on.

  7. RScVaHHuUOetU5Jr
    RScVaHHuUOetU5Jr
    ZxRpVJ4yIubZFmYO
    ZV1qHMIbts1ZaKBn
    • Take the fan you intend to insert into the computer.

    • Align the new fan over the four screws you previously removed.

    • Insert the new fan header into its socket.

  8. BuSsFFmptbeWFVV2
    BuSsFFmptbeWFVV2
    KXWyySKLcAEcNQlj
    B6NotIdCeXUJ6BqA
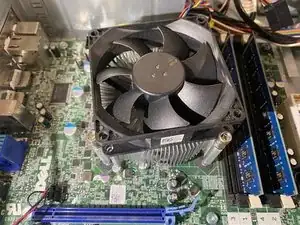
    • Ensure the fan is correctly aligned with the four screw holes.

    • Place screws back in the holes

    • Tighten screws using the Phillips #1 screwdriver by turning it clockwise (right).

    • If needed, apply downward pressure on the screwdriver while turning to ensure the screws are securely tightened.

  9. GunfB2mIKOOk1R1F
    GunfB2mIKOOk1R1F
    gcLPEb2P4IoUTGn1
    QIWl1nWp1oiVBaLf
    • The replacement of the Dell Optiplex 9010 Fan has been complete!

    • Place the access panel back on to secure the inner hardware.

Conclusion

You have successfully replaced the CPU Fan of your Dell Optiplex 9010!

Abhiraj Khinda

Member since: 13/09/23

196 Reputation

0 comments