Introduction

Using a PH100 screwdriver, a set of wire cutters, and a soldering tool, the on/off switch can be replaced in the Casdon Dyson Ball.

  1. YlTZGZANJqMMEBBw
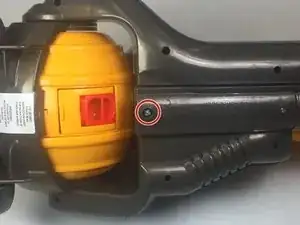
    • Remove one 9.2mm (0.36 in) screw using the PH00 screwdriver.

    • Remove the battery cover by pulling it away from the vacuum once the 9.2mm (0.36 in) screw is removed.

  2. AxajdNe36xqhMsJ2
    • Remove batteries from the vacuum by pulling them out and away from the vacuum.

    It take 4 C batteries. Hope this helps!

    Ladii Lee -

  3. BHkfIIADnfnaZJnI
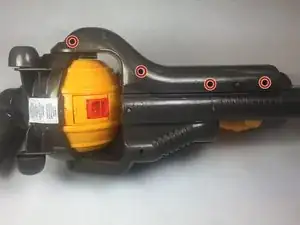
    • Remove four 9.2mm (0.32 in) screws from the back of the vacuum using the PH00 screwdriver.

  4. B2rkAbhVlBBTUR2O
    • Remove the cover to the on/off switch by pulling up on the cover from the front of the vacuum.

  5. 2vFE12rBPwMBJT5j
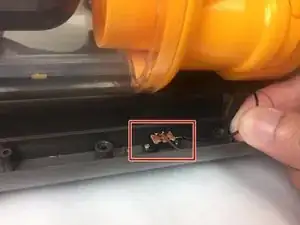
    • Cut the two wires connected to the on/off switch using a set of wire cutters.

    What is underneath the little board that’s circled and in between that and the black plastic on off switch as my sons has broke I put it back together as so but it doesn’t work but if I put the screwdriver on the metal solder point of the wire it comes on so I’m guessing there should be a metal bit that slides across underneath the bit circled in the picture to make the connection on or off.

    benrandle -

  6. CUhWuKQVeoZKSEHB
    • Remove the two 9.2mm (0.32 in) screws which hold the on/off switch to the vacuum using the PH00 screwdriver.

  7. ihXorubxPdxU6QTh
    • Remove the on/off switch by pulling it away from the vacuum with your fingers.

    • Replace the faulty on/off switch with the new on/off switch.

    • Solder the new on/off switch's wires to the vacuum's wires using a soldering station.

    Nice! Got any part numbers/sources for a replacement switch?

    Paul DiGioia -

Conclusion

To reassemble your device, follow these instructions in reverse order.

Seldon Price

Member since: 07/11/17

612 Reputation

One comment

Great instructions but where can you purchase the on of switch and what is the part number?
debbyh1024 -