Introduction

This guide will teach you how to replace your printer's right side transformer. Do not touch anything other than what is specified, specifically on the green board. You may accidentally short or damage the electrical configurations or give yourself an electric shock.

  1. SaveUCjXXNUmtjrD
    • Lift the printer lid up as shown in the photo.

  2. RIbK4jnc3gmnjZAM
    RIbK4jnc3gmnjZAM
    pXlprey5FgKULsRw
    • Locate and remove the two 10mm side screws. There is one on each side.

  3. WFivXeQ3WA3nAPgO
    WFivXeQ3WA3nAPgO
    FkJybSASTfZLigLN
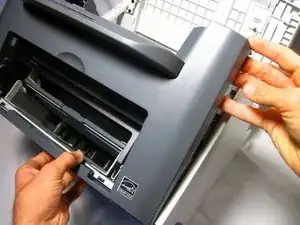
    • Unhook the plastic panel from the printer starting from the top.

    • You may need to wiggle the panel a bit to loosen it.

    • To remove the bottom part of the paneling gently lay the printer on its back.

    • The scanner lid needs to be supported when moving the printer

  4. pTGWjKO4Bxiqg4Ll
    pTGWjKO4Bxiqg4Ll
    FHWYQWeOiieDTa5Q
    3cchtDe3PiuVdolu
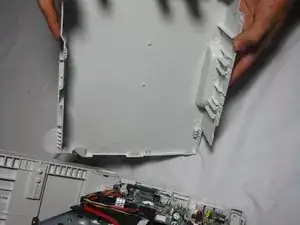
    • Gently unhook the right side paneling (as looking at the printer's front face) from the printer.

    • Use a gentle back and forth motion to wiggle the hooks out.

  5. CAPgtU1uxf3y4X4l
    CAPgtU1uxf3y4X4l
    fLDCZNRUrQoTkJqW
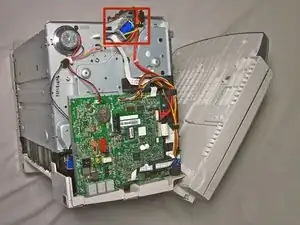
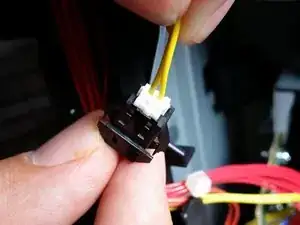
    • Locate the yellow wire connected to the metal box.

    • Carefully pull the yellow wire from the black connector.

    • Wires may detach completely from plug so tug very gently.

  6. 1a5ODvAx5ZQ1UrYu
    1a5ODvAx5ZQ1UrYu
    TCgpwWitrtXCkX5L
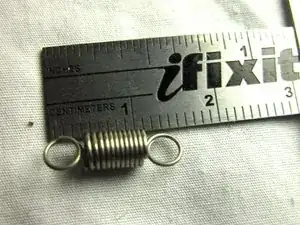
    • Locate the spring.

    • Unhook the spring on the side of the metal box.

  7. VZBxOqAi2Iwy3BWG
    • Unscrew the 10mm screw attaching the metal plate to the printer.

  8. 1RE4O3khybDqUHAe
    • Lift the transformer out of the printer.

Conclusion

To reassemble your device, follow these instructions in reverse order.
Helena Yanez

Member since: 30/09/13

455 Reputation

0 comments