Introduction

If your battery notch is stuck, or even broken, then follow this guide to replace the notch. All it takes is some hard work, a few tools, and the right attitude.

  1. BcOjfAYMMWgSKO5M
    BcOjfAYMMWgSKO5M
    eUBRnDFGu2QyoHIB
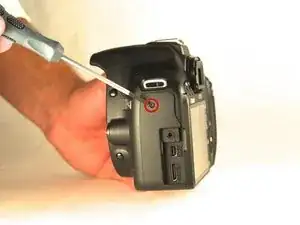
    • Locate the side of camera with the HDMI port.

    • Unscrew the 7mm with a #00 Phillips screw driver.

  2. KYqKdS4saYZwcpcT
    KYqKdS4saYZwcpcT
    nNvrcNLA5hv1AoYt
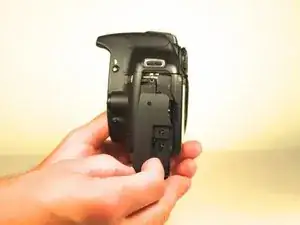
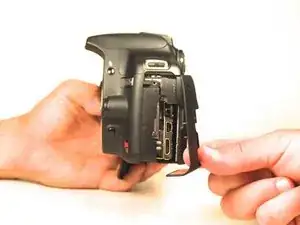
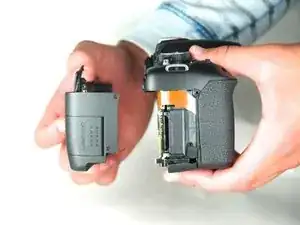
    • Use your fingers to gently detach the plastic component from the camera

  3. ShXdErHqulFEPBWw
    ShXdErHqulFEPBWw
    CkNK6ZRSykfnGZGE
    KJkpUK2eaIIAQELg
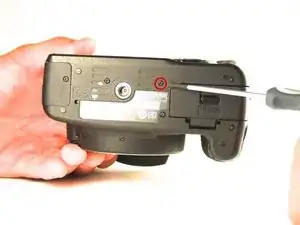
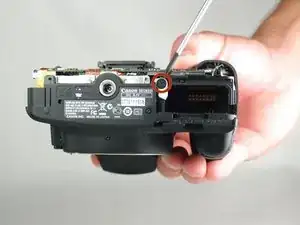
    • Unscrew the bottom three 4mm screws with a #00 Phillips screwdriver.

  4. e1VPXbOU3LGRMjOF
    • Unscrew the inner 4mm screw with a #00 Phillips screwdriver.

  5. MHrEZY2HPOtv2PmH
    MHrEZY2HPOtv2PmH
    KAaNqCLRcE1qYiYu
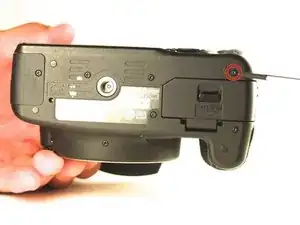
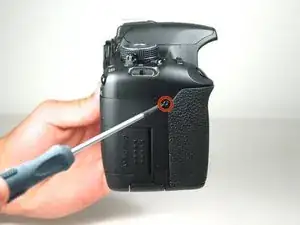
    • Unscrew the top 7mm screw on the right side of the camera.

    • Unscrew the bottom 4 mm screw on the right side of the camera.

  6. gMSdpMInYFZGQSsg
    gMSdpMInYFZGQSsg
    xrQGH4wdLAPIWLWy
    6G3ND2lACBM3FiJJ
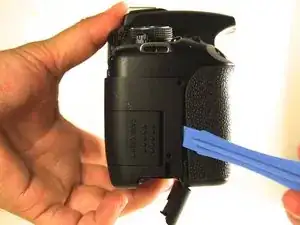
    • Use the plastic opening tool to pry open the entire back panel.

    • Use your fingers to pull off the back panel.

  7. 5REI5Dtt6QfjDrFE
    5REI5Dtt6QfjDrFE
    AEwBMbGZT4UkLLpF
    PeenHrZdD4eVgYOH
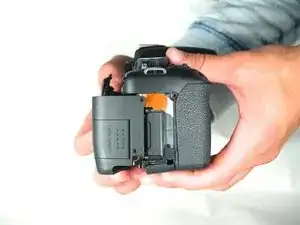
    • Now that the panel is off, unscrew the 9mm screw holding the battery notch in.

    • Use the pliers (or your fingers) to take off the white notch.

    • There is a spring underneath the battery notch. Do not lose this spring or let it fall off.

Conclusion

To reassemble your device, follow these instructions in reverse order.
Jonathan Lin

Member since: 14/04/14

548 Reputation

0 comments