Introduction

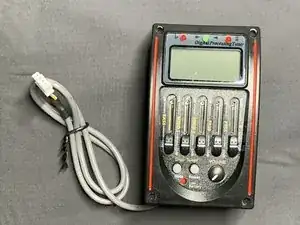
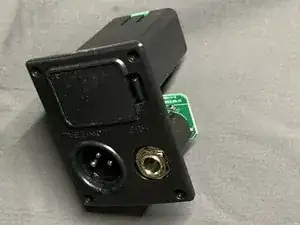
This guide will help you replace the preamp for your acoustic bass. This guide can also be applied to other guitars because of the similar process.

For this process, make sure to purchase a preamp kit that will fit your bass or guitar.

  1. OgYfwZUBZ6xavncf
    OgYfwZUBZ6xavncf
    ujPBDOSbOMnYQ4cm
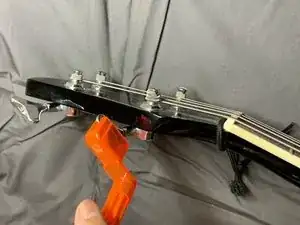
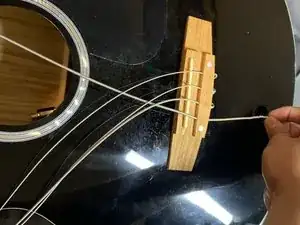
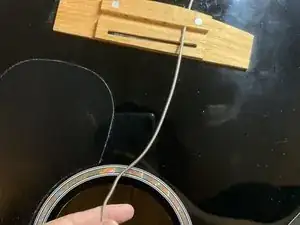
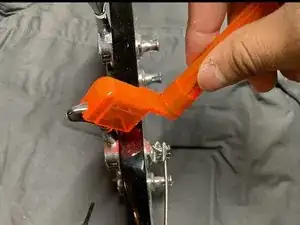
    • Use a guitar string winder to carefully remove each string.

  2. xaOTWIaI3jEULkGX
    xaOTWIaI3jEULkGX
    MKZTOgjbegdgcTtB
    TZdFMB2hwfsVVGAG
    • Look inside the bass for the preamp tuning box.

    • Once you find it, unplug the small jack.

  3. Na1nIRHVbGiAxRmR
    Na1nIRHVbGiAxRmR
    QLDel2oXhOBTBBqL
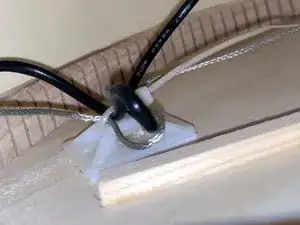
    • Cut the zip tie holding the excess length of wires in place. This is located inside the bass.

    • The zip tie is most likely right under the bridge of the bass.

    • This will allow you to disassemble all parts the wires will connect to later on in the repair.

  4. 6LJhVntQYLBxFn1o
    6LJhVntQYLBxFn1o
    eqMWqFD2P14BXTBL
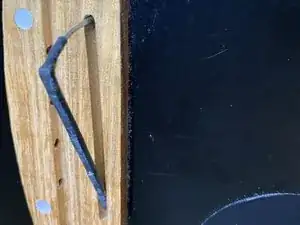
    • Pull out the pick-up stick from the bridge of the base.

  5. 2KnKbH5UBRbE31dx
    2KnKbH5UBRbE31dx
    kGtKdARwHQsSwiPr
    • Look for the tuner/equalizer/preamp and carefully remove each screw using a Phillips screwdriver.

    • Once screws are removed, look for the endpin jack and remove it.

    • In the first image, the part had already fallen off. Refer to the second image if you have trouble finding the endpin jack.

  6. EwfAhFGgaIDtsMoh
    EwfAhFGgaIDtsMoh
    ITZxJmF1NWEKkqM2
    njsX2QgJhQAfjAYG
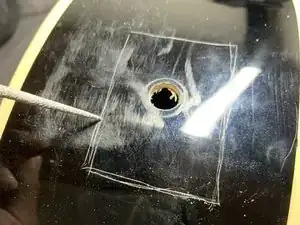
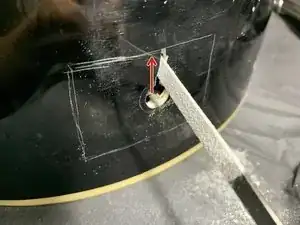
    • Place the tuner over the area you removed the previous one from.

    • Scratch a line around the opening to the area of the bottom portion of the tuner.

    • Refer to the second image for a visual reference.

    • Ensure the scratched guideline is made to the parameter of the parts behind the face of the tuner.

  7. 5Nf2tXHFVwMguY6L
    5Nf2tXHFVwMguY6L
    rWoa2UhlJ5MQO3D2
    xr6hMO5MYh31HnAh
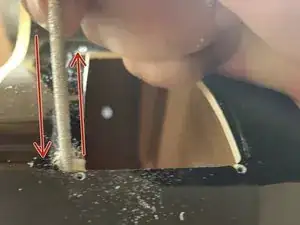
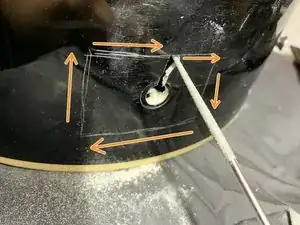
    • Using a metal file, file up and down, following the outline.

    • Continue this, going around the outline until the desired opening is made.

    • This will most likely take quite a bit of time. If you have access to a small jab saw or similar power tool it will speed up the process.

    • Do this step ideally in a well-ventilated area as the wood shaving are small, and inhalation can cause harm or injury. Wear protective gear like a face mask, and goggles/eye protection to prevent injury or pain.

  8. YJ3KFHFUZ6ihNiSB
    YJ3KFHFUZ6ihNiSB
    hZZPuYtNLVacqPCw
    OQEagFXpCufLTJpk
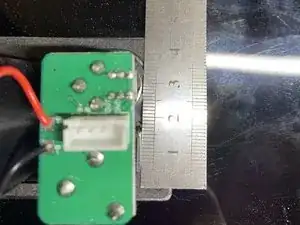
    • Get your output platform and measure, with a ruler, the perimeter of the parts under the face with the screw holes.

    • The second and third images show the underside of the part, measuring around the internals.

    • Once you measure each side, jot them down for Step 9.

  9. 3coYhr1UwPYKQIxZ
    3coYhr1UwPYKQIxZ
    UT36dIck4OLKIbVp
    GUUYQNYdy6COrO5p
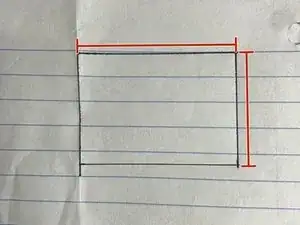
    • Use a pencil and paper to outline the measurements jotted down.

    • Cut the shape out using a pair of scissors.

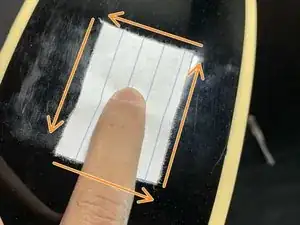
    • Place the paper over the opening on the guitar and trace the perimeter of the paper.

  10. A4LNntJdNfIZk2Sj
    A4LNntJdNfIZk2Sj
    fsN2SGFXQltiyRWq
    vDFnUHePKmFnfFSP
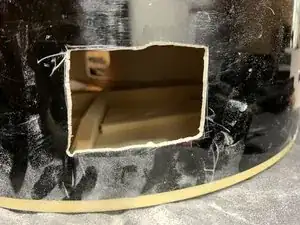
    • Insert the file into the opening and file up until you reach the outline you traced.

    • Then follow the outline until the opening is completely cut out.

    • Do this step ideally in a well-ventilated area as the wood shaving are small, and you may inhale them.

  11. YUkRpooHOZubwWL3
    YUkRpooHOZubwWL3
    TSFFbm6SDf6MgTfH
    wCynDylRZ3VBpT6y
    • Place the preamp into the opening and screw into place with your power drill.

    • A power drill and four screws are required in this step. This will allow you to create a hole to screw in the screws or just directly screw in the screw without drilling holes.

  12. 2hDI1iGIrn3UmSSH
    2hDI1iGIrn3UmSSH
    fiMvpbfh52BPsqNq
    • Using your power drill and the other four screws, drill the screws into the output platform openings.

  13. FDJRDUJidJWGOqsx
    FDJRDUJidJWGOqsx
    vBDQWVOIX4UcbnHh
    RNNHEJEHVA4JbUGL
    • Get your pickup stick and insert it into the hole in the bridge.

    • Look into the guitar for the end of the pick-up stick and pull it until it reaches the preamp box.

    • Plug in the pickup stick jack into the box, as seen in the fourth image.

  14. iVEEUCFaQaQQkbDC
    iVEEUCFaQaQQkbDC
    oEasJtOFf1q3P6qo
    • Look for the preamp inside the bass. You will find a wire showed in the first image.

    • Stretch your arm into the bass to reach the output platform and find where you will need to plug the wire into.

    • Ensure the wire plugs in the right way and is firmly plugged in.

  15. DTuOpXQJuy1It5ar
    DTuOpXQJuy1It5ar
    5WCo1LDRBt6q6t5x
    • Use a zip tie to secure the extra length of wire inside the bass.

    • This step is not required but will help disguise wires and keep them tucked inside the bass.

  16. LP6vOcLHLNxFu2Ll
    LP6vOcLHLNxFu2Ll
    Bv4XkRYIAoIO4Eg4
    • Replace the old strings or install new strings to the bass.

    • Use the string winder to make this step a lot faster.

Conclusion

Congratulations! You have just retrofitted a new amp into your bass.

Had trouble with one of the steps? Leave a comment letting us know how we can help!

Juan Chavez

Member since: 04/04/23

304 Reputation

0 comments