Introduction

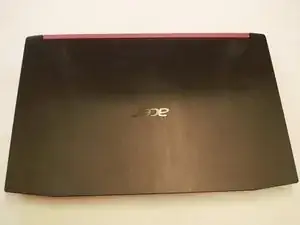
Use this guide to replace the SSD in the Acer Nitro 5 Acer Nitro 5 AN515-53-55G9. This laptop comes with a SSD installed, this guide will show how to replace an new SSD.

  1. WUiSr2CjeCX2ZBEL
    WUiSr2CjeCX2ZBEL
    ja3RaKWdaUTSbD2U
    kAvO4MgtBy3eMviV
    • Make sure laptop is off and unplugged before beginning replacement.

    • Flip the laptop upside down so that the bottom is facing up.

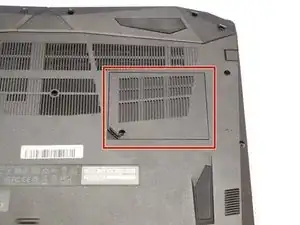
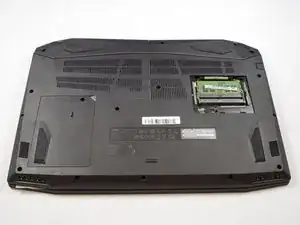
    • Identify the RAM tray on the bottom of the laptop.

  2. 5RMoNfLpSVYDHCRV
    5RMoNfLpSVYDHCRV
    qkJrsRLvDtddaJle
    5irWLvpMnh1a46iE
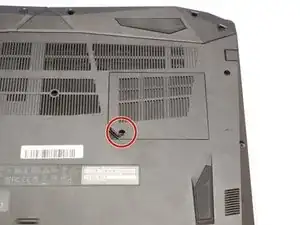
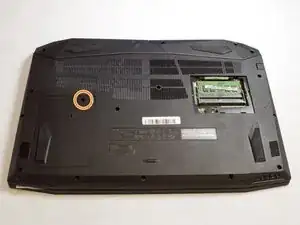
    • Use the Phillips #0 screwdriver to remove the 9mm screw in the bottom left corner of the RAM tray covering.

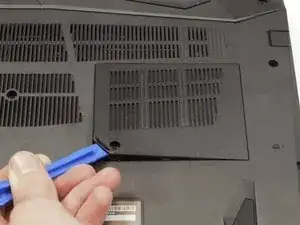
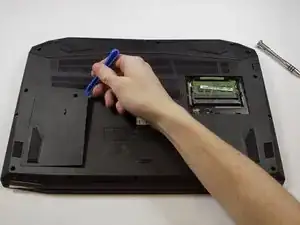
    • Remove the RAM tray cover by prying up with a spudger.

  3. iatldYlgcXqKEYx2
    iatldYlgcXqKEYx2
    HOT5MWQOfXJCI3pF
    QhbTH3f1E4ULba6W
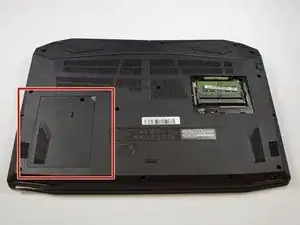
    • Identify the Hard Drive tray to the left side of the laptop.

    • Remove screw with a #0 Philips screwdriver.

    • Lift up the Slot covering using a spunger.

  4. CGIICOfEMJHqfgE4
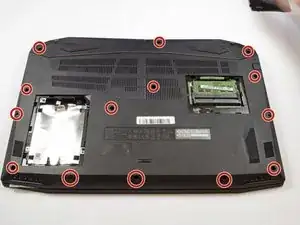
    • Use the Phillips #0 screwdriver to remove the 9mm screws holding the back cover in place.

    • Remove the screws from the hard drive and remove it from the device.

  5. Mi1xOygrjqfh4yhZ
    Mi1xOygrjqfh4yhZ
    CRFoNjrrOVoiDQCf
    AdRCh5fXCogPbpMr
    • Be sure you removed the hard drive. when you open the back shell and hard drive is built in this may cause damage to cable and other components.

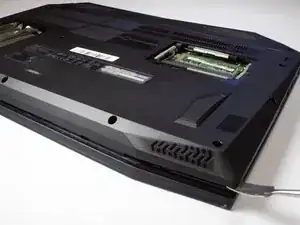
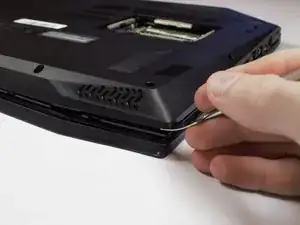
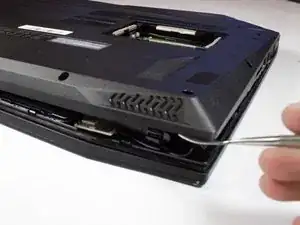
    • Carefully remove the back shell from the device working your way around all the edges.

    • Do not forcefully try to separate the shell as you may cause harm to the shell.

  6. dSWO3JklKQAZlHSs
    dSWO3JklKQAZlHSs
    eMDDJKsjbVhRfMmc
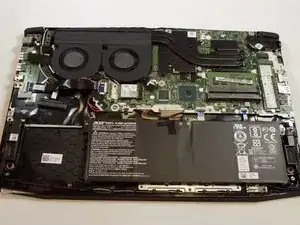
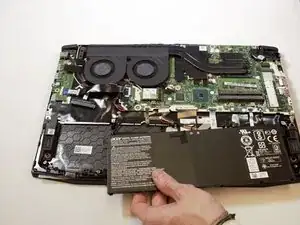
    • Removing the back shell of the computer and it will look like this.

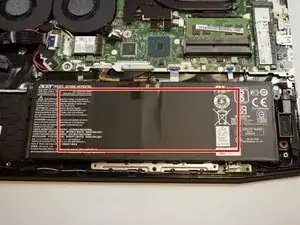
    • The battery for the device is located at the bottom middle of the laptop at this orientation.

    One part you missed was to tell everyone that the HDD would still be attached to the back shell. I removed the shell and promptly ripped out my HDD cable. Now having to order a new cable…

    Mike Nitchie -

  7. ZsvtbppCyPMBIDSs
    ZsvtbppCyPMBIDSs
    FMPsT6ZnAYoISwri
    dTXYJGoHrLRfPxBv
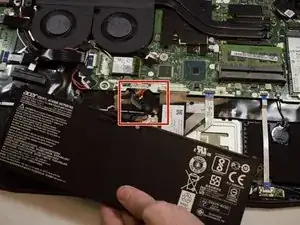
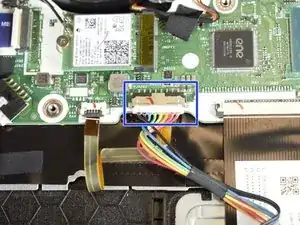
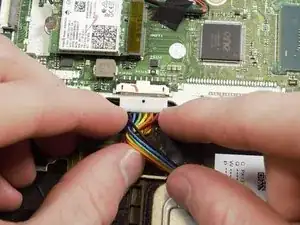
    • Locate the connector of the battery to the motherboard.

    • Using your fingers, slide out the connector.

  8. jPWGGm3UFb2Kqksa
    • Remove battery from device.

  9. He3HYwVCVLl2OHJM
    He3HYwVCVLl2OHJM
    3fyBmj62UqtZLXHY
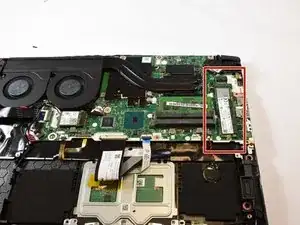
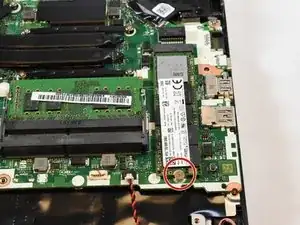
    • Locate the SSD in the top right corner of the laptop.

  10. FKYDKcBYD5QQOxNC
    FKYDKcBYD5QQOxNC
    aUMCPw1a3ijK2iNd
    vjUmWdCinbOFdMPD
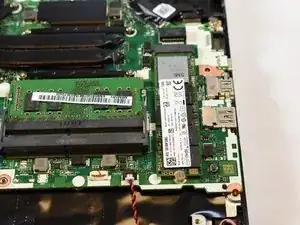
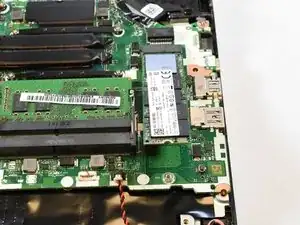
    • Use the Phillips #0 screwdriver to remove the 3mm screw holding the SSD card in place.

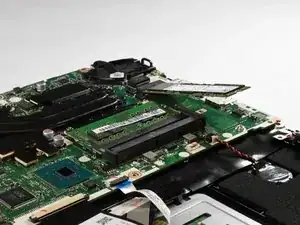
    • The SSD will pop up at an angle when the screw is removed.

  11. 6Dk3sADHLY5wjMve
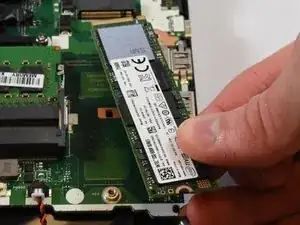
    • Slide the SSD out of its slot.

Conclusion

To reassemble your device, follow these instructions in reverse order.
Rheo Bruer

Member since: 05/02/19

973 Reputation

0 comments