Introduction
If your Acer Aspire 5 Slim Laptop (A515-43-R19L) does not come with sufficient RAM for your workload, use this guide to replace or install new sticks for the device.
The Aspire 5 (depending on the variation you purchased) needs a helping hand to hit the quick and snappy response times one should expect from a relatively modern device. We can attribute this issue to RAM or your device's "short-term" storage. The default kit included in the Aspire 5's cheapest chassis is a single channel 4GB stick. Generally speaking, more is needed to match user expectations compared to consumer devices, like phones, you see on the market today. But luckily, at the time of writing, RAM had become one of the cheaper components for a PC. As such, you can build up some hardware experience while improving your user experience.
Following this guide will help alleviate the potential anxiety a first-time repairer may have when interacting with the sensitive internals of their device. In addition, replacing RAM in this context can be translated to most laptop form factors and roughly translates to replacing RAM in a desktop tower.
Before beginning, please ensure the device is powered off and disconnected from any external power source.
Tools
-
-
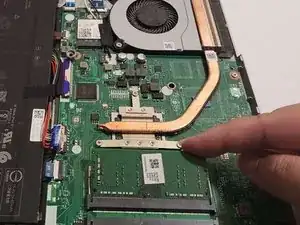
You'll find RAM slots north of the battery connection point and to the right of the copper pieces.
-
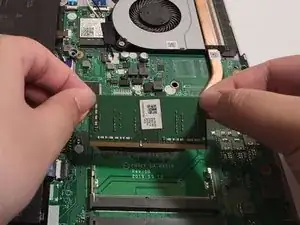
Lightly grip and push both sides of the RAM housing in opposite directions until the RAM pops up from the slot at an angle.
-
Pull the RAM free from the slot.
-
-
-
Align your RAM's DIMMs so the shorter side slots into the shorter space and the larger side slots into the larger space.
-
Insert the RAM at an angle.
-
Press down on the stick until the bearings on both sides click into place.
-
-
-
Place the shell back onto the laptop, clicking each corner and side into place.
-
Screw the shell back onto the laptop.
-


